Adjusting audio volume, Normalizing audio of multiple clips – Grass Valley EDIUS Pro v.7.0 User Manual
Page 106
Outputting Work
98
EDIUS -
User Guide
3 Drag and drop [Color Balance] to the clip (video part) on the timeline.
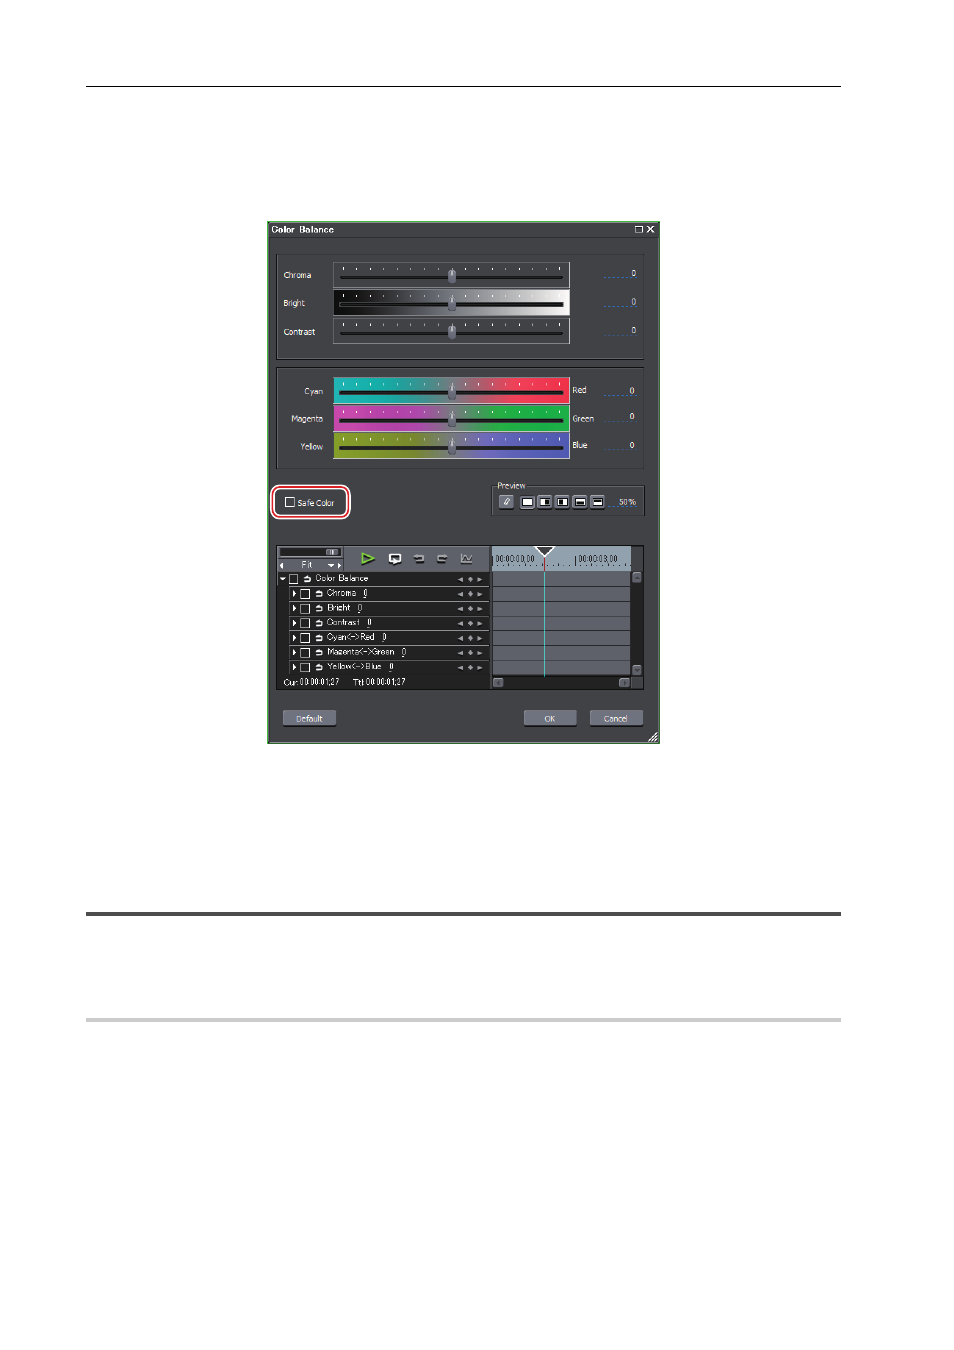
4 Select [Color Balance] in the [Information] palette, and click [Configure].
The [Color Balance] dialog box appears.
5 Check [Safe Color].
Make an automatic adjustment to keep the video signal within the YUV color space.
6 Click [OK].
3
•
Although safe color clips a range of luma (luminance) 16-235 and chroma 16-240, and the chroma is not
automatically adjusted within the safe area, it is calculated so that luma/chroma will be within IRE0-100.
Adjusting Audio Volume
Use the normalization function to adjust the entire audio volume and use the V-mute function to reduce momentary
noise.
Normalizing Audio of Multiple Clips
Normalization function is useful to perform entire volume adjustment. Set a reference level of audio and adjust the
volume of the entire video at one time. When normalization is applied to multiple clips, the volume level is adjusted to
be appropriate for each clip.
1 Select the clips to be normalized.
2 Click [Clip] on the menu bar, and click [Normalize].
The [Normalize] dialog box appears.
3 Enter the audio level to be used as reference, and click [OK].
The initial level setting will be the [Audio reference level] in the project setting.
When normalization is applied, an orange line will be displayed in the area below the audio part of the clip.