Time scale settings/track header – Grass Valley EDIUS Pro v.7.0 User Manual
Page 21
13
Screen Configuration and Functions
EDIUS -
User Guide
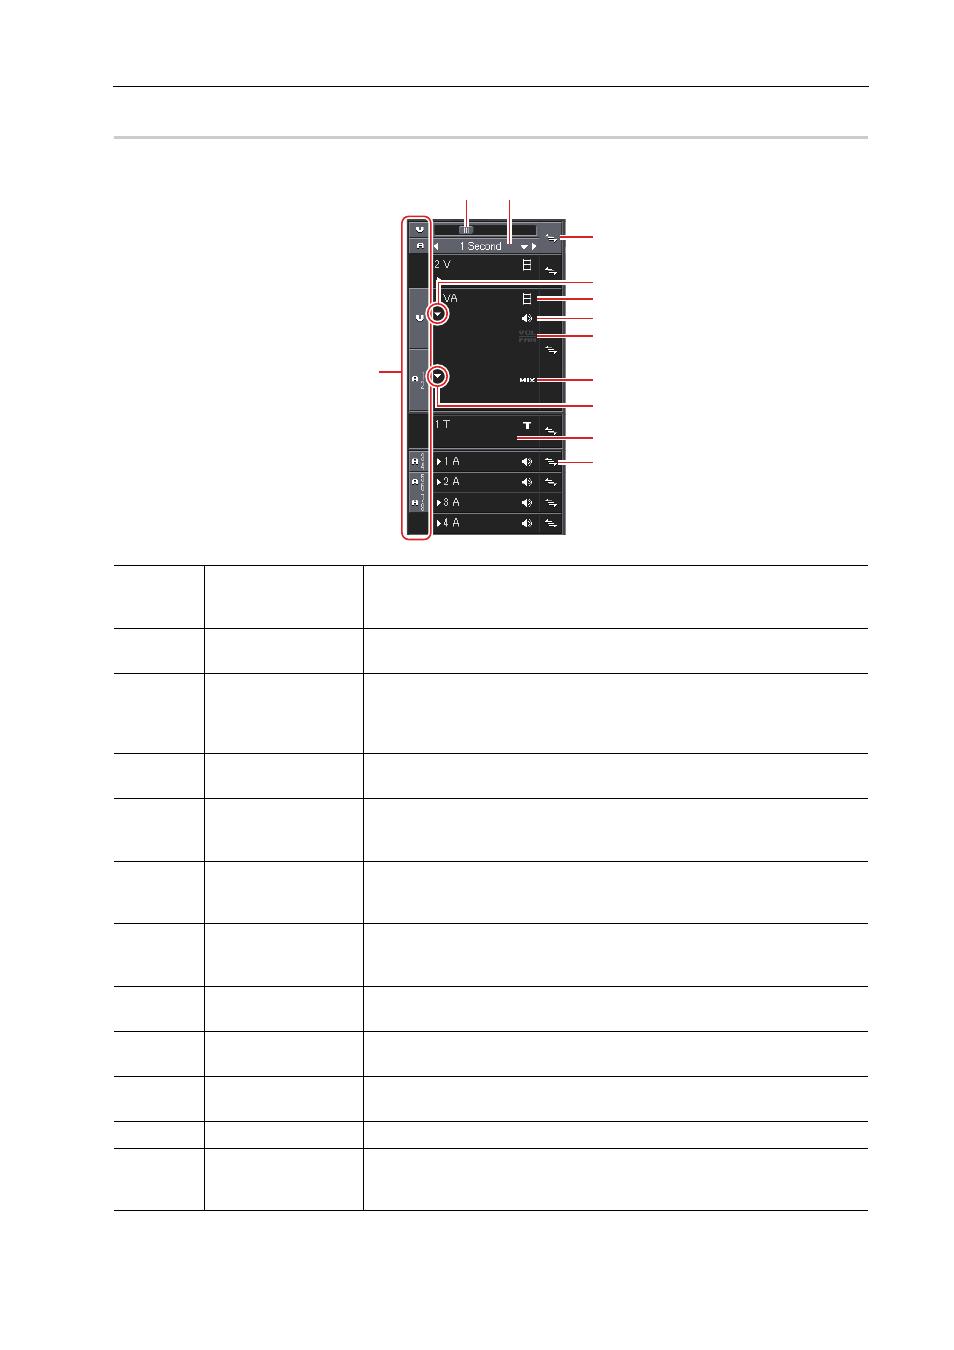
Time Scale Settings/Track Header
Time scale settings and track settings of timeline are performed in this area.
(1)
Track patch
When a clip is displayed on the Player or a clip is selected in the bin, the
channels that the clip has (source channels) are displayed on the track patch.
(2)
Time scale
controller
Change the display unit by dragging the slider. Move the slider to the left to
reduce the display unit, or to the right to increase it.
(3)
Time scale settings
Change the display unit for time scale. Click the center area to toggle the
specified display unit and [Fit].
• Setting [Fit] adjusts the display unit automatically and displays all the clips
on the timeline.
(4)
Batch lock panel
Click this to set sync-lock for all tracks on/off.
(5)
Audio expand button Click this button to display the rubber band for the audio.
[Alt] + [S]
Adjusting the Volume/Pan of Clip
(6)
[Video Mute]
When mute is set, the video part of the track is not played back. The video
part and mixer part of the clip on a muted track is displayed in gray.
[Shift]+[W]
(7)
[Audio Mute]
When mute is set, the audio part of that track is muted. The audio part and
volume/pan part of the clip on a muted track is displayed in gray.
[Shift]+[S]
(8)
[Volume/Pan]
Switch between the volume adjustment mode and the pan adjustment mode.
Adjusting the Volume/Pan of Clip
(9)
[Mixer]
Switch the transparency adjustment mode on/off.
• For details on transparency, see the Reference Manual.
(10)
Mixer expand button
Click this button to display the rubber band for the transparency.
• For details on transparency, see the Reference Manual.
(11)
Track panel
Click this to switch the select/deselect setting for the track.
(12)
Lock panel
Click this to set sync-lock for a specified track on/off.
Right-click on the lock panel, and click [Track Lock] to lock the track.
(1)
(3)
(2)
(4)
(5)
(6)
(7)
(8)
(9)
(10)
(11)
(12)