3 pms mode functions, 1 programmed scan operations – Alinco DJ-X2000 User Manual
Page 65
64
3.3 PMS mode functions
This section explains operations in the PMS mode.
3.3.1 Programmed scan operations
This section is for programmed scan operations.
Starting the scanning frequency apply for low frequency, and ending the
scanning frequency apply for high frequency in the VFO.
A modulation mode and a frequency step apply for the active VFO (indicated in
uppercase A or B) settings.
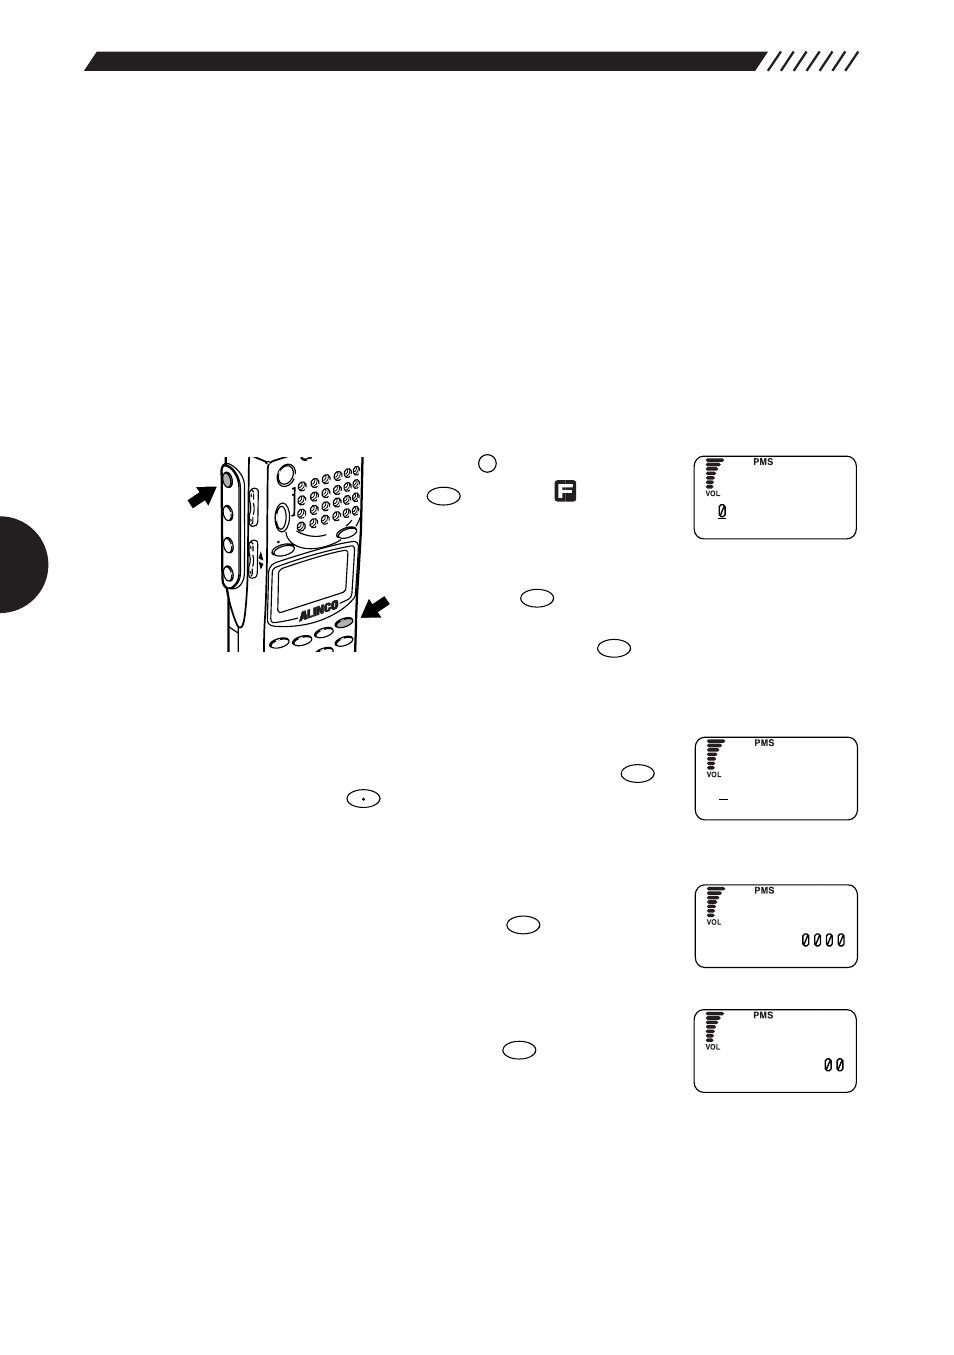
1
Call up the PMS SET screen.
Press the
key, and then press
the key
while
is
shown
on the display.
The MENU will appear. Point the
arrow at
+PMS
using the dial or
UP/DOWN
key, and
then press the
key.
The PMS screen will appear. Point the arrow at
+PMS
SET
and then press the
key.
The PMS SET screen will appear.
2
Select the bank on which you want to store the scanning program.
Using the dial or numeric keys, select the bank on which
you want to store the scanning program. Press the
key (Pressing the
key toggles between the
uppercase P and the lowercase p).
3
Specify the frequency to start the scanning.
Using numeric keys, enter the frequency at which you
want to start the scanning. Press the
key.
4
Specify the frequency to end the scanning.
Using numeric keys, enter the frequency at which you
want to end the scanning. Press the
key.
ENT
TF
ENT
TF
F TUNE
ENT
TF
ENT
TF
ENT
TF
HELP
SET
F
MODE
AUTO MW
MIC
A-B S
M NAME
STEP
ATT
SET
POW
ER
PMS
VFO
MR M
W
A B
SET
KL
3
6
2
1
RF C
HELP
MONI
F
SRCH
LAMP
SQL VOL
DOWN UP
S
P
- - - - . - - - -
- - - - - - - -
e t PMS BANK
S
p 1 - - - - . - - - -
- - - - - - - -
e t PMS BANK
S
p 1
8 2 .
- - - - - - - -
e t PMS START
S
p 1
1 4 5 . 3 4
e t PMS END