1 securing cable to the floor, Securing cable to the floor, Figure 3.2 cable installation methods – RLE LD2000 User Manual
Page 22
www.rletech.com
22
970.484.6510
3
Installation
4
Route the sensing cable according to a cable layout diagram, if provided.
5
Secure the EOL terminator on the unoccupied end of the sensing cable.
3.2.1 Securing Cable to the Floor
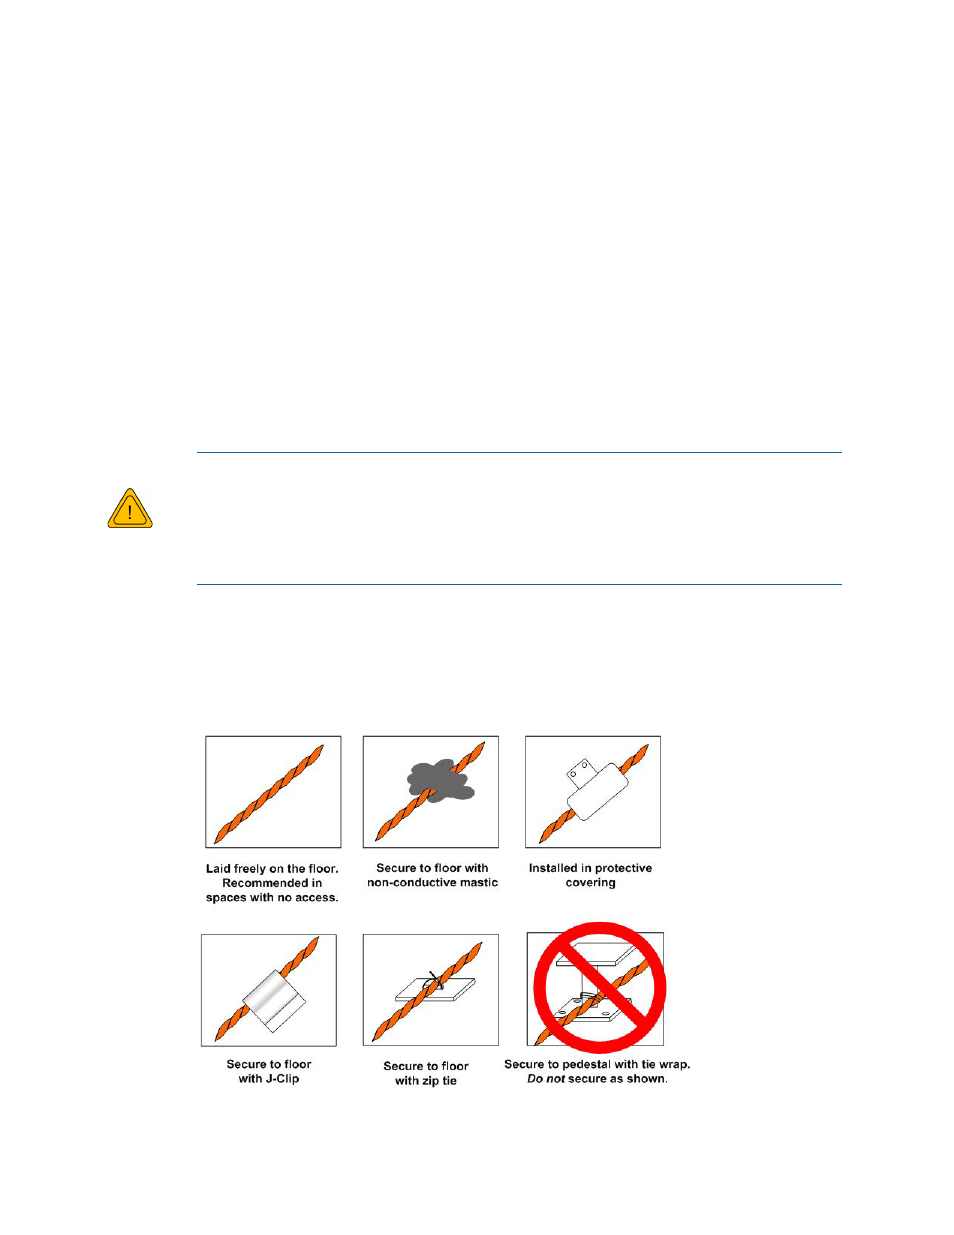
Secure the sensing cable to the floor with either J-clips (part #JC), or one of the other approved
methods shown in Figure 3.2. Available from RLE and designed specifically for use with
sensing cable, J-clips (part #JC) are the manufacturer's recommended installation method and
can be installed as follows:
Place one J-clip every 5 to 6 feet (1.52 to 1.83m) along the length of the sensing cable and
one at each turn of the cable. Use more J-clips if a “tighter” configuration is required.
If the cable is installed over an obstruction, clip the cable on both sides, as close to the
obstruction as possible.
Do not install the cable directly in front of an air conditioner. Allow a minimum of 4
to 6 feet (1.22 to 1.83m) between the unit and the cable. If the cable is too close to
the air conditioning unit’s air stream, the moisture from the humidifier may cause
false leak readings. If the cable must be installed in front of an air conditioning
unit, place the J-clips 12 to 18 inches (.305 to .457m) apart.
Finish the end of the SeaHawk leak detection cable (sensing cable) with the end terminator
(EOL) that is shipped with the LD2000. If the EOL terminator is not present, a cable fault
will register. Note any variances between the cable layout diagram and the actual cable
installation.
Figure 3.2 Cable Installation Methods
W
ARNING