Gasboy Fuel Point Dispenser User Manual
Page 24
GASBOY Fuel Point System
3-6
03/28/03
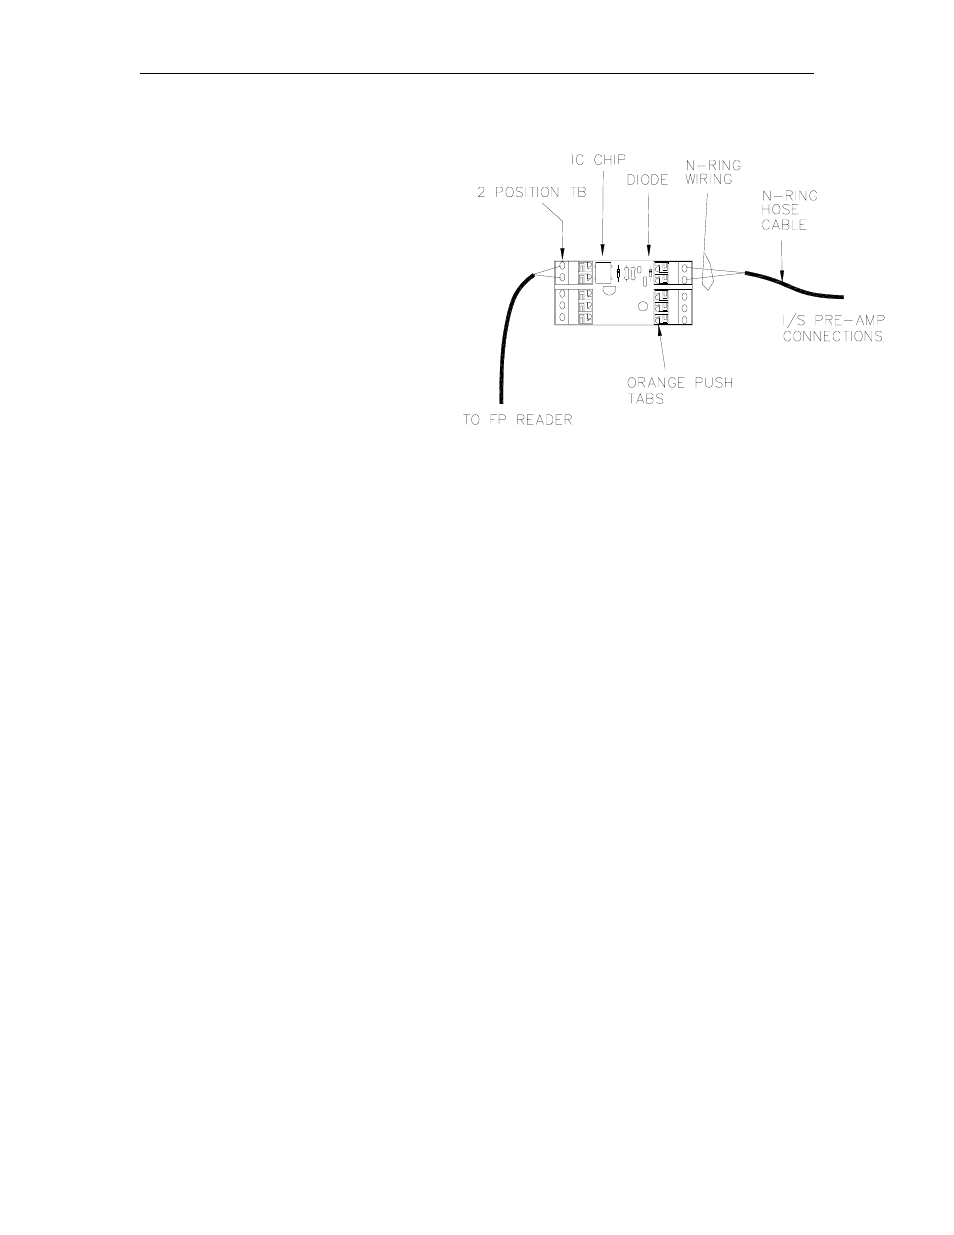
STEP E: COMPLETE N-RING WIRING
1. At the J-Box, cut the pump wire to
about a 15" length and remove 2" of
outer jacket. Strip (2) wires 3/8" from
the N-Ring hose cable. You are now
ready to make the final N-Ring
connections.
2.
The N-Ring hose cable connects to the
two (2) section terminals nearest the
diode. To insert, press the orange tabs
and insert wire. Release tab and verify
a tight connection.
CAUTION: Wire polarity is not important, but connection to the wrong side of the pre-amp
assembly will cause damage!!!
STEP F: APPLY POWER AND CHECK INSTALLATION
IMPORTANT: Before applying power and checking installation, all wiring must be
complete from Fuel Point Reader to Junction Box Pre-amp. Refer to the
appropriate installation/operation manuals to verify this.
1.
Return power to pumps and fuel management system. Switch system to AUTO operation.
For mechanical pumps, the switches are located on the pump control unit; for GASBOY
electronic pumps, these switches are on the CPU board behind the bezel assembly. For
other manufacturer’s pumps, refer to their installation/operation manuals.
2.
Test the installation on a vehicle equiped to operate with Fuel Point. If communications are
intermittent, check and insure the N-ring and T-ring are within 9" of each other and the N-ring
communications path to the T-ring is not blocked by the metal fill tube (see TIP 1).
TIP 1: Vehicles with large metal fill pipes can allow the nozzle to be fully inserted in the tank
opening. The metal fill tube can block N-ring communications. If this condition exists, use a
nozzle with a extra long spout and provide a mechanism to hold the spout at a 5" to 9" gap
with the ring communication path unobstructed.
Once the system is communicating, pump a small amount of fuel and check for fuel leaks at
all threaded hose connections. For internally-wired hoses, check all O-ring seals and check
for faulty hose wires (see TIP 2).
TIP 2: If hose assembly leaks at one of the O-ring seals, tighten the pressure fitting only as
needed. Do not overtighten; this can also cause leaks. Finger tight, plus 1/4 to 3/8 turns is
sufficient torque to seal.
Internally wired hoses must be checked for damaged internal hose wiring (see WARNING).
WARNING: A nick or cut in the hose wire located within the hose will allow fuel to enter the
jacket interior and travel past o-ring seals. Fuel will be found in connectors and/or J-box.
When this occurs, immediately remove the pump from service and install new hose wiring.