3 tighten all screws equally, Caution – Gasboy M06245K0XX User Manual
Page 9
MDE-4506A Atlas™ Pulser Kits M06245K0XX Installation · May 2006
Page 9
Installing the Pulser Kit in Twin Units (Kits M06245K001 through M06245K003 and M06245K008)
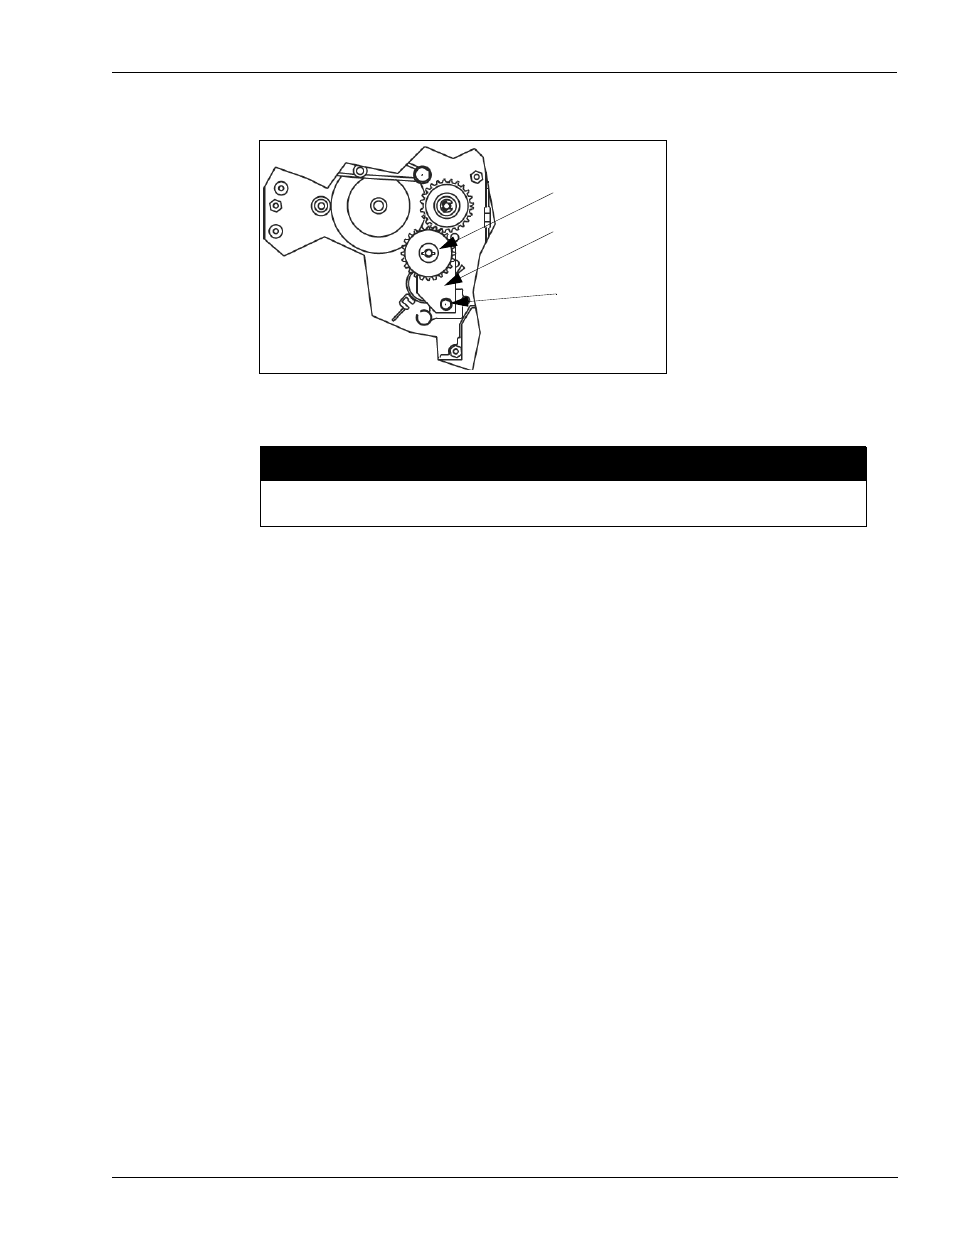
Figure 2: Plate and Idler Gear Assembly
Mounting Screw
(Self tapping)
Plate and Idler
Gear Assembly
Idler Gear
Note: This illustration is shown rotated 90 degrees from its installed position.
Excessive tightening of the mounting screw will crack the plastic plate
.
CAUTION
3
Ensure proper gear position, alignment, and meshing and tighten mounting screw.
4
through
to mount the second Plate and Idler Gear Assembly on the other
computer.
Assembling 046970 Pulser Mounting Plate and 0469XX Pulser and
Coupling Assembly
1
In the kit, locate two 046970 mounting plates, two 0469XX* Pulser and Coupling Assemblies,
six 051805 screws, and six 068891 lock washers.
* The part number depends on which kit is being installed. See
for the part number.
2
Place the mounting plate on the Pulser and Coupling Assembly, align the three mounting
holes, and loosely secure with three screws and three lock washers.
3
Tighten all screws equally.
4
for the other mounting plate and pulser and coupling assembly.