D*ap4 – Junger Audio D*AP4 FLX / D*AP4 LM Edition User Manual
Page 13
D*AP4
8
Getting Started – IP setup of the D*AP4
–
via console interface
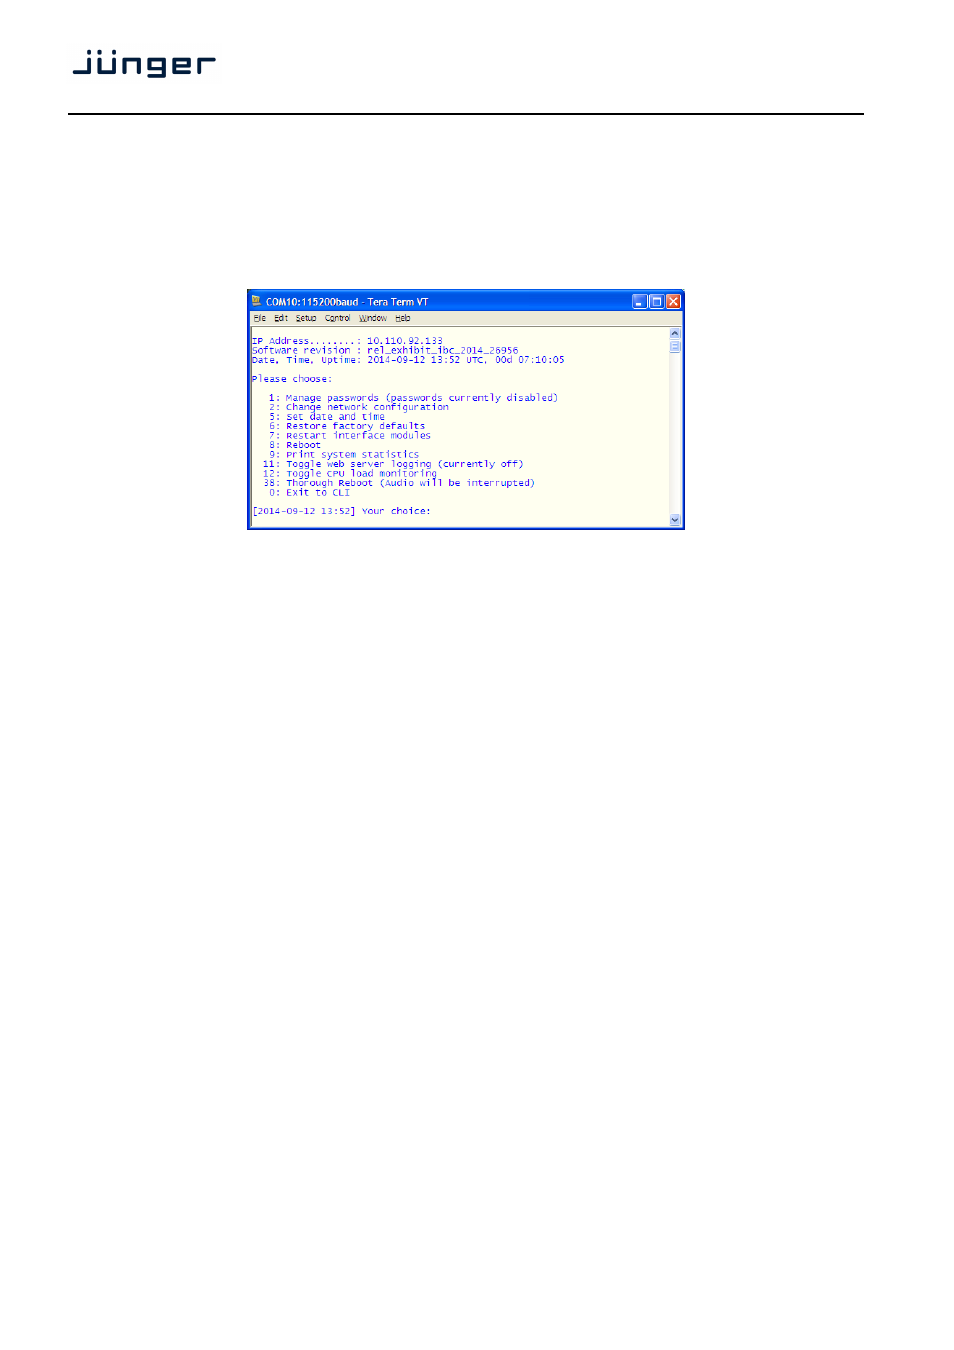
The tool to change the IP configuration of the D*AP8 can be selected via the console interface. You must
connect it with the PC via an USB A to B cable. This will install the driver for the built-in USB to serial
converter. Now you can open a terminal program. Here you must select the virtual COM port assigned by
the OS. The communication parameters are:
115200kBaud, 8, N, 1 no hand shake. Pressing
[2014-08-22 12:01] Your choice:
Select item "2":
Current network configuration
IP Address:
10.110.24.128
Netmask ...:
255.255.0.0
Gateway ...:
10.110.0.1
Enter new IP address, press ENTER to cancel:
You must enter the new IP address (e.g.): "192.168.178.78"
Enter new netmask, press ENTER to cancel:
You must enter the new netmask (e.g.): "255.255.255.0"
Enter new gateway address, press ENTER to configure without gateway:
You may press
You may enter the new gateway address (e.g.): "192.168.178.1"
Important Note! The gateway entry is optional but you must take care that the gateway address matches the
network mask related to the device IP address! If you are not sure simply enter 0.0.0.0.
or leave it without an entry.
Changing Network configuration
Network configuration has been changed. Please reboot the device
to activate the new settings.
Select item "8: Reboot"
Do you want to reboot the device ?
Press small "y"
Rebooting the device ……..
After reboot has finished, the new IP configuration is active and will be displayed at the top of the
configuration menu.