Sub-trim (servo sub-trim adjustment), Reverse (servo travel direction reverse), Sub-trim – HITEC Aurora 9X User Manual
Page 87: Servo sub-trim adjustment, Reverse, Servo reversing function
9 CHANNEL 2.4GHz AIRCRAFT COMPUTER RADIO SYSTEM
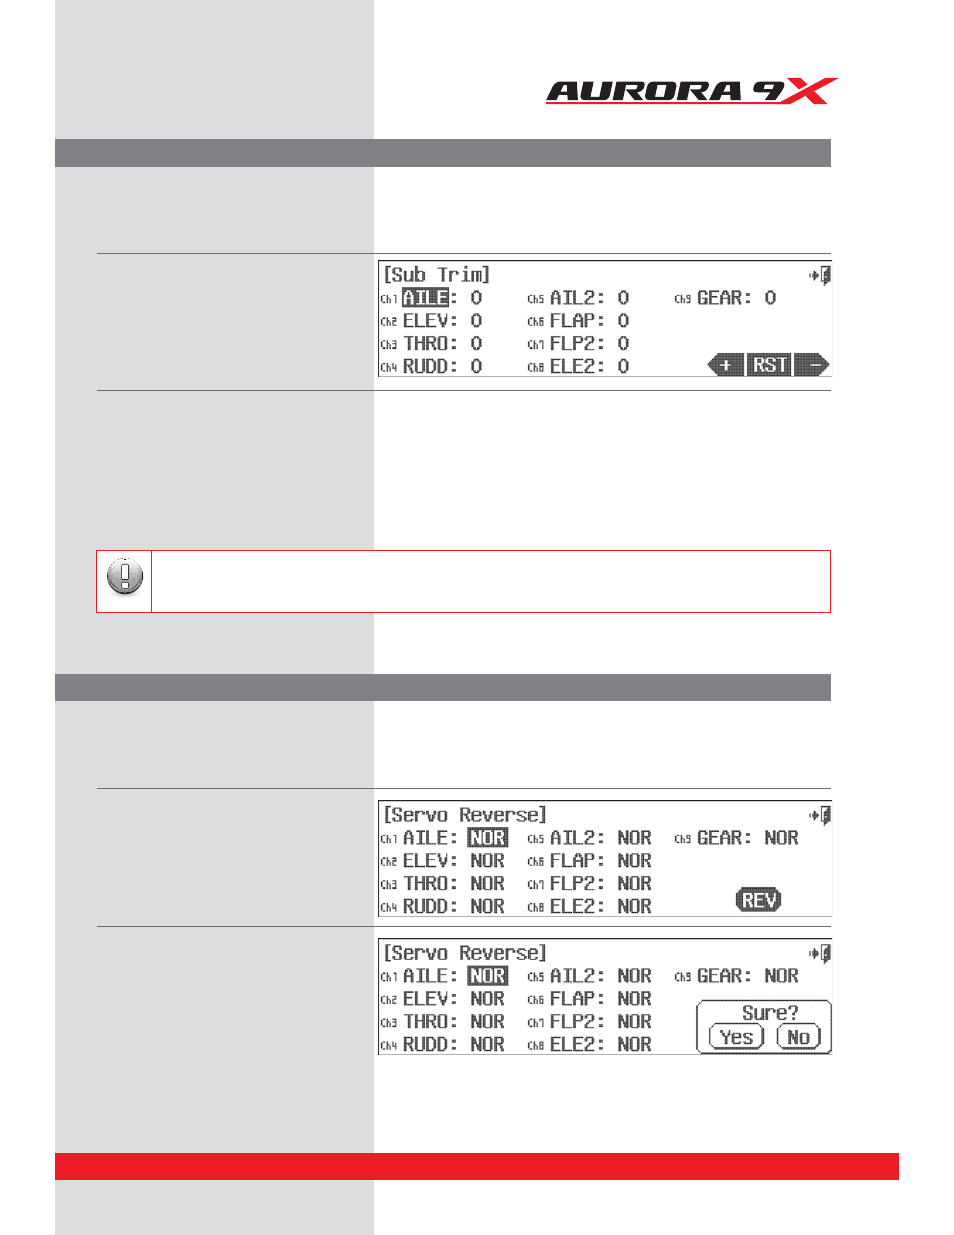
Sub-Trim (Servo Sub-Trim Adjustment)
Reverse (Servo Travel Direction Reverse)
a. Select
Sub-Trim
from the model menu.
b. Select the control/channel to adjust by pressing its respective icon.
c. Using the
+ RST –
icon at the screens lower right corner, adjust a value as necessary by selecting the plus or minus icon.
Select
RST
to bring the value back to zero if you wish. You should see the control surface moving as changes are made with the
+
or
–
icon.
E'PMMPXUIJTQSPDFEVSFGPSBOZDIBOOFMTSFRVJSJOHTVCUSJN
e. When done, back up to the model menu by selecting the
Exit
icon.
a. Select
Reverse
from the model menu.
b. Move your controls, are all the servos going
JOUIFDPSSFDUEJSFDUJPO *GOPU
TFMFDUUIF
channel to reverse, then press the
REV
icon.
D*GUIJTJTDPSSFDUQSFTTUIF4VSF
Yes
icon.
d. Do this process until all servo throw
directions are correct.
e. Back up to the model menu by selecting the
Exit
icon.
Your servo control arms should be as close to 90 degrees as possible, and the control surfaces as close to level as you
can make them by adjusting the control linkages. Use the sub-trim feature to make very small adjustments to “center”
the control surface.
Are all your servos traveling in the correct direction? Use this menu to change the direction for any of the active
model’s channels.
Sub-trim is not the place to do a major adjustment. Any servo needing more than 40 points of movement should be
adjusted by moving the servo control horn and adjusting the linkage.
Caution
C
ti
C
ti
C
ti
C
ti
C
ti
C
ti
C
ti
C
ti
C
ti
C
ti
ti
ti
ti
ti
ti
ti
ti
ti
tiiiiiiiiiiiiiiiiiii
87