10 lpg conversion - all models – Glow-worm Betacom C User Manual
Page 44
44
11 Commissioning - Nat. Gas (G20) to LPG (G31) Conversion
11.10 LPG CONVERSION - all models
IMPORTANT: Gas conversion must be carried out by a
competent person approved at the time by the Health and
Safety Executive.
Isolate the boiler from both the Gas and Electricity supplies.
The burner must be removed from the boiler by removing,
the front panel, hermetic chamber cover and combustion
chamber cover. Remove the two securing screws, one on
each side of the burner, see diagram 11.13.
The old injector bar (manifold) must be removed.
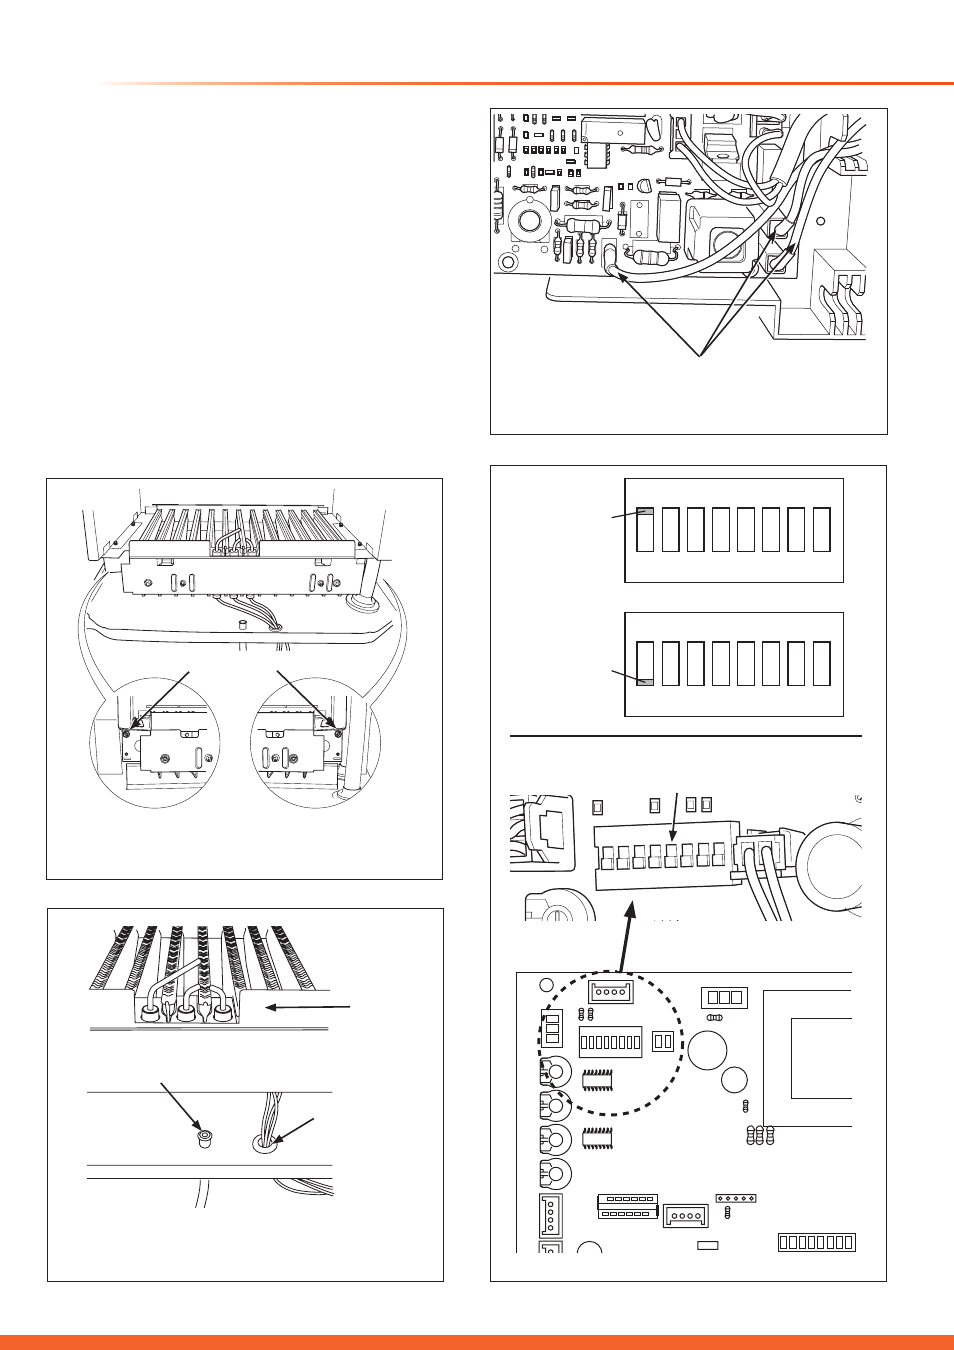
The ignition electrode and flame (ionisation) electrode
cables must be removed by opening the control panel and
gaining access to the PCB. Disconnect the plugs of the
ignition and flame (ionisation) electrodes, see diagram
11.15.
Fit new injector bar (manifold), new sealing washer and
tighten, ensuring that the injector size is marked 0.75 mm for
LPG (both for Betacom 24c and Betacom 30c)
Fit burner and re-assemble.
The joint must be checked for Gas Tightness.
14555
Diagram 11.15
FLAME AND IGNITION
ELECTRODE LEADS
14566
Diagram 11.14
SENSING TUBE
GROMMET
BURNER
14557
Diagram 11.13
SECURING SCREW
LEFT HAND SIDE
OF BURNER
RIGHT HAND
SIDE OF BURNER
Remove the gasket of cables with the cables inside.
1 2 3 4 5 6 7 8
ON
DIP
1 2 3 4 5 6 7 8
ON
DIP
DIP SWITCH
OFF POSITION
DIP SWITCH
ON POSITION
1 2 3 4 5 6 7 8
ON
P7
P5
P2
P4
DIP
8 DIP SWITCHES IN
THE OFF POSITION
MAIN PCB
Diagram 11.16