Dillon Precision XL 650 User Manual
Page 9
10
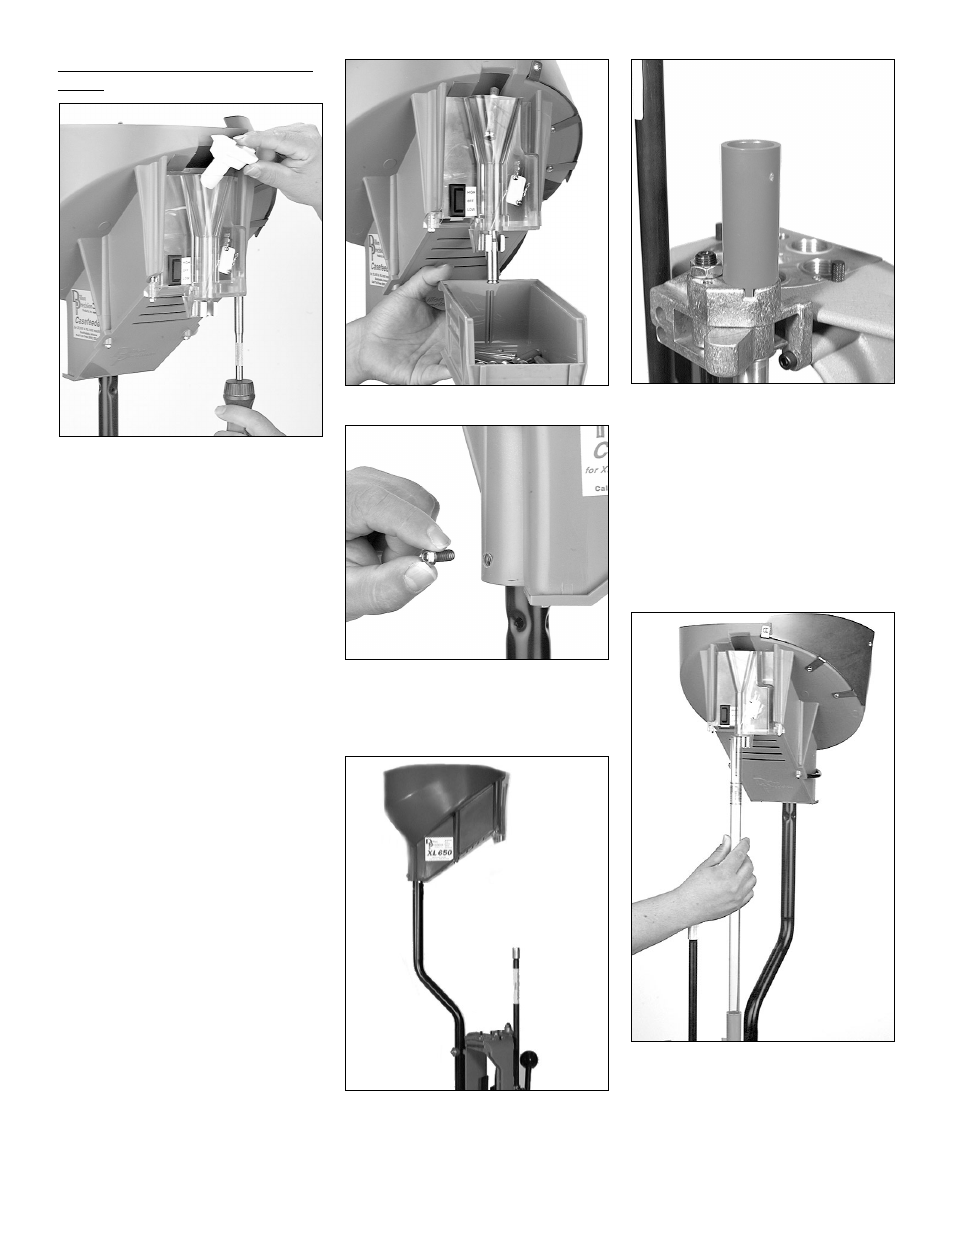
To Install the casefeed funnel adapter
FIG 18:
FIG 18
Remove the screws that attach the clear
casefeed funnel. Slide the front cover down
a bit, and slip the white plastic funnel
adapter into the funnel FIG 18. Reassemble.
Note: Do not loosen the two screws that
are holding the microswitch (pt#
13779).
Note: Occasional jams will occur. To
keep them to a minimum, be sure
to use the spacer washer FIG 13
or white casefeed funnel adapter
FIG 16 when called for. Use the
low setting if it will keep up with
your loading pace, and do not over-
load the casefeed bowl. The rated
capacity of the casefeeder is about
1/2 of the bowl’s physical capacity.
Before placing the casefeed bowl on the
casefeed post, take a moment to look over
and understand the casefeed assembly and
how it works. If you like, you can run the
casefeeder before placing it on top of the
casefeed post. This will allow you to get a
better idea of how it works. To do so, plug
in the casefeeder and fill it with about 50
cases. Hold the casefeeder FIG 19 so the
funnel is vertical. Place the cartridge bin
under the funnel and turn it on. Experiment
using both the high and low settings.
FIG 19
FIG 20
2. Remove the set screw from the acces-
sory bag and thread it into the case-
feed assembly FIG 20.
FIG 21
3. Place the casefeed bowl onto the
casefeed post FIG 21.
FIG 22
4. Place the casefeed adapter on the case-
feed body FIG 22. Note how the key
fits into the notch on the casefeed
body.
Note: Casefeed adapters are caliber spe-
cific. Cross-check your casefeed
adapter with the one listed in the
caliber conversion chart (for the cal-
iber you’re loading) to ensure that
you have the correct one installed in
your machine.
FIG 23
5. Align the casefeed bowl so the spring
clamp is directly over the casefeed
adapter. Place the casefeed tube into
the casefeed adapter then snap the
tube into the clamp FIG 23.