Dillon Precision XL 650 User Manual
Page 7
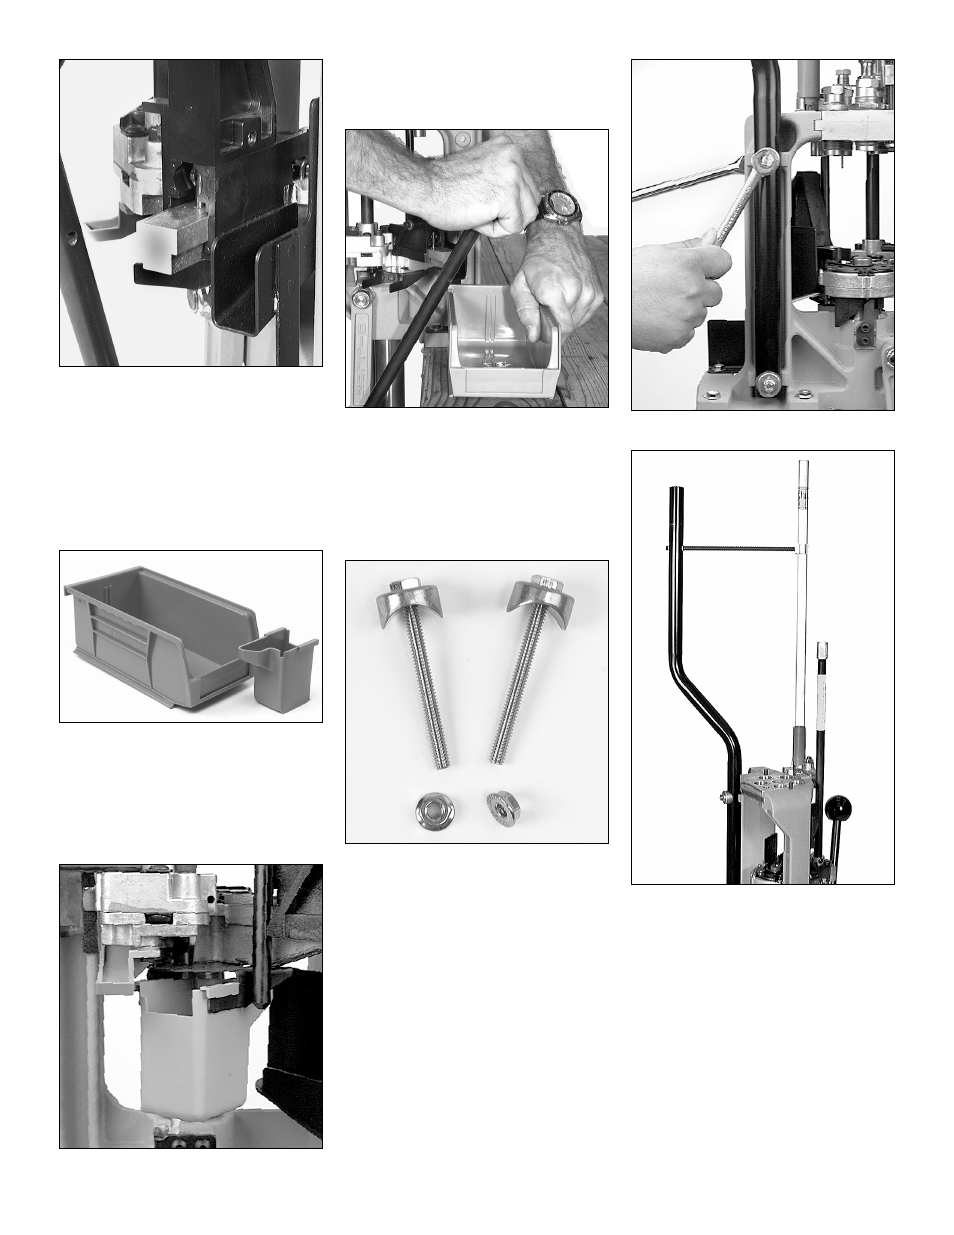
FIG 5
Operate the handle slowly to ensure that
the machine operates smoothly. Make sure
that the handle and the crank completely
clear the bench. Contact with the bench may
hinder its range of movement. Observe the
movement of the shellplate platform and veri-
fy that there is no interference or contact of
the case insert slide and the chute/bin mount
FIG 5.
FIG 6
B. Installation of the Spent
Primer Cup FIG 7 and
Cartridge Bin FIG 6:
1. Raise the platform (i.e., lower the
handle all the way).
FIG 7
2. Slide the spent primer cup onto the
rails as shown. Make sure when
installing the cup that it is on both
rails.
FIG 8
3. Place the cartridge bin on the
chute/bin bracket. Push the handle aft
FIG 8 while sliding the bin toward
the handle as shown. With the handle
pushed to its full aft position, there
should be a space between the han-
dle and bin.
FIG 9
C. Installation of the Casefeed
Post
1. Remove the bolts, nuts and clamp
from the spacer kit and assemble
them as shown in FIG 9.
FIG 10
FIG 11
2. Install the casefeed post as shown in
FIG 10. Make sure the bend in the
post is facing away from you FIG 11.
3. Using two 7/16” wrenches, tighten
the bolts.
D. Installation of the Casefeed
Tube Bracket FIG 11.
Install as shown in FIG11.
Note: If you ordered your machine with
the optional casefeed assembly,
you won’t need to use the casefeed
tube bracket. This is because the
upper end of the casefeed tube is
supported by the casefeed bowl.
8