Dillon Precision XL 650 User Manual
Page 35
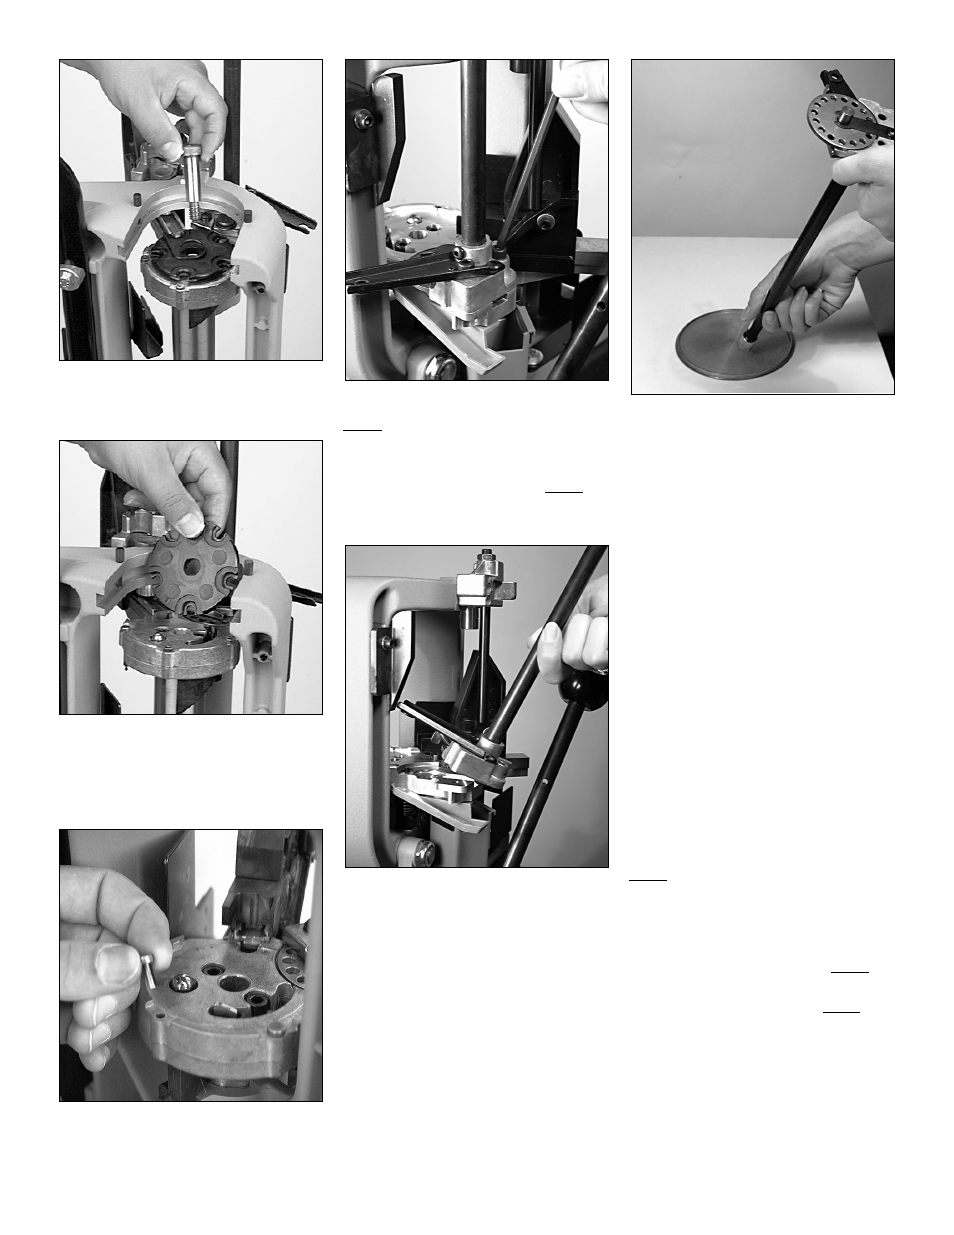
FIG 159
2. Using a 1/4” Allen wrench remove
the shellplate bolt FIG 159.
FIG 160
3. Swing the ejector wire out of the way
and remove the shellplate. Be sure
that the index ball and index pawl
remain in place FIG 160.
FIG 161
4. Remove the locator buttons FIG 161.
FIG 162
Step 5) Remove the primers:
Remove the primers only if you need to
change to a different size or type of primer.
1. Remove the shellplate (ref. Step 4).
2. Loosen and remove the two primer
system bolts FIG 162.
FIG 163
3. Carefully lift the primer assembly
away from the machine FIG 163.
FIG 164
4. FIG 164 Empty the remaining
primers by placing a finger over the
primer shield cap, inverting the
magazine and carefully pouring the
primers onto the primer flip tray. Put
the primers back into their original
box.
5. If any primers remain in the primer
area (on the machine) carefully
remove them.
6. If you need to change the rotary
primer disc go to Step 6. If you only
to need empty the primer magazine,
reinstall the primer system at this
time.
Note: About Steps 6, 7 and 8. If you’re
changing from a large rifle/pistol
primer to a small rifle/pistol primer
or vice versa, the rotary primer disc,
primer magazine, and primer punch
will have to be changed. This is
because each of these three items
are designed specifically for either
large rifle/pistol primers or small
rifle/pistol primers.
Step 6) Change the rotary primer disc
(see note above):
Note: The two different size rotary primer
discs are labeled L (large) and S
(small).
1. Remove the shellplate (ref. Step 4).
2. Remove the primer system and empty
the primer magazine (ref. Step 5).
36