Dillon Precision XL 650 User Manual
Page 27
turning it counter clockwise and try
again.
6. Screw the seating stem down 1/2 turn
at a time FIG 118.
FIG 119
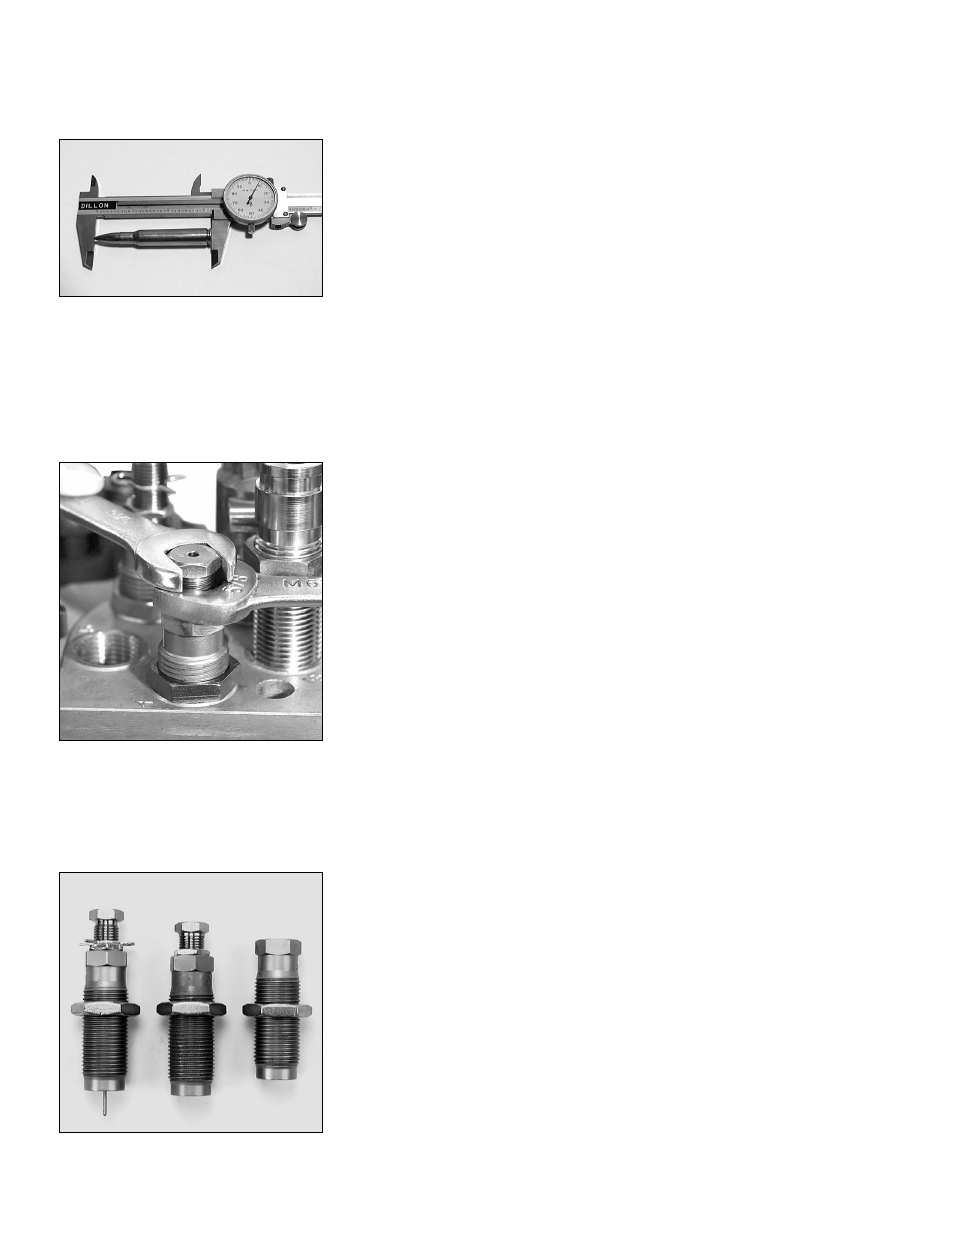
7. Repeat as necessary until the correct
overall length is achieved. Use a dial
caliper or equivalent to measure the
overall length of the cartridge FIG
119. Check the overall length of the
round against the information in your
reloading manual.
FIG 120
8. Once you have obtained the proper
OAL, replace the cartridge into
Station 4, raise the platform and
snug the lockring on the seating stem
FIG 120.
FIG 121
M.Station 5 – Installation and
adjustment of the Crimp
Die FIG 121:
1. Screw the crimp die into Station 5.
Screw it down until it is flush with the
bottom of the toolhead. This is a good
starting point for the crimp adjust-
ment.
2. Place a lubricated cartridge with a
properly seated bullet into Station 5.
3. Raise the platform and continue to
screw the die down until it stops.
4. Lower the platform and give the die a
half turn down; again, raise the plat-
form.
5. Lower the platform halfway and
inspect the cartridge. If the desired
amount of crimp has not been
achieved, give the die a 1/4 turn
down and try again. Continue making
small adjustments to your crimp die
until the desired amount of crimp has
been achieved.
6. Once the adjustment is complete,
place the case back into Station 5 and
raise the platform. Using a 1” wrench
to turn the lockring and a 7/8”
wrench to hold the die body, snug
the lockring.
Go to Loading Components
Section - Page 30
28
Sizing/Decapping Die
Seating Die
Crimp Die