Start up, 30hh,hj, Installation – Carrier 30HH User Manual
Page 19
Attention! The text in this document has been recognized automatically. To view the original document, you can use the "Original mode".
INSTALLATION
30HH,HJ
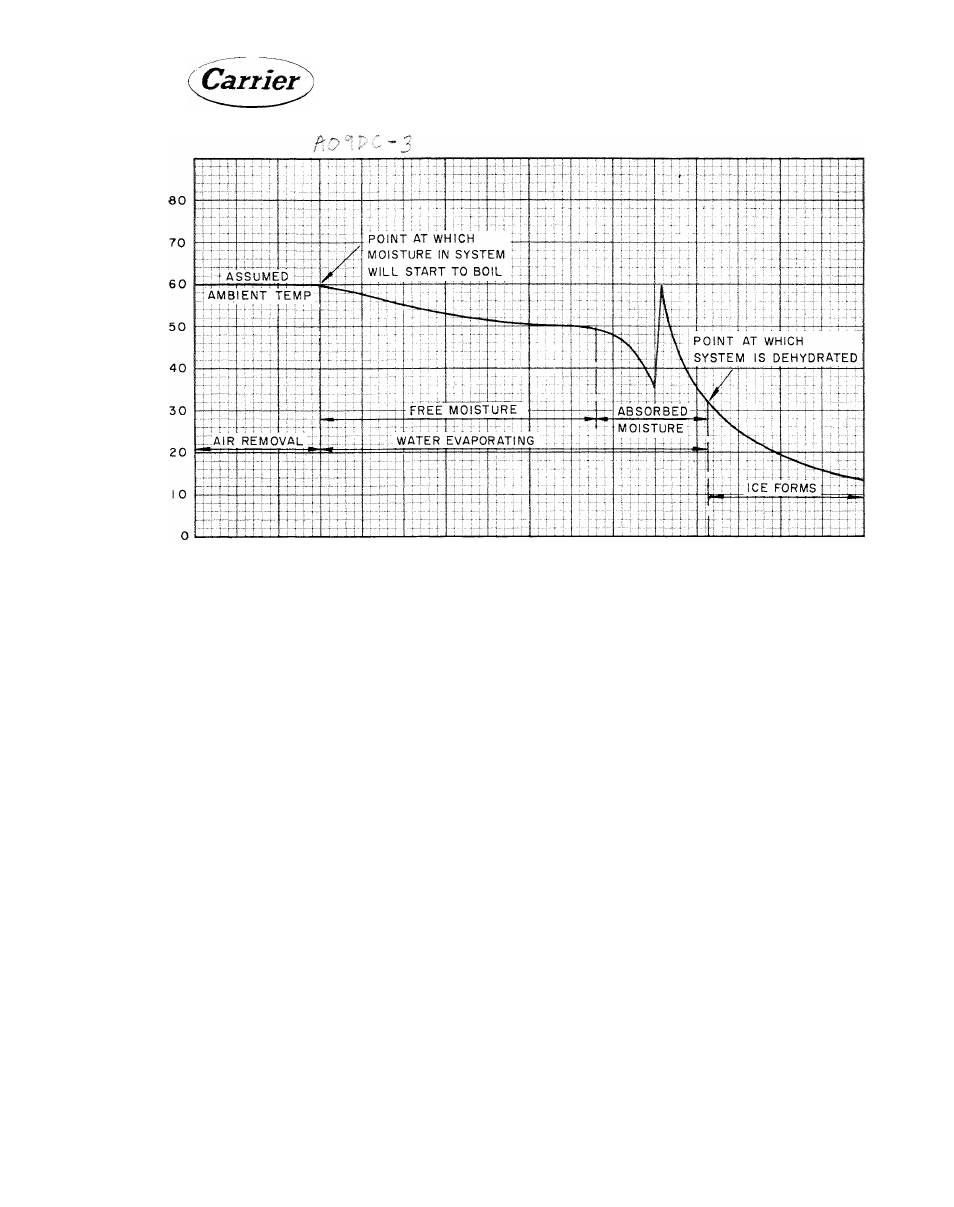
TIME
Fig. 25 - Dehydration Puii-Down Curve
one
turn
to
allow
pressure
to
reach
the
gages.
4.
Open the liquid line shut-off valves at the
condensers (30HH if using the vapor charg
ing method - see "Charge With Refriger
ant”) or the inlet, outlet, and vent valves on
the receivers (30HJ).
5.
Open the valves to the capillaries of the
water regulating valves (when used).
6.
Fill
the
chilled
liquid
circuit
completely
with
clean
water
or
other
non-corrosive
fluids to be cooled. Bleed all air out of the
high points of the system.
7.
If the condenser is cooled by waste water,
open the water supply valve. If it is cooled
by a cooling tower, fill the tower with water.
8.
Start the air handling equipment or other
equipment to which the 30HH or HJ is con
nected.
lay
and
remove
protective
paper
between
contacts of the balancing relay in the step
controller.
Start Up
Upon
completing
the
initial
check,
charge
the
unit with refrigerant. (See "Charge with Refrig
erant.”)
IMPORTANT: 30HH015,020 units are
fully charged at factory.
The unit should only be started under the super
vision of a refrigeration mechanic who is famil
iar
with
the
accepted
operating
practices
for
refrigeration systems.
1.
Open all compressor or system valves that
may have been closed during or after charg
ing.
2.
Start the unit by pushing the "START" and
"STOP” button.
9. Set the temperature controller (page 24).
10. Check tightness of all electrical connec
tions.
11. Remove cardboard spacer from recycle re -
3.
Check all controls for proper operation. (See
"Check Controls.”)
4.
Adjust watfer regulating valve to the most
economical
pressure
for
the
locality.
Nor
mally 200 to 230 pounds for F 22.
19