4 setting up a 6-series sonde for checkout, 4 setting up a 6-series sonde for system checkout, Caution – YSI 6200 User Manual
Page 15
YSI 6200 DAS USER Manual
YSI/Massachusetts 508.748.0366, Fax 508.748.2543
Page 2-6
however, use the direct link to functionally check your sensors, power source, and DCP in this
laboratory setup.
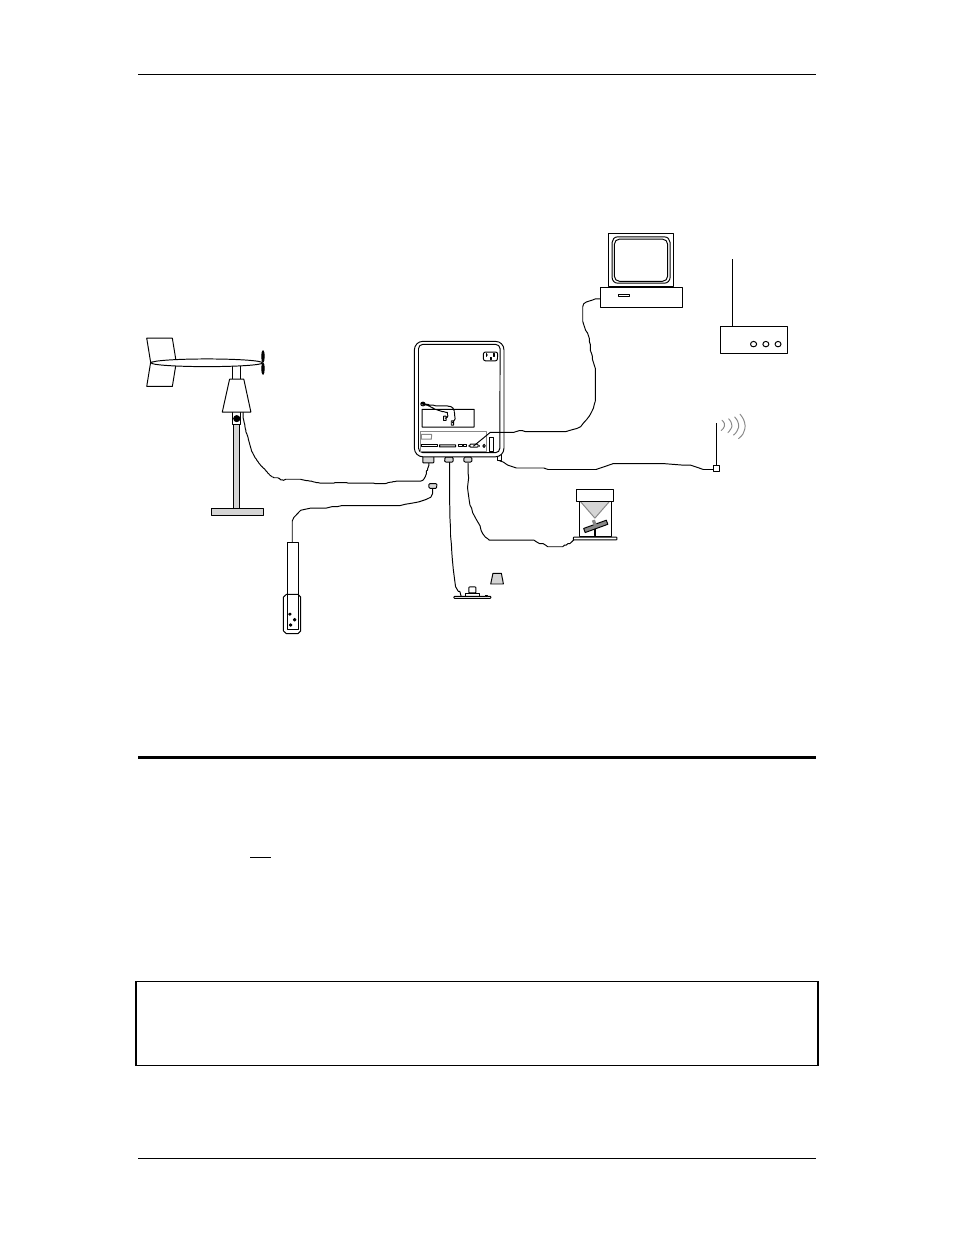
Your setup as described above should now appear similar to the diagram below. Note that the
Radio Base Station is not connected to the system at this point, as it will be checked later.
Radio
Antenna
Battery
Data Collection
Platform
Radio Transceiver
(or Cellular Modem)
Radio
Base Station
MET Suite
Wind Speed/Direction
Relative Humidity
Air Temperature
Pyranometer
Solar Radiation
6-Series Sonde
Water Temperature
Conductivity
Dissolved Oxygen
pH
makeshift
support
Direct Link Initial Checkout
(Phone Modem)
Barometer
AC
Power In
RS-232
Cable
* Sonde connects to MS-8 once calibrated.
Rain Gauge
Rain accumulation
Rain rate
*Remove cover to activate tipping buckets.
Computer with
EcoWatch DCP
Figure 2.3 Setup and Checkout Configuration with Direct Link RS-232 (no radio)
2.4 Setting Up a 6-Series Sonde for Checkout
If a 6-series sonde is not part of the system you ordered, proceed to Section 2.5.
Below is the procedure to unpack and set up a 6-Series sonde for 6200 DCP checkout. The
procedure does not include calibration of the sonde sensors. Other than temperature, the
readings may seem unrealistic at this time. The objective is to familiarize you with specific
sensor setup protocols, not to obtain accurate data.
For many sonde models you must physically install some of the sensors into the sonde bulkhead.
You should refer to the sonde manual for details so not to damage the sensors.
CAUTION!
To avoid permanent damage to the sonde, do not submerse the sonde in water during
this initial checkout.