Top Flite TOPA0700 User Manual
Page 39
❏
2.
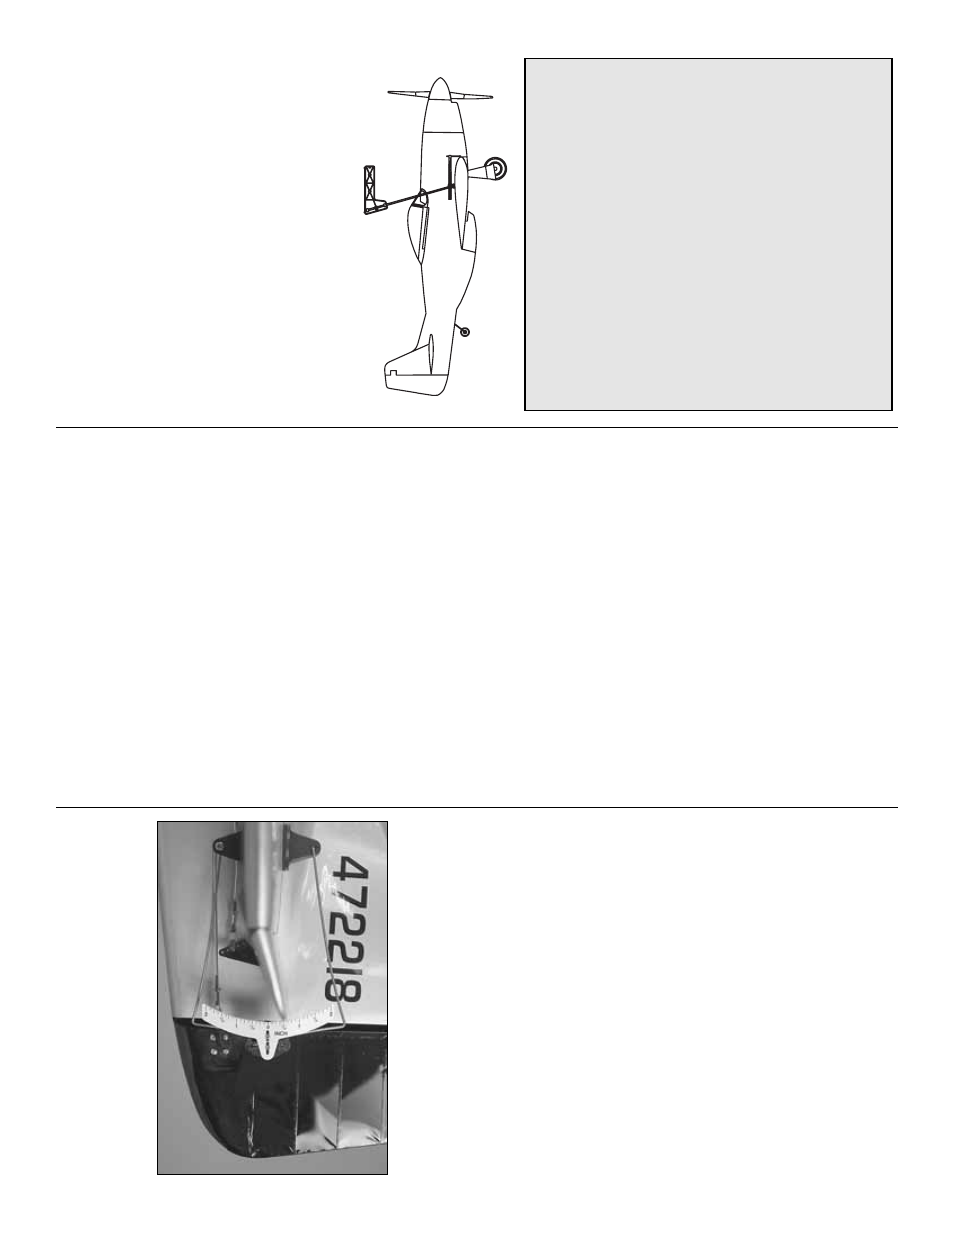
With the wing attached to the fuselage
, all par
ts
of the model installed (ready to fly) and an empty fuel
tank, place the model upside-do
wn on the CG
Machine
, or lift the model upside-do
wn with y
our
finger tips on the tape line
.
❏
3.
When vie
wing the model from the side
, the
hor
iz
ontal stabiliz
er should be le
v
e
l.
If the tail is lo
w
,
the model is
“tail hea
vy”
and the batter
y pac
k and/or
receiv
er m
ust be shifted f
orw
ard or w
e
ight m
ust be
added to the nose to balance
.
If the tail is high, the
model is
“nose hea
vy”
and the batter
y pac
k and/or
receiv
er m
ust be shifted aft or w
e
ight m
ust be added
to the tail to balance
.
If additional w
eight is required,
Great Planes (GPMQ4485)
“stic
k-on”
lead ma
y be
added where necessar
y.
If nose-w
eight is required
attach it to the fire
w
all (don’t attach w
eight to the
co
wl—it is not intended to suppor
t w
e
ight).
If tail-
w
eight is required it could be attached to the inside
of the fuselage through the tail gear door opening.
In
either case
, do not rely upon the adhesiv
e on the
bac
k of the lead w
eight to per
manently hold it in
place
.
O
v
er time
, fuel and e
xhaust residue ma
y
soften the adhesiv
e and cause the w
eight to f
a
ll off
.
Instead, use #2 sheet-metal scre
ws
, R
TV silicone or
epo
xy to per
manently hold the w
eight in place
.
❏
4.
IMPOR
T
ANT
:
If y
ou f
ound it necessar
y to add
an
y w
eight, rechec
k the C
.G.
after the w
eight has
been installed.
Balance the Model Laterall
y
❏
1.
With the wing le
v
el, ha
v
e
an assistant help y
o
u
lift the model b
y
the engine propeller shaft and the
bottom of the fuse under the
TE of the fin.
Do this
se
v
e
ral times
.
❏
2.
If one wing alw
a
ys drops when y
ou lift the
model, it means that side is hea
vy
.
Balance the
air
plane b
y
adding w
eight to the other wing tip
.
W
eight ma
y be tempor
ar
ily adhered to the bottom of
the wing tip with the adhesiv
e f
oam tape that comes
with it, then per
manently glued inside after doing the
necessar
y in-flight chec
ks to deter
mine the e
xact
amount of w
eight necessar
y.
An airplane that has
been laterall
y balanced will trac
k
better in loops
and other maneuver
s.
Chec
k the Contr
ol Directions
❏
1.
T
u
rn
on the tr
ansmitter and receiv
er and center
the tr
ims
.
If necessar
y,
remo
v
e
the ser
v
o
ar
ms from
the ser
v
os and reposition them so the
y are centered.
Reinstall the scre
ws that hold on the ser
v
o
ar
ms
.
❏
2.
Adjust the length of an
y pushrods necessar
y
and the pull/pull cab
les on the tail wheel b
y
scre
wing
the cle
vises in or out.
Securely tighten all the 4-40
jam n
uts on the 4-40 pushrods to loc
k the cle
vises
do
wn.
This w
ould also be a good time to study the
installation of all the systems to mak
e sure
e
v
er
ything is secure and connected proper
ly (air
lines
, ser
v
o
wires
, receiv
er antenna, etc.).
❏
3.
Mak
e
cer
tain all the controls respond in the
correct direction.
If an
y of the controls respond in the
wrong direction, use the ser
v
o
re
v
ersing in the
tr
ansmitter to re
v
erse the ser
v
os connected to those
controls
.
Be cer
tain the control surf
aces ha
v
e
remained centered.
Adjust if necessar
y.
Set the Contr
o
l
Thr
o
w
s
Use a Great Planes AccuThro
w (or a r
uler) to
accur
ately measure and set the control thro
w of each
control surf
ace as indicated in the char
t that f
ollo
ws
.
NO
TE
:
The thro
ws are measured at the
widest par
t
of the ele
v
ators
, r
udder ailerons and flaps
.
This is where y
our model should balance f
or the
first flights
.
Later
, y
ou ma
y wish to e
xper
iment b
y
shifting the C
.G.
up to 5/16" [8mm] f
orw
ard or
5/16" [8mm] bac
k to change the flying
char
acter
istics
.
M
o
ving the C
.G.
forw
ard ma
y
impro
v
e
the smoothness and stability
, b
u
t the
model ma
y then require more speed f
o
r tak
eoff
and mak
e it more difficult to slo
w f
or landing.
Mo
ving the C
.G.
aft mak
es the model more
maneuv
er
ab
le
, b
ut could also cause it to become
too difficult to control.
In an
y case
,
star
t at the
recommended balance point
and do not at an
y
time balance the model outside the specified
range
.
Note:
If flying the model at the f
orw
ard
C
.G.
location, y
ou should land with the ele
v
ator
thro
ws (pro
vided on page 40) set to the
high
rate
.
If the model is nose-hea
vy the lo
w-r
a
te
thro
ws ma
y not pro
vide enough control to flair
upon landing.
- 39
-