Top Flite TOPA0700 User Manual
Page 10
❏❏
10.
Mix up some 30-min
ute epo
xy and
microballoons (if using mixing cups
, appro
ximately
1/4 oz.
of microballoons added to 1/8 oz.
of mix
e
d
epo
xy is recommended).
Use a piece of m
usic wire
to
thor
oughl
y
apply the mixture in the holes in the
wing and aileron.
Use the wire to get the epo
xy out of
the opening of the holes in the aileron so it doesn’t
get into the hinge pins
.W
ipe a
w
a
y
an
y epo
xy around
the outside of the holes with a couple of the small
paper to
w
el squares
.
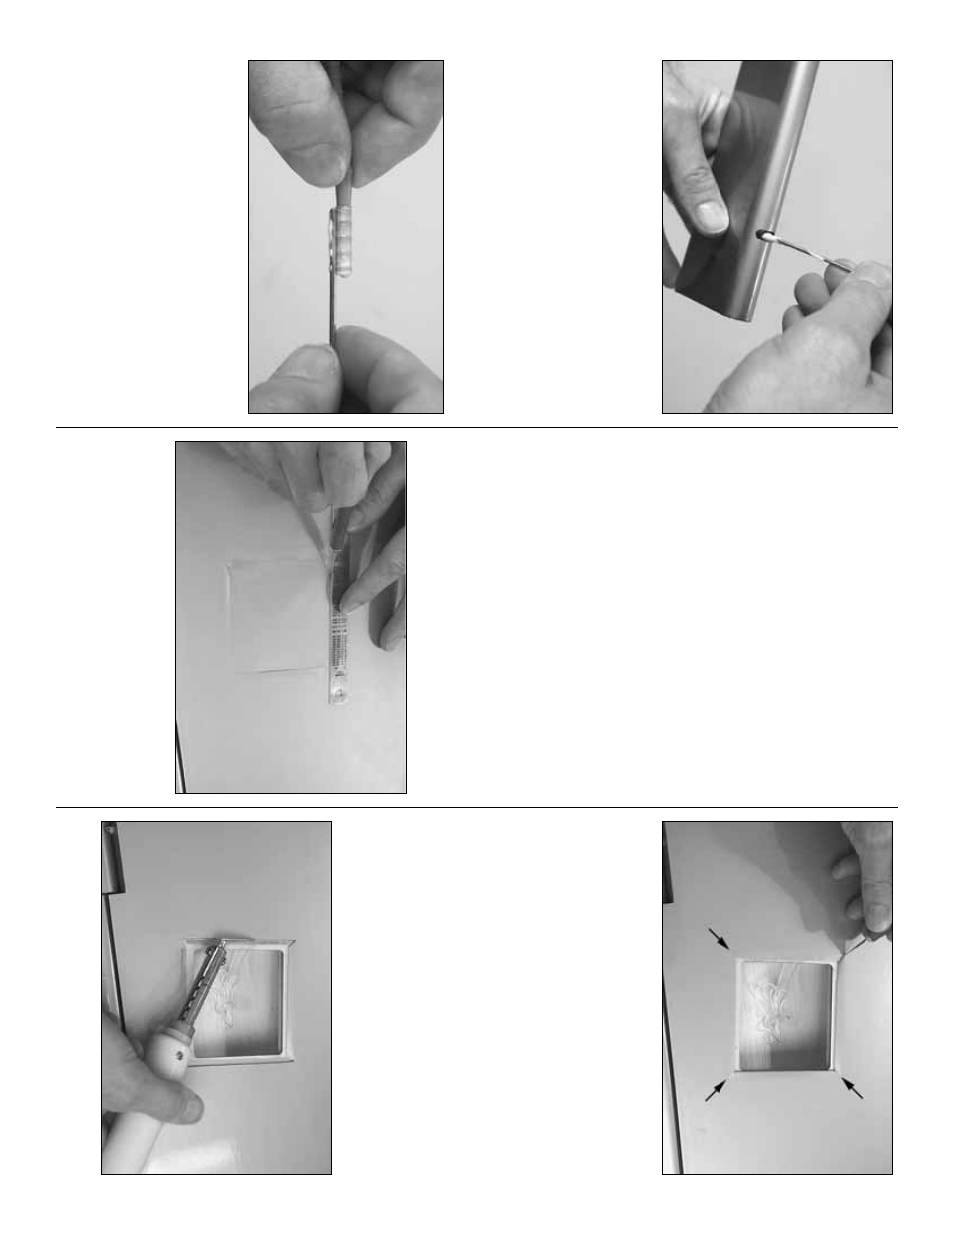
❏❏
11.
Use the wire to apply epo
xy to the ends of
the aileron hinges that go into the aileron.
Inser
t each
hinge and wipe a
w
a
y
an
y epo
xy that squeez
es out of
the holes
.
❏❏
12.
Apply epo
xy to the other end of the hinges
.
Join the aileron to the wing, pushing the hinges only
about 3/4 of the w
a
y in.
Use small str
ips of balsa or
toothpic
ks to wipe a
w
a
y
epo
xy that squeez
es out,
then fit the aileron the rest of the w
a
y in.
❏❏
13.
Mo
v
e
the aileron up and do
wn a f
e
w times
to align the hinges and mak
e cer
tain y
ou are getting
enough deflection.
Use a small piece of masking
tape to hold the tip of the aileron in alignment with
the tip of the wing.
Allo
w the epo
xy to fully harden.
❏❏
14.
Mix up another batch of epo
xy and microballoons
and join the flap to the wing the same w
a
y.
❏❏
15.
Allo
w the epo
xy to
full
y
harden bef
ore
mo
ving the aileron or flap
.
After the epo
xy has fully
hardened,
“break”
them loose b
y
r
apidly mo
ving
them up and do
wn a couple of times
.
❏
16.
Join the r
ight aileron and flap to the r
ight wing
the same w
a
y.
Mount the ser
v
o
s
❏❏
1.
Use a str
aightedge and a hob
b
y
knif
e to cut
the co
v
e
ring appro
ximately 1/4" [5mm] inside the
edges of one of the openings f
o
r the ser
v
o
hatch in
the bottom of one of the wing halv
es
.
(Y
ou can sa
v
e
the piece of MonoK
ote y
ou cut out f
or small patches
or repairs
.)
❏❏
2.
Slit the co
v
e
ring up to the cor
ners (indicated
b
y
the arro
ws).
❏❏
3.
Cut the remaining three ser
v
o
hatch
openings the same w
a
y.
❏❏
4.
Use a tr
im iron to iron the co
ve
ring to the edges
of the openings and to the plyw
ood ledge inside
.
- 10
-