Top Flite TOPA0410 User Manual
Page 9
- 9 -
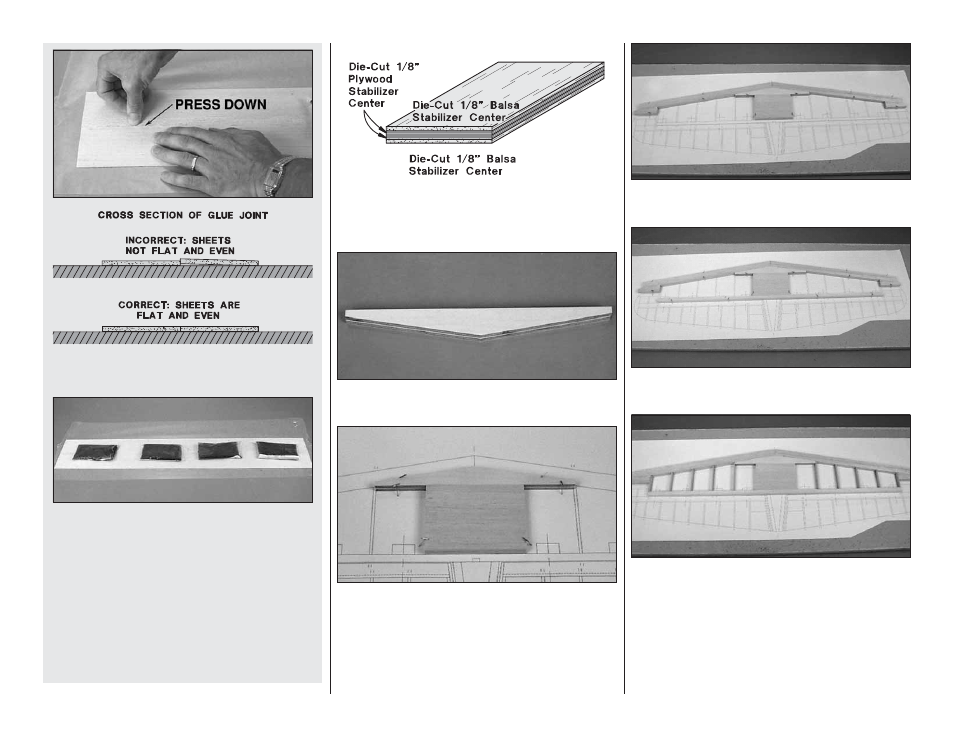
❏ E. Inspect the seam and press the sheets together
where they do not align.
❏ F. Place weights on top of the sheets to hold them
down. We prefer plastic bags filled with lead shot, but
anything similar will do the job.
❏ G. After the glue dries, remove the weights and
masking tape. Sand the sheet flat with your bar sander
and 150-grit sandpaper. The idea is to sand the
sheeting before you glue it to the structure. This
eliminates low spots that can occur over the ribs from
excessive sanding.
This is the same procedure we recommend when it is
time to make the wing and fuse skins.
❏ 2. Use 30-minute epoxy to glue the two die-cut 1/8"
[3.2mm] plywood stab centers (SC) between the two 1/8"
[3.2mm] balsa stab centers. To ensure that the lamination
stays flat, clamp it to a flat table until the epoxy cures.
❏ 3. Use epoxy to glue the two shaped 1/4" [6.4mm]
plywood leading edge doublers together.
❏ 4. Place the stab plan on a flat building board (you may
wish to cut out the stab section) and cover the stab plan
with plan protector or wax paper. Pin the ply LE doubler
over the plan and glue the stab center to its aft edge.
❏ 5. From the 1/2" x 7/8" x 24" balsa sticks, cut and
glue stab LE’s to the LE doubler. Pin the LE’s to the
building board.
❏ 6. From the remaining 1/2" x 7/8" balsa stick, cut and
glue the stab tips to the LE.
❏ 7. Cut the 3/8" x 1/2" x 30" balsa stab TE to length. Pin
and glue the TE in position at the aft edge of the stab center.
❏ 8. From the 1/8" x 1/2" x 30" balsa sticks, cut and glue
stab ribs between the LE and TE. Note: Sand a bevel on
the LE of the ribs to fit the angle of the stab LE.
❏ 9. Remove the stab from your building board. Inspect all
the glue joints and add CA to any joints that don’t appear
strong. Trim and sand the LE and stab tips to match the
shape on the stab plan. Use a bar sander to sand the
entire top and bottom surface until it is flat and even. Be
careful that you don’t sand any area of the stab too thin.