Top Flite TOPA0410 User Manual
Page 34
- 34 -
❏ 5. Use 3/32" x 3" x 24" balsa to sheet the bottom of the
wing center section, between the R-5 ribs.
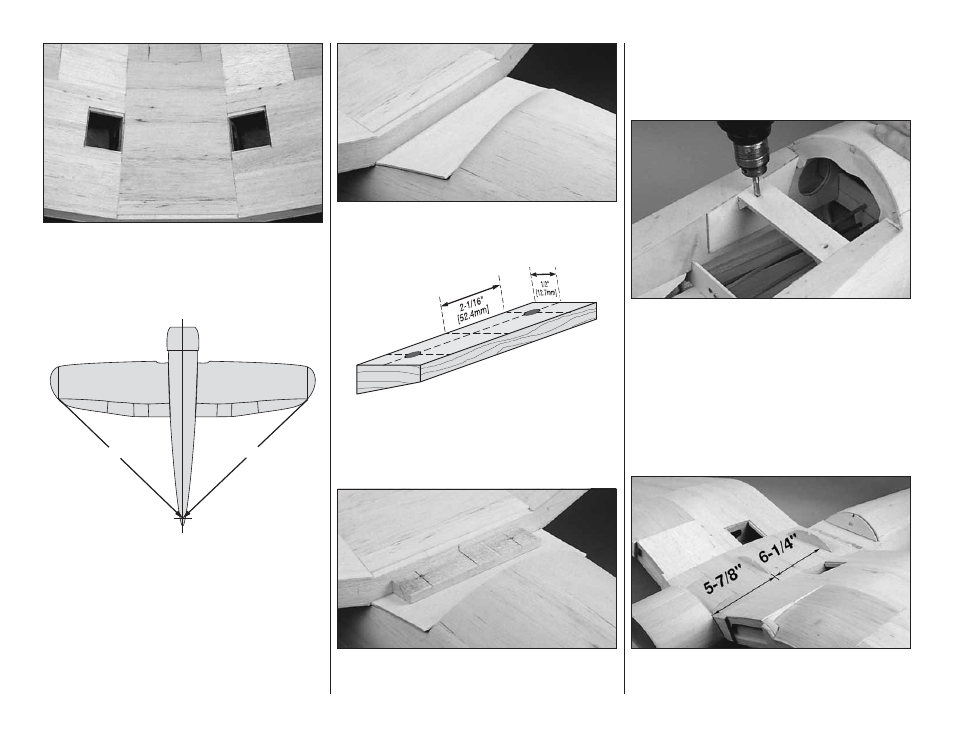
❏ 6. Cover the wing saddle with plan protector or wax
paper. Place the wing in the wing saddle.
B
A=B
A
❏ 7. Push a T-pin into the bottom center of former F-11.
Tie a piece of string to the pin. Use the string to check the
distance between the pin and the wing tips. Adjust the
wing so that the distance is equal.
❏ 8. Tape the wing in position and cut a piece of 3/32"
[2.4mm] balsa sheet to fit in the wing saddle behind the wing,
flush with the fuse sides. With the balsa sheet and the wing
tight against the wing saddle, glue it to the TE of the wing.
❏ 9. Mark the tapered hardwood bolt plate with a
centerline. Put two lines 2-1/16" [52.4mm] outside the
centerline on the non-tapered (square) side of the block.
Drill two 3/16" [4.8mm] pilot holes, 1/2" [12.7mm] behind
the front (thick) edge of the block, perpendicular to the top
surface. Refer to the plan for the exact locations.
❏ 10. Use 30-minute epoxy to glue the tapered hardwood
bolt plate, centered on the TE of the wing and the 3/32"
[2.4mm] balsa sheet.
❏ 11. After the epoxy cures, check that the wing is still
centered on the fuse. Use weights to hold it firmly down.
Use a 13/64" [5.2mm] drill bit to drill through the pilot
holes in the tapered bolt plate and through the wing bolt
plate in the fuse.
❏ 12. Remove the wing and tap threads in the wing bolt
plate in the fuse with a 1/4-20 tap. Wick thin CA into the
threads to harden them. Allow the CA to cure. Then, screw
the tap back through the holes to clean up the threads.
❏ 13. Enlarge the holes in the tapered wing bolt plate, in
the wing only, with a 17/64" [6.7mm] drill bit.
❏ 14. Keep the wing saddle covered with plan protector.
Bolt the wing onto the fuse with two 1/4-20 nylon bolts.
Note: For ease of installation, the nylon bolts can be cut
to 1-1/4" [31.8mm] long.
❏ 15. Place a leftover piece of 1/16" [1.6mm] plywood
against the front of former F-6D. Lightly sand the bottom
edge of the die-cut 1/8" [3.2mm] plywood former W-6E to