Top Flite TOPA0410 User Manual
Page 26
- 26 -
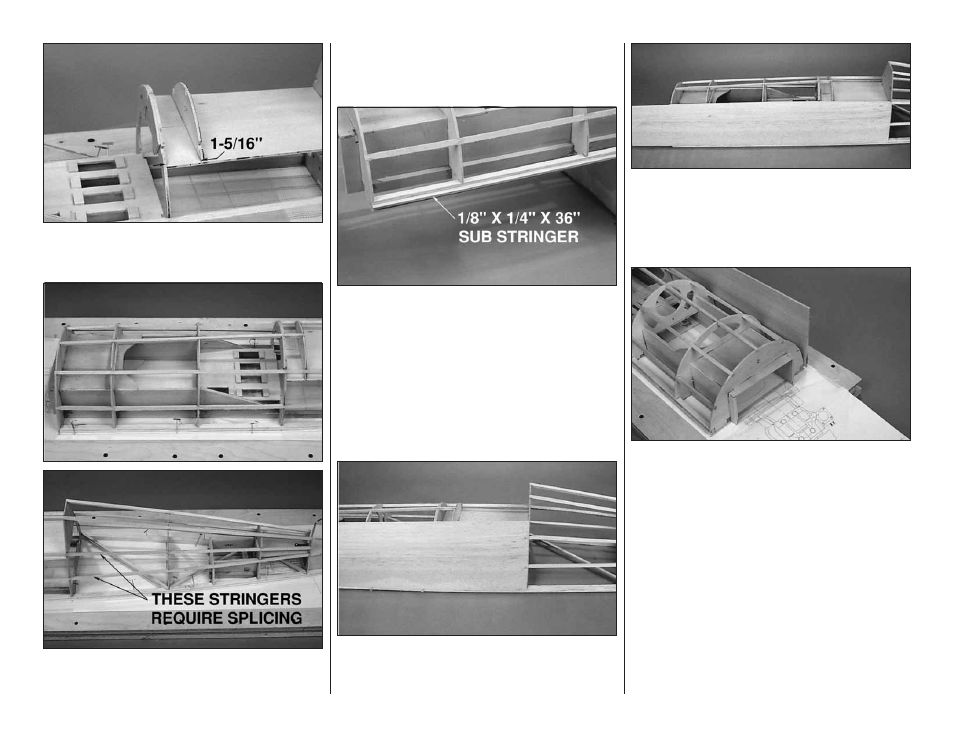
❏ 31. Glue the die-cut 1/8" [3.2mm] plywood instrument
panel perpendicular to the top of the cockpit floor,
1-5/16" [33.3mm] from the back of former F-5.
❏ 32. Glue 1/4" x 1/4" x 36" balsa stringers in the notches
of the formers from F-2 to F-10. The stringers on the side
will need to be spliced together to span the full distance.
❏ 33. Remove the T-pins holding the fuse to the building
board. Use a sanding bar to blend the stringers with the
formers, sanding any glue joints smooth that might affect
the sheeting of the fuselage.
❏ 34. Glue the 1/8" x 1/4" x 36" balsa sub stringers into
the slots in each of the main fuse stringers. These will
provide a shelf for the sheeting to rest on.
SHEET THE FUSE TOP
❏ 1. Trim the edges straight on four 1/8" x 3" x 30" balsa
sheets. Glue two sheets together to make two 6" x 30"
forward sheets.
❏ 2. With the fuse on your building board, add weight to
the top of the fuse to hold it flat against the building board.
❏ ❏ 3. Pin one of the 6" x 30" balsa forward sheets on the
sub stringer. Trim the aft end of the sheet so that it is
centered on former F-6, allowing the forward end to
extend past F-2.
❏ ❏ 4. Use bright colored chalk to mark the top full length
stringer. Wet the outside of the forward sheet and carefully
wrap it around the formers, pressing it against the marked
stringer. Trim the sheet so that it covers half of the top full
length stringer. Test fit the forward sheet to the fuse frame
and trim as necessary.
❏ ❏ 5. Use thin CA to glue the forward sheet to the main
fuse stringer and sub stringer only between F-4 and F-5.
Apply medium CA to the edge of F-4 and F-5 and the
edge of the instrument panel. Carefully wrap the forward
sheet against the formers. Use thin CA to glue the forward
sheet to the stringers between F-4 and F-5.
❏ ❏ 6. Work your way forward and aft from this point, one
former section at a time. Glue the forward sheet to the
main stringer (at the bottom edge of the forward sheet)
first. Then, to the formers and upper stringer for that
segment. If you notice the center of the fuse trying to lift
off of the building board during this process, the bottom
edge of the forward sheet will need to be trimmed slightly.
Repeat steps 3 to 6 for the other fuse side.
❏ 7. Trim and sand the sheeting flush with the front of
former F-2.