Build the fuselage – Top Flite TOPA0410 User Manual
Page 22
- 22 -
❏ ❏ 7. Cut a 3/32" [2.4mm] balsa skin to fit between ribs
R-1 and R-3C. The first skin should cover the forward half
of the main center spar. Wet the skin and glue it to the
main spar and ribs starting at rib R-1.
❏ ❏ 8. Cut a second 3/32" [2.4mm] balsa skin to fit between
ribs R-1 and R-3C. Trim the skin to fit around the bump for
the oil cooler. Wet the sheet and glue it to the LE and ribs.
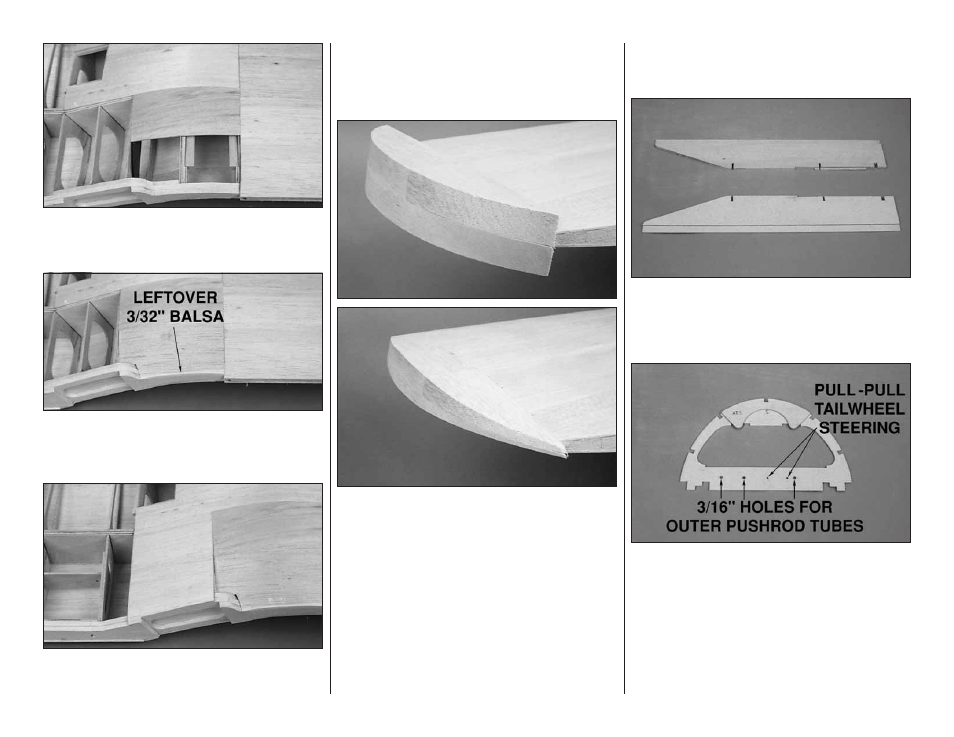
Use a leftover piece of 3/32" [2.4mm] balsa to finish the LE.
❏ ❏ 9. Cut 3/32" [92.4mm] balsa skin to fit between ribs
R-3 and the center of R-5, from the center of the main
spar to the LE.
❏ 10. Sand the wing skin flush with the LE, TE and tip ribs
R-7T.
❏ 11. Make two sets of 1-3/4" [44.5mm] thick wing tips by
gluing two shaped 7/8" [22.3mm] balsa wing tips together.
❏ 12. Glue the wing tips onto the wing. Use a knife, razor
plane and sanding bar to shape the wing tips.
❏ 13. Using the wing cross-section shown on the plan as
a guide, rough sand a radius on the LE of the wing and
wing tips.
Now is a good time to set the wing aside, clean off
your building table and get ready to build the
fuselage.
BUILD THE FUSELAGE
BUILD THE UPPER FUSE SIDES
❏ 1. Use 30-minute epoxy to glue the die-cut 1/8" [3.2mm]
plywood upper fuse crutch doublers (UFCD) to the
inside of both die-cut 1/8" [3.2mm] plywood upper fuse
crutches (UFC). Align the notches and the top edges. Be
sure to make a left and a right upper fuse crutch assembly.
❏ 2. Glue the die-cut 1/8" [3.22mm] plywood air tank
saddle (ATS) to the front of the die-cut 1/8" [3.2mm]
plywood former F-5. Drill 3/16" [4.8mm] holes through the
punch marks at the locations shown on F-5. These holes
are for mounting the outer pushrod tubes. The remaining
two punch marks are for the pull-pull tail wheel steering
cable and should be drilled to match the size of the outer
cable tube.