59 m, Return to point – TeeJet Matrix 840G User Manual User Manual
Page 49
●
44
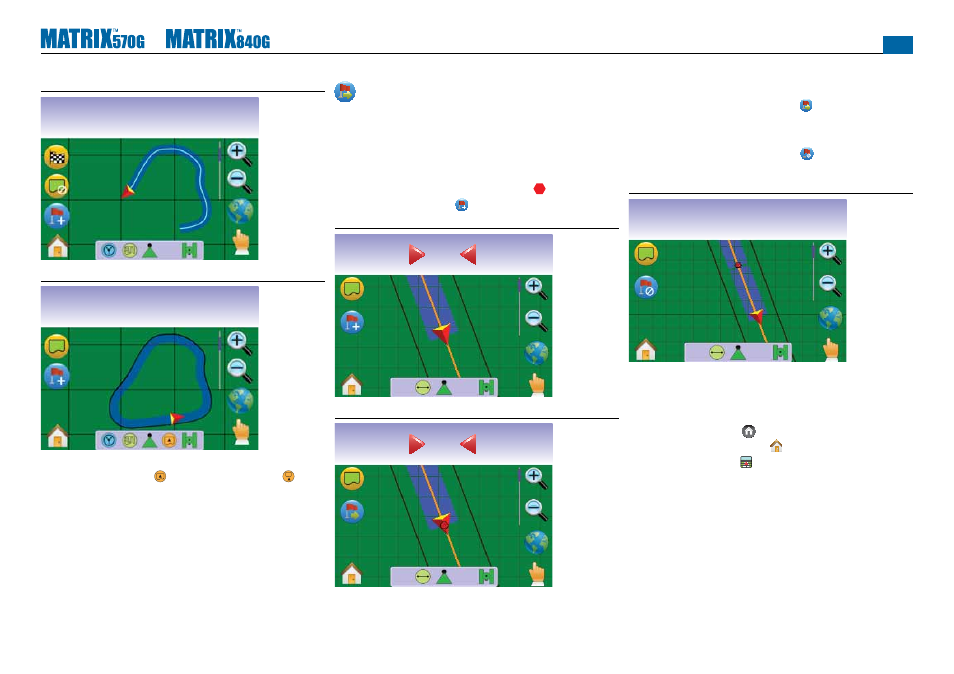
Figure 3-35: Boundary in Progress
km/h
ha
2.75
12.3
Figure 3-36: Boundary Established
km/h
ha
4.92
12.4
NOTE: In correspondence to your current location, the IN
BOUNDARY ICON or OUT BOUNDARY ICON
is displayed on the Status Bar once the boundary is
established.
Return to Point
Return to Point guidance in Field View provides a straight line
distance back to an established point. While in Vehicle View, Return
to Point Guidance also provides navigation back to an established
point.
Marking Return Point
1. Drive to the desired location of Return Point .
2. Press ADD POINT ICON .
Figure 3-37: Mark Return Point
km/h
ha
2.52
10
0.0
Figure 3-38: Return Point Established
Swath
ha
2.53
0
0.0
Distance to Established Point
1. Press the RETURN TO POINT ICON .
The console will begin providing the distance information on the
Guidance Bar from the vehicle to the established point.
Use CANCEL RETURN TO POINT ICON to delete the
established point.
Figure 3-39: Return to Point Guidance
km/h
ha
2.53
10
59 m
Guidance Back to Established Point in Vehicle View
Return to Point Guidance can be followed in Vehicle View.
To follow guidance in Vehicle View:
1. Press HOME BUTTON or press the screen to activate the
icons and select HOME ICON in bottom left corner of screen.
2. Press VEHICLE VIEW .
The console will begin providing navigation information. Distance to
the established point is shown on the Guidance Bar.