TeeJet Matrix 840G User Manual User Manual
Page 37
●
32
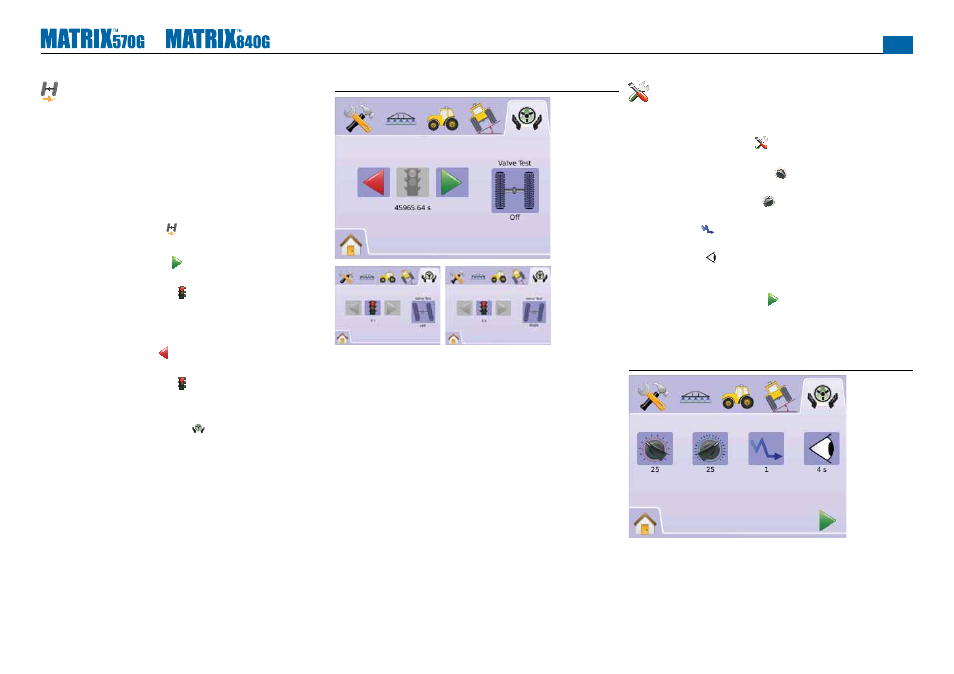
Valve Test
The Valve Test verifi es steering is directed correctly and is typically
used to fi ne tune the oil fl ow to properly calibrate the amount of time
to steer the wheels from full left to full right (lock to lock) for non-
proportional valves.
NOTE: For non-proportional valves, the amount of time for left
to right / right to left (lock to lock) will be established by
mechanically adjusting oil flow through the valve. Refer to
your vehicle user manual for specific instructions.
1. Press VALVE TEST ICON .
2. Turn the wheels all the way to the left.
3. Press the GREEN ARROW . This will start a timer below the
STOPLIGHT as well as turn the vehicle to the right.
4. Press the RED STOPLIGHT when the wheels are all the way
to the right. The time displayed under the STOPLIGHT is the lock
to lock time.
5. Turn the wheels all the way to the right.
6. Press the RED ARROW . This will start a timer below the
STOPLIGHT as well as turn the vehicle to the left.
7. Press the RED STOPLIGHT when the wheels are all the way
to the left. The time displayed under the STOPLIGHT is the lock
to lock time.
8. Press FIELDPILOT SETUP TAB to return to main FieldPilot
Setup.
Figure 2-68: Valve Test
Confi gure FieldPilot
Confi gure is used to confi gure Coarse Adjustment, Fine Adjustment,
Deadband and Lookahead settings.
1. Press CONFIGURE ICON .
2. Select from:
►Coarse Steering Adjustment – adjusts how rapidly the
vehicle approaches a guideline in Straight A-B
►Fine Steering Adjustment – adjusts how rapidly the vehicle
approaches a guideline in Curved A-B
►Deadband – adjusts if steering is too choppy/responsive or
remains consistently off the guideline
►Lookahead – used during Straight A-B Guidance mode to
adjust the vehicle’s approach to the guideline
OR
Press PAGE RIGHT ARROW to cycle through all settings.
NOTE: Options labels are current settings. While in a setting screen,
press icon to view available factory settings and setting
ranges.
Figure 2-69: Configure Screen