TeeJet Matrix 840G User Manual User Manual
Page 45
●
40
Marking A and B Points
1. Drive to the desired location of Point A .
2. While the vehicle is in motion, press MARK A ICON
A
.
3. Drive along the arc that the pivot would create (a wheel track is a
good guide) to the desired location of Point B .
4. Press the MARK B ICON
B
to establish the A-B arc.
NOTE: The MARK B ICON
B
is not available for selection (greyed
out) until the minimum distance is travelled (50.0 m) or if
driving in a straight line.
Use CANCEL MARK ICON to cancel the Mark A command and
revert to the previous A-B guideline (when established).
NOTE: It is not necessary to drive the entire circumference of the
centre pivot in order to initiate guidance.
Figure 3-22: Mark A and B Points
km/h
ha
1.20
10.5
Mark A
km/h
ha
2.60
10.5
Mark B
The console will begin providing navigation information.
Figure 3-23: Circle Pivot Guidance
Swath
ha
5.36
0
0.0
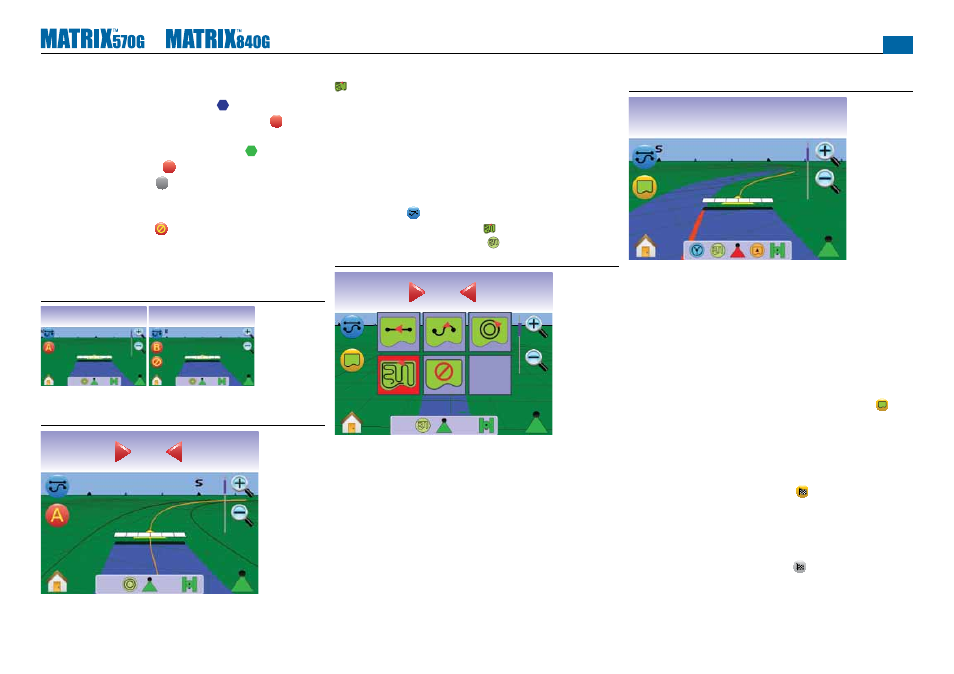
Last Pass Guidance
Last Pass Guidance offers true last pass navigation. The console will
automatically detect the nearest applied area and establish parallel
guideline based on that area.
NOTE: If a boundary is established but no application occurred
during the boundary process, guidance will not initiate.
Activate Last Pass Guidance
1. Press the screen to activate the icons and select the GUIDANCE
MODE ICON .
2. Select LAST PASS GUIDANCE .
◄Status Bar Icon will change to .
Figure 3-24: Guidance Mode Selection
Swath
ha
0.0
0
0.0
Last Pass
1. Drive to a desired location to apply the fi rst pass.
2. Travel next to the applied area.
The console will begin providing navigation information.
NOTE: If a boundary is established but no application occurred
during the boundary process, guidance will not initiate.
Figure 3-25: Last Pass Guidance
km/h
ha
6.2
3
Create Field Boundary
Field boundaries establish application area and determine the no
apply zone.
NOTE: A Field Boundary can be created in either Last Pass
Guidance while in Vehicle View or during any guidance while
in Field View.
To create a fi eld boundary:
1. Drive to a desired location at the perimeter of the fi eld/area.
2. While the vehicle is in motion, press BOUNDARY ICON .
3. Travel the perimeter of the fi eld/area.
4. Finish boundary:
►Travel to within a swath width of the starting point. The
boundary will close automatically (the white guideline will turn
black).
►Press BOUNDARY FINISH ICON . A straight line will
complete the boundary between your current location and the
starting point.
NOTE: If a swath was applied while creating a boundary, the
boundary line will be to the exterior of the applied swath.
NOTE: The BOUNDARY FINISH ICON is not available for
selection (greyed out) until the minimum distance is travelled
(five-times the swath width).