Englishenglish – KEYENCE SL-CHG Series User Manual
Page 49
Chapter 5 Troubleshooting
5-3
5
ENGLISHENGLISH
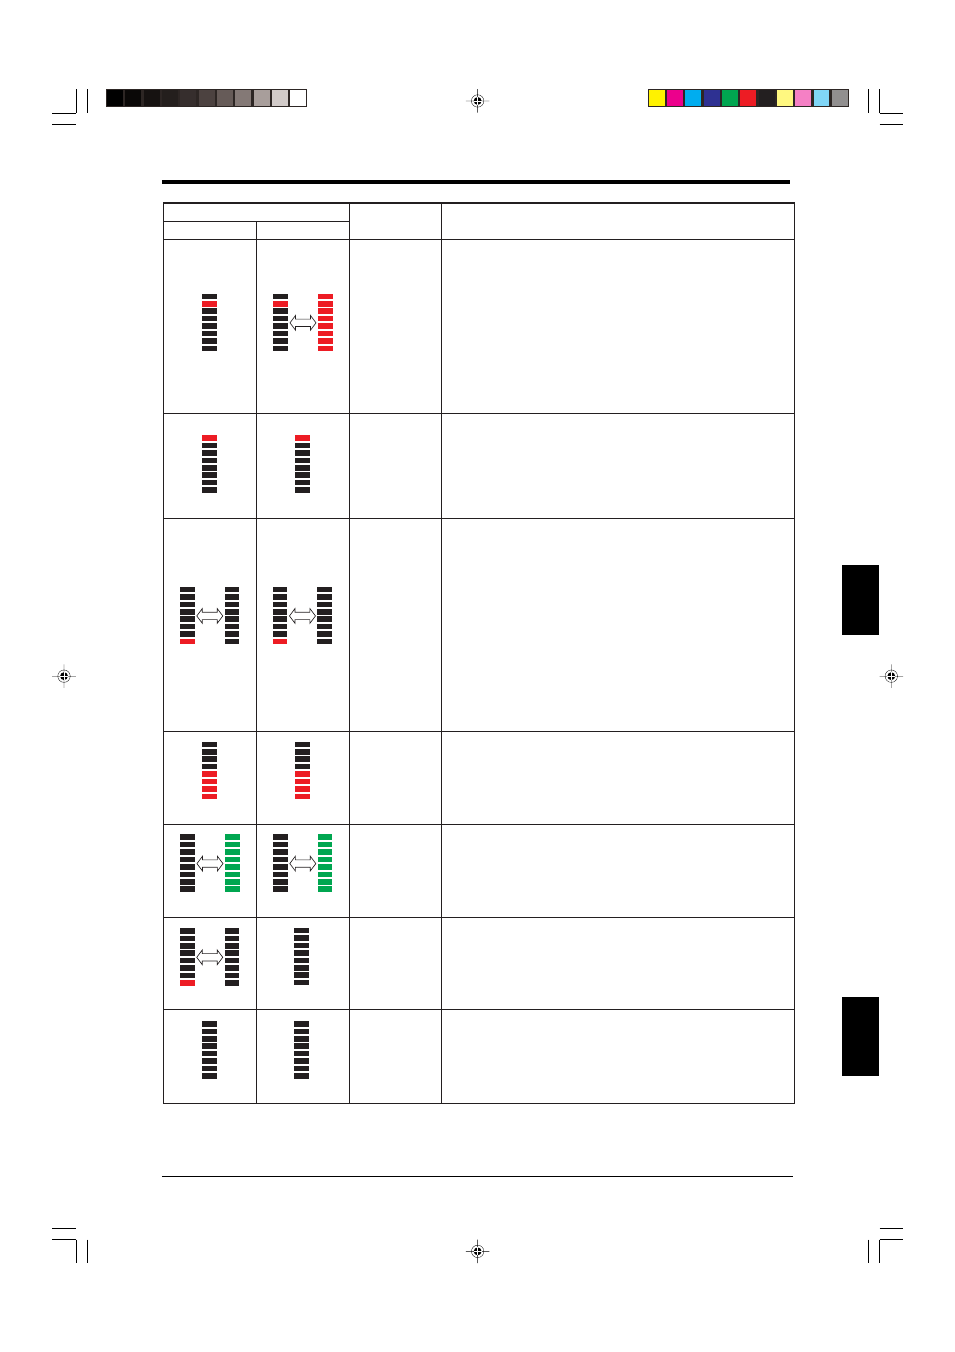
Bar LED display status
Receiver
Description
Causes and solutions
Transmitter
OSSD error
• The cable connected to the SL-CHG has its transmitter and receiver ends
reversed. Connect the cable properly as described in section 2-4-1
“Connecting Cable Installation” (
➮2-9) in the SL-CHG manual.
• The OSSD is shorted with the power supply’s 0 V or 24 V leads, or 2 OSSDs
are shorted. Wire the system properly as described in section 3-1 “Wiring”
(
➮3-1) in the SL-CHG manual.
• An overcurrent is flowing to the OSSD. Check the load on the circuit, and if
the current is in excess of the specifications, introduce an MPCE or similar
measure and use the system with a current level that falls within the
specifications.
• The OSSD is damaged. Replace the sensor.
7 lights up
7 and all lamps
alternatively flash
8 lights up
8 lights up
FSD error
• The SL-R11G’s FSD has failed due to contact adhesion or a similar cause.
Replace the relay board as described in section 4-2-1 “How to replace the
relay output terminal block”
(
➮4-2)
in the SL-R11G manual.
• Verify that the relay board has been installed properly as described in section
4-2-1 “How to replace the relay output terminal block”
(
➮4-2)
in the SL-
R11G manual and 6-2 “Relay Circuit Board Replacement” (
➮
6-1) in the SL-
R11G manual.
1 flashes
1 flashes
1 flashes
No beam is being
received
• Either the beam axes are completely misaligned, or are being blocked by a
shielding object. Readjust the beam axes as described in section 3-9 “Beam
Axis Adjustment”
(
➮3-8)
in the SL-CHG manual.
• Verify that the operating distance does not fall outside of the range indicated
by the specifications.
• The switch setting is incorrect. Configure the switch properly as described in
section 3-6 “Connection for Light Interference Prevention”
(
➮3-5)
in the SL-
CHG manual.
• A test input is not connected to 0V. Connect it to 0V when the system is to be
used normally as described in section 3-3 “When Only the SL-CHG is Used”
(
➮3-3)
in the SL-CHG manual.
• The cable connected to the SL-CHG has its transmitter and receiver ends
reversed. Connect the cable properly as described in section 2-4-1
“Connecting Cable Installation” (
➮2-9) in the SL-CHG manual.
Multiple lamps
light up red
Multiple lamps
light up red
Beam is being
blocked
• Some of the beam axes are misaligned or are being blocked by an obstacle.
Readjust the beam axes as described in section 3-9 “Beam Axis Adjustment”
(
➮3-8)
in the SL-CHG manual.
• Verify that the operating distance does not fall outside of the range indicated
by the specifications.
All lamps flash green
All lamps flash green
Unstable light
reception
(allowance of
100 to 110%)
• The beam axes are not completely aligned, or are being blocked by an
obstacle. Readjust the beam axes as described in section 3-9 “Beam Axis
Adjustment”
(
➮3-8)
in the SL-CHG manual.
• Verify that the operating distance does not fall outside of the range indicated
by the specifications.
All lamps are off
All lamps are off
Power has not yet
been turned on
• Power is not being properly supplied to either the SL-CHG or the SL-R11G.
Check the cable connector, the power supply connector, and the power supply
voltage.
• Either the SL-CHG or the SL-R11G is damaged and needs to be replaced.
All lamps are off
The power supply
voltage drops
• The power supply voltage drops consecutively or instantaneously.
• Replace the power supply or increase the power supply capacity.
• Stop supplying power to other devices, and use the dedicated power supply.
When attempting any of the solutions described above, be sure to follow the appropriate procedures
properly, after referring to all applicable manual sections. Contact your nearest Sales Office if the device
fails to resume normal operation after the above solutions are implemented, or if your system exhibits
problems other than those described above.
5-2