Install exterior assembly, Install interior mounting plate – Weiser SmartCode5 - Traditional & Contemporary User Manual
Page 3
U P
KEEP
PARALLEL
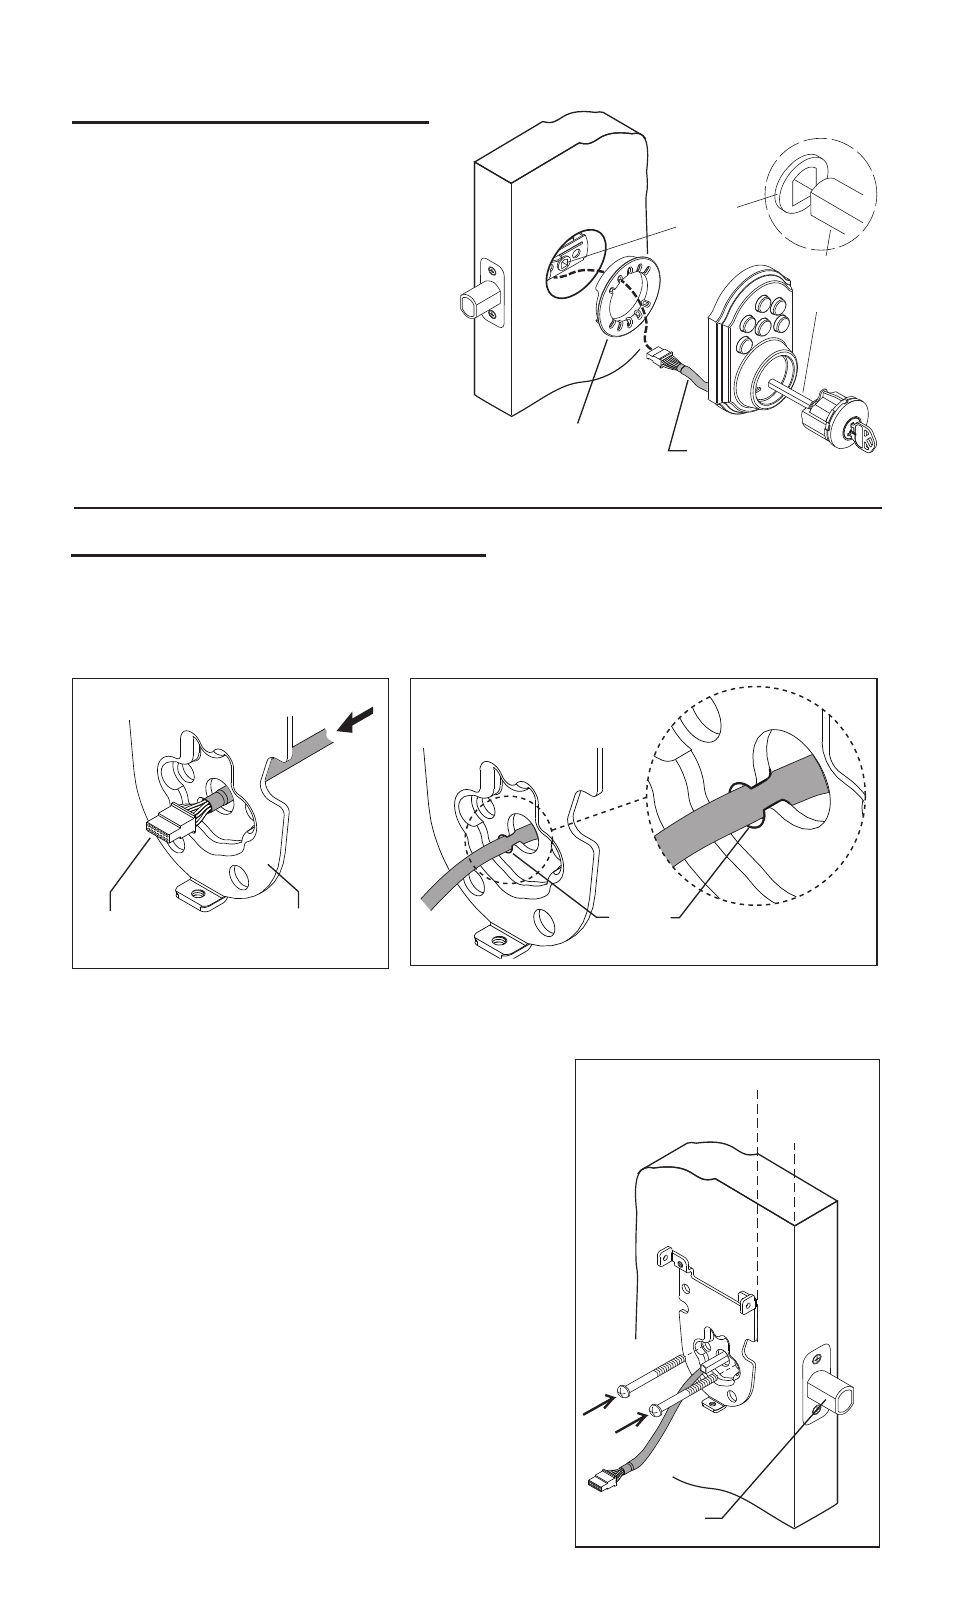
3. Install Exterior Assembly.
Bolt
3
Wire
Harness
Adapter
For 2-1/8”
diameter only.
Fig. 10
Fig. 9
Fig. 8
a. Place adapter on door as shown,
(note, adapter is not required if
mounting on a 1-1/2” (38mm)
diameter hole.
Crank
Torque
Blade
c. Place assembly on door, threading
the wire harness (through adapter - if
used) and under the latch.
b. Insert cylinder into exterior
assembly. With key in cylinder,
rotate the torque blade to align
with crank in latch.
a. Carefully insert the connector of the wire harness - through the center
hole of the mounting plate (see figure 8).
e. Check the vertical alignment for mounting
plate
and exterior assembly. (See figure 10.)
h. Repeat as required.
f. Test. Using the key, retract and extend the
bolt a few times to test for smooth action.
c. Slide wires through the notch until mounting
plate sits flush against door.
4. Install Interior Mounting plate.
Mounting
Plate
Connector
b. Important, once the connector has passed through the center hole, tuck
the wire harness out of the way by pressing it into the notch hole as shown
in figure 9.
Notch
Hole
d. Making sure that exterior assembly and
cylinder are pressed flush against exterior
door, insert mounting bolts and tighten.
g. If action feels rough, loosen screws and
re-align the mounting plate and the exterior
assembly. Note: Also see step 1-c for possible
crank interference.