Meter installation, Finger meter adjustments, Meter installation finger meter adjustments – Great Plains YP2425F-2470 Operator Manual User Manual
Page 82
78
YP2425 & YP2425F
Great Plains Manufacturing, Inc.
401-406M
2014-07-14
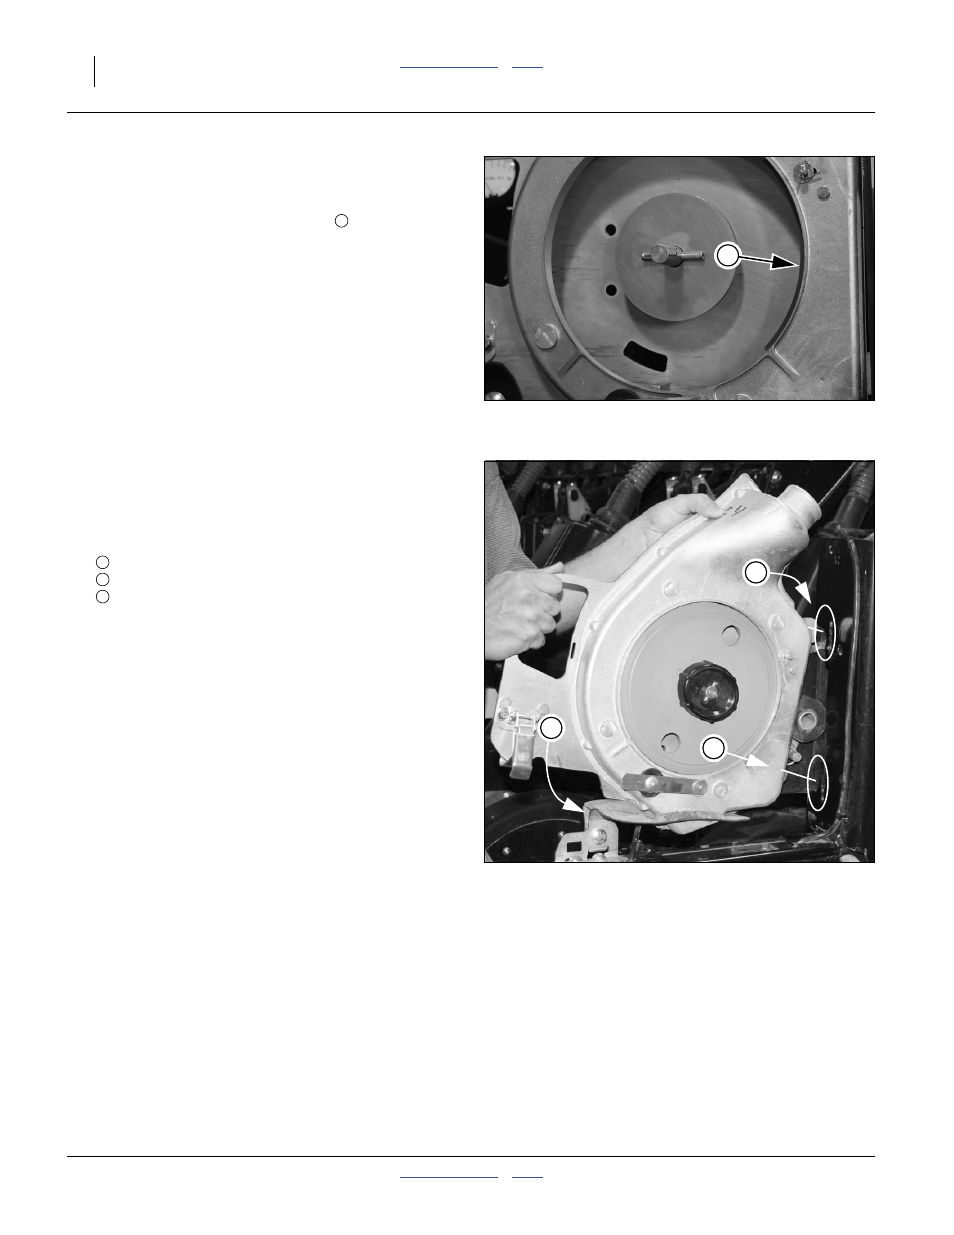
Refer to Figure 109
Note: With the seed meter wheel removed, you may want
to check the meter for internal damage or trash.
Note: Some wear on top edge of slide
is normal.
Excess wear is cause for replacement.
5.
When changing crops be sure to clean out air
system before installing new meters or wheels. See
“Cleaning Out Air System” on page 94.
6.
Place new wheel on meter wheel shaft. Tilt it slightly
forward to engage and push back on the slide. Seat
wheel fully on cross-pin.
7.
Replace spring-loaded wheel retainer. Make
1
⁄
4
turn
to seat cross-pin in shallow groove of retainer.
Meter Installation
Installation is the reverse of the removal process, with
two steps omitted.
Insert the meter.
Insert the top meter tab (with the hook).
Align the meter base with the latch plate ears.
Insert the bottom meter tab.
Mind the lower latch, as it tends to swing under the
meter base and block mating with the latch plate.
Refer to Figure 102 on page 75
2.
Engage the upper latch, and swing the mounting
plate into engagement with the meter.
Note: Always engage upper latch first.
Refer to Figure 103 on page 75
3.
Engage the lower latch.
Refer to Figure 104 on page 76
4.
Slide the seed hose over the meter inlet tube, and
then slide the retaining ring down the seed hose.
Finger Meter Adjustments
Figure 109
Inspect Meter
22884
1
Figure 110
Install Meter
25275
3
2
1
1
2
3