Clover Electronics LCD2084 User Manual
Page 58
Stand-alone DVR
Instruction Manual
58
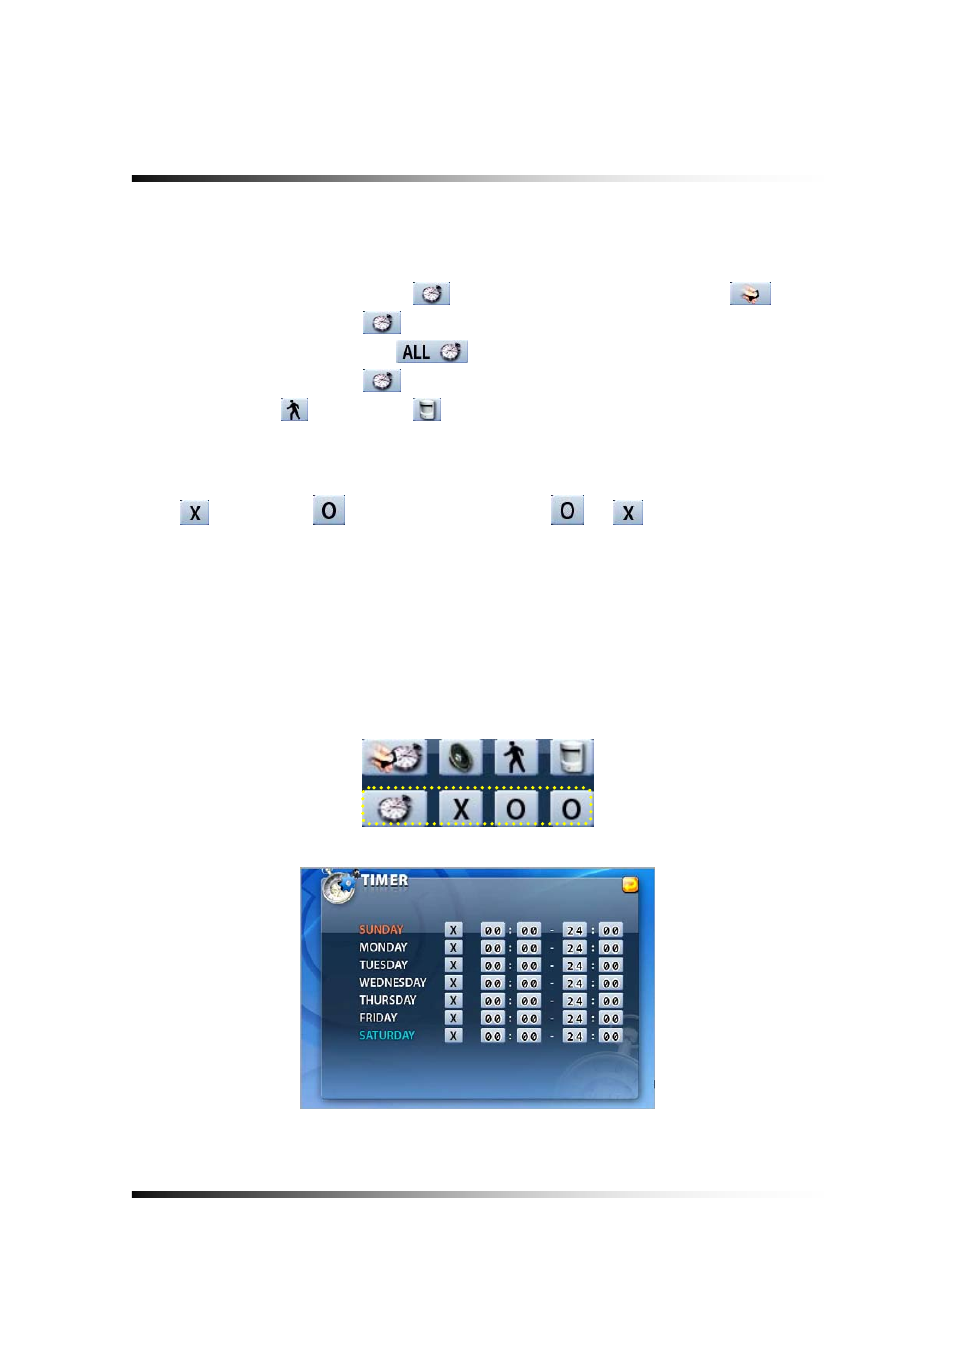
6-9.4. Timer Event Recording
▫ Click the SETUP icon on the MENU window in the LIVE mode.
▫ Click the RECORD button in the SETUP menu and the RECORD window will be displayed.
▫ Select the TIMER RECORDING (
)
between the MANUAL RECORDING (
)
and
the TIMER RECORDING (
) as shown in [Fig. 6-32]. All channels can be set at the
same time by clicking the ALL (
) or each of the channels can be set by clicking
the TIMER RECORDING (
) on the CAM 1 through CAM 8.
The MOTION (
) or SENSOR (
) as shown in [Fig. 6-32] should be turned ON in this
recording mode.
▫ Choose one from SUNDAY to SATURDAY in the TIMER menu by clicking the mouse on
(
) that turns to (
). You can choose the value
or
by repeatedly clicking
the mouse.
▫ Click the Hour (or Minute) button in [Fig. 6-33] to setup the Starting Time and Ending Time,
then the Hour (or Minute) table will appear as shown in [Fig. 6-34].
-Click the Hour (or Minute) you wish to set up.
-The recording time can be set in military hour mode (24hour).
▫ Press the RECORD button on the side panel or click the RECORD icon on the MENU
window.
[Fig. 6-32 Timer Event Recording setup]
[Fig. 6-33 Timer Menu]