Receipt printing, Output – DgFlick Event Xpress User Manual
Page 28
User Manual-3.0
Page 28 of 66
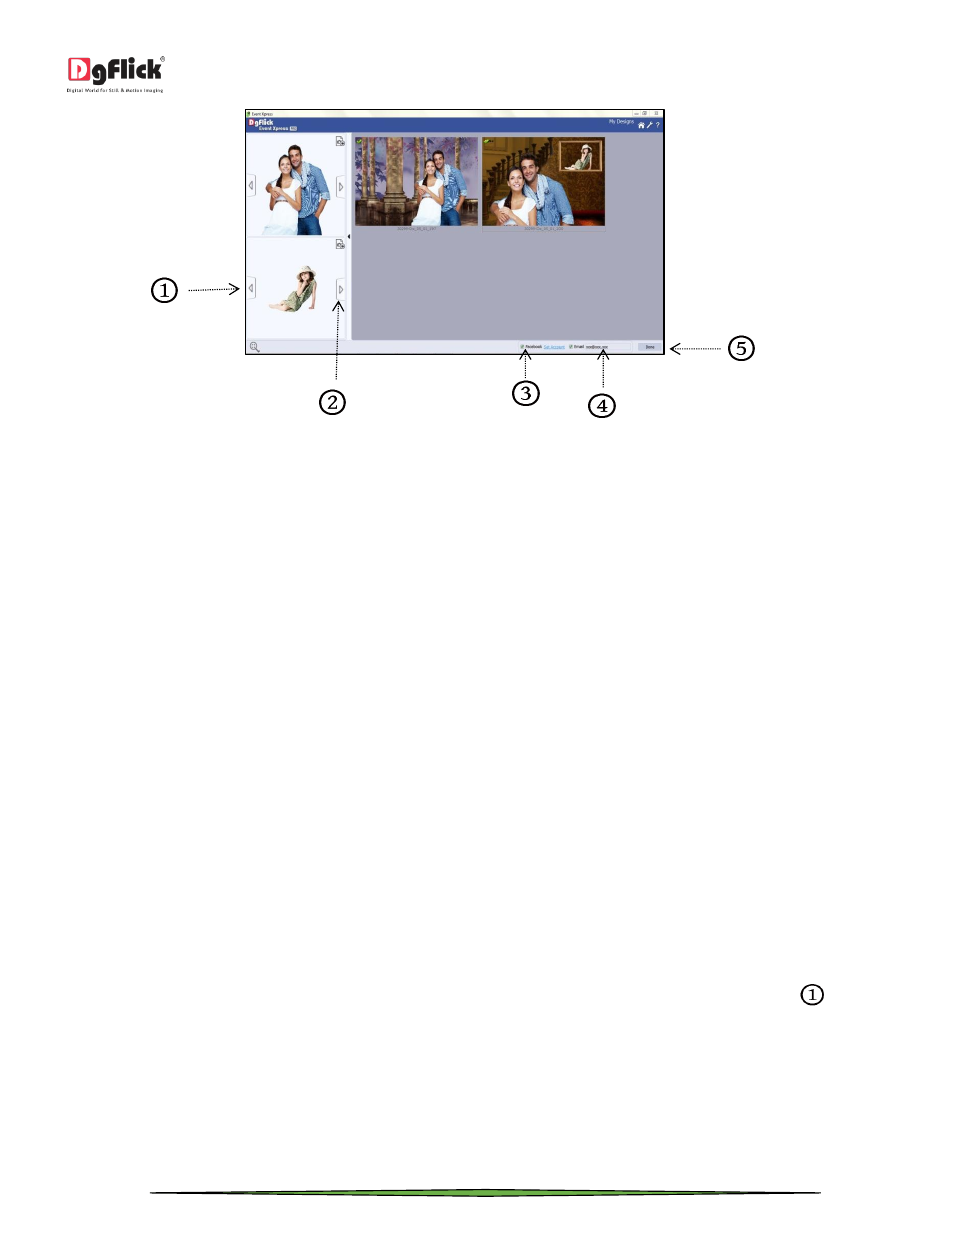
‘My Designs’ window
Once your project is processed, you will be indicated by a dialog box that your project is exported successfully.
Receipt Printing
After each process, software generates a receipt of the transaction. If you have given path of the receipt printer at the
time of adding the event, the receipt will also get printed on the printer. Various details will get printed on the receipt
such as seller’s name, date and time of the process, event name, order number, name of the photo used in the design
and number of files generated.
From ‘Receipt’ section in ‘Add Event’ window, you can define the Seller’s name, receipt number and define the printer
also.
From ‘Seller’s Name’ option, you can define the seller’s name for receipt.
From ‘Receipt Number’ option, you can define receipt number.
If you want to print Receipt Number, check the checkbox of ‘Receipt Printer’. Browse from the ‘Browse’ button and
define the printer.
Output
There are multiple posibilities to take output from Event Xpress.
In ‘My Designs’ window, you will find various options for taking output. The options you get here are according to the
preferences selected by you at the time of adding the event. (For More Details Refer Section Define New Event)
If you have selected the ‘Print’ option and have defined the printer path, then you will find a ‘Print’ option
in ‘My
Designs’ window.
In ‘Add Event’ window, you have the option to define 4 printers to take different type and size of output.
The ‘Printer’ options you get here are according to the preferences selected at the time of defining the event.
If you have selected two printers then you will get two options for printing i.e. ‘Printer 1’ and ‘Printer 2’.