Defining and modifying events – DgFlick Event Xpress User Manual
Page 11
User Manual 1.0
Page 11 of 66
Email: You can send designs through Email. You can set the file size from email option while creating event. You have
size options of 4 X 6 OR 5 X 7 OR 6 X 8 OR 8 X 12.
File: All the processed events are exported in JPG format by default. You can set the output file size from available size
options of 4 X 6 OR 5 X 7 OR 6 X 8 OR 8 X 12.
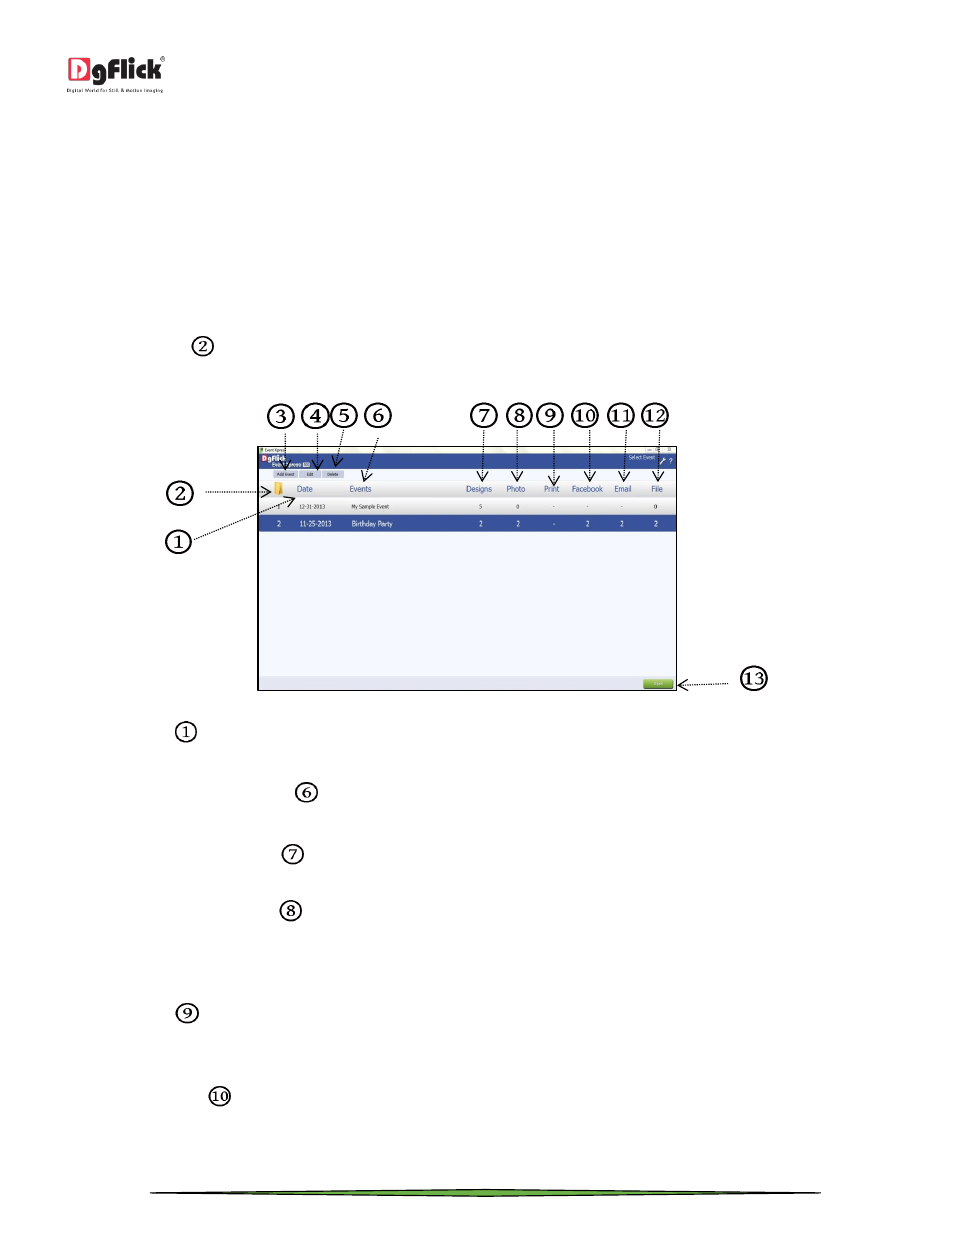
Defining and Modifying Events
After opening Event Xpress, the first screen you see is ‘Select Event’ window. In this window, you can see all the
events created by you.
The ‘Open’ button
located at the left top side of the window lets you give the path of the folder where the projects
have been saved. Click on the ‘Open’ button, browse through the computer and select the folder in which the projects
are saved.
‘Select Event’ window
In ‘Date’ column
, you can see the date of the event. The events are auto sorted according to the date i.e. the
farthest event comes first.
Second column is ‘Events’ column
. In this column, you can see the name you have given to the event at the time of
generating the event.
Third column is ‘Design’ column
. In this column, you can come to know about the number of designs selected for
the event.
Next column is ‘Photos’ column
. In this column, you can see the no of photos for which output has taken from this
event. To go to the folder where the photos have been saved, directly click on the number in ‘Photos’ column. This
column is interlinked to the output folder to save your time. Direct clicking allows you to go to the folder you can see
the photos of the event.
In ‘Print’ column
, you can see the no of prints you have taken. By clicking on the number, you can go to the folder
where the print files have been saved. This column is interlinked to the output folder to save your time. Direct clicking
allows you to go to the folder you can see the print files of the event.
In ‘Facebook’ column
, you can see the no of photos shared on Facebook. To go to the folder where the photos have
been saved, directly click on the number in ‘Facebook’ column. This column is interlinked to the output folder to save
your time. Direct clicking allows you to go to the folder you can see the Facebook shared files of the event.