Rockwell Automation 6189V-xxxx Non-display Industrial Computers User Manual User Manual
Page 41
Rockwell Automation Publication 6177R-UM002D-EN-P - October 2014
41
Component Replacement
Chapter 4
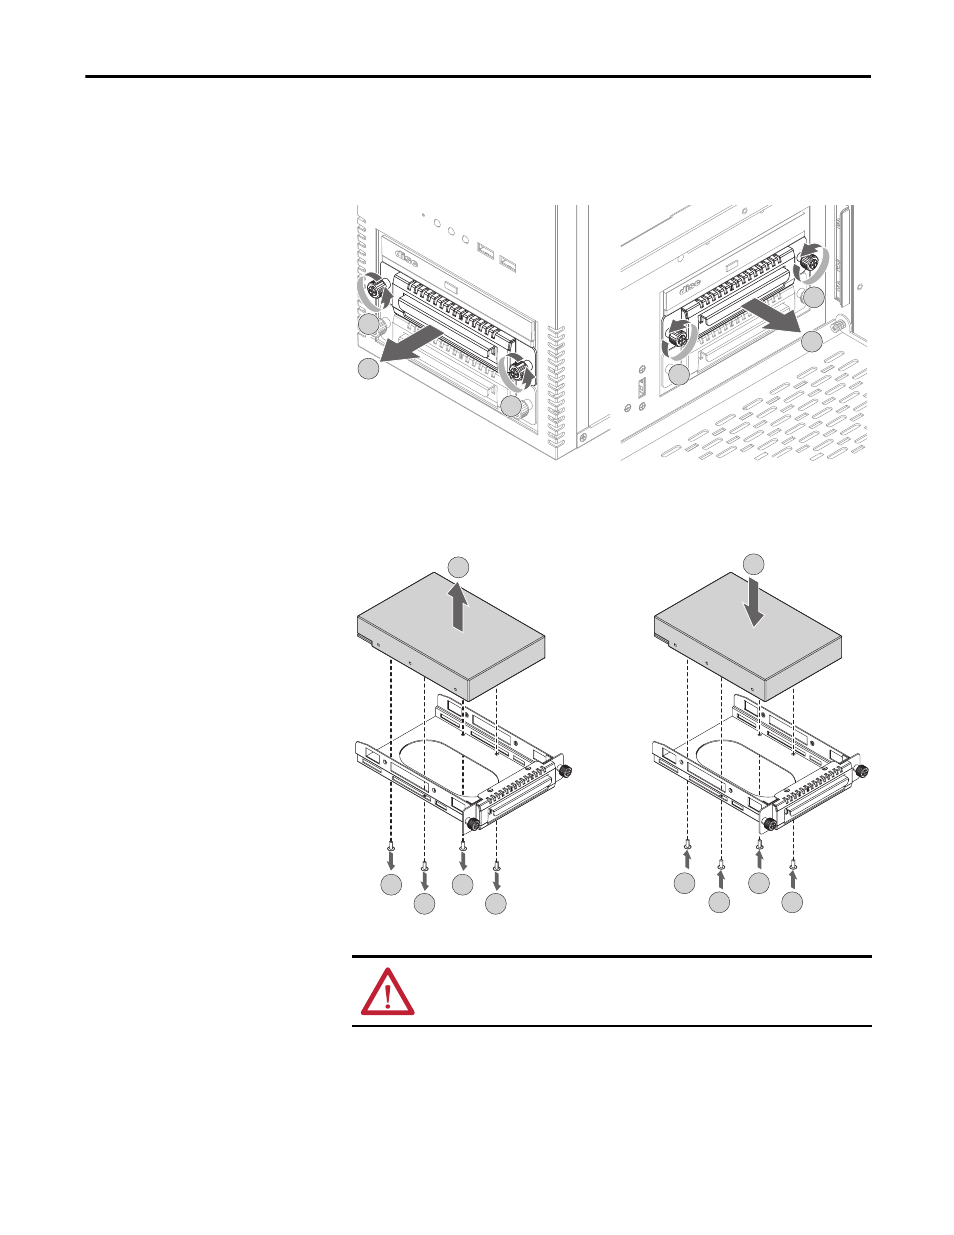
3. Remove the HDD assembly from its bay.
a. Loosen the two captive thumbscrews of the HDD assembly (A).
b. Pull the HDD assembly from its bay (B).
4. Remove the HDD module from its tray.
a. Remove the four mounting screws from the bottom of the tray (C).
b. Detach the tray from the HDD module to be replaced (D).
5. Install the new HDD module to the tray.
a. Install the new HDD module with the PCB-side down.
b. Fasten the drive tray over the HDD module (E).
c. Secure the drive tray to the module with the four mounting screws (F).
Torque the screws to 0.59 N•m (5.2 lb•in).
ATTENTION: Mechanical shock can damage a drive. Do not drop or bump the
drive.
A
B
A
A
B
A
750R Computer
1450R Computer
Drive Tray
Mounting Screws (4)
C
C
C
C
D
F
F
F
F
E
Existing
HDD Module
New
HDD Module