Bonding modules – Rockwell Automation 2090 Ultra3000 Installation Manual User Manual
Page 35
Publication 2098-IN003E-EN-P — April 2004
Installing Your Ultra3000
1-11
Bonding Modules
Unless specified, most paints are not conductive and they act as
insulators. To achieve a good bond between modules and the
subpanel, surfaces need to be paint-free or plated. Bonding metal
surfaces creates a low-impedance exit path for high-frequency energy.
Improper bonding blocks that direct exit path and allows
high-frequency energy to travel elsewhere in the cabinet. Excessive
high-frequency energy can effect the operation of other
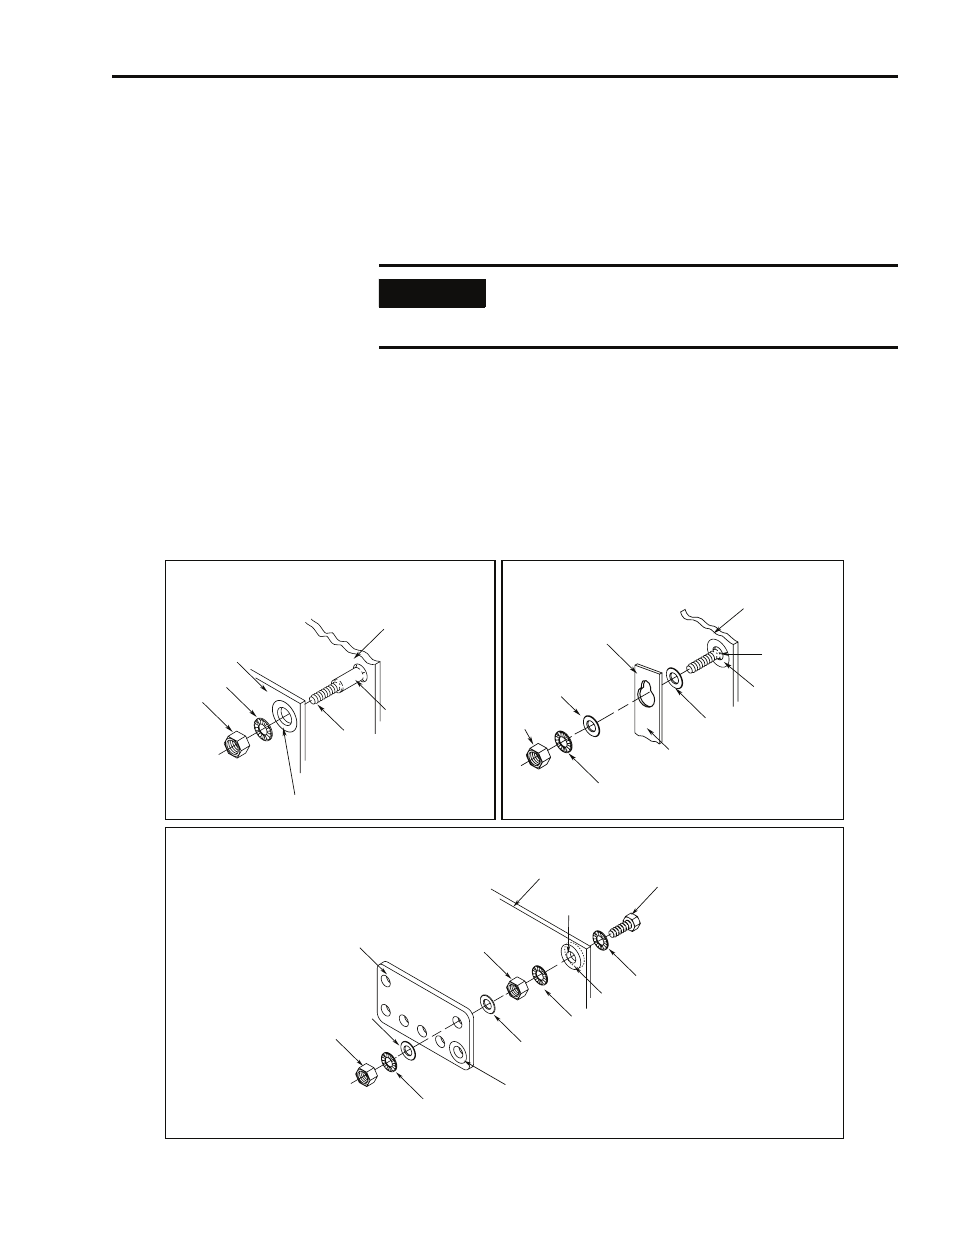
microprocessor controlled equipment. The illustrations that follow
(refer to Figure 1.5) show details of recommended bonding practices
for painted panels, enclosures, and mounting brackets.
Figure 1.5
Recommended Bonding Practices
IMPORTANT
To improve the bond between the drive and
subpanel, construct your subpanel out of zinc plated
(paint-free) steel.
Stud-mounting the subpanel
to the enclosure back wall
Stud-mounting a ground bus
or chassis to the subpanel
Subpanel
Welded stud
Scrape paint
Flat washer
If the mounting bracket is coated with
a non-conductive material (anodized,
painted, etc.), scrape the material
around the mounting hole.
Star washer
Nut
Nut
Flat washer
Mounting bracket or
ground bus
Use a wire brush to remove paint from
threads to maximize ground
connection.
Back wall of
enclosure
Welded
stud
Subpanel
Star washer
Use plated panels or scrape paint on
front of panel.
Subpanel
Nut
Nut
Star washer
Flat washer
Star washer
Star washer
Scrape paint on both sides of
panel and use star washers.
Tapped hole
Bolt
Flat washer
Ground bus or
mounting bracket
If the mounting bracket is coated with
a non-conductive material (anodized,
painted, etc.), scrape the material
around the mounting hole.
Bolt-mounting a ground bus or chassis to the back-panel