Rockwell Automation 1760 Pico GFX-70 Controllers Quick Start User Manual
Page 34
Publication 1760-QS002A-EN-P - April 2004
6-2 Lesson 4
You can then make all the necessary settings in the appropriate
tabs. The settings will be downloaded to the device together
with the circuit diagram.
4. The Mode tab should be the first tab to be activated. The Mode
area indicates at Display that this first basic unit is initially
configured for stand-alone operation.
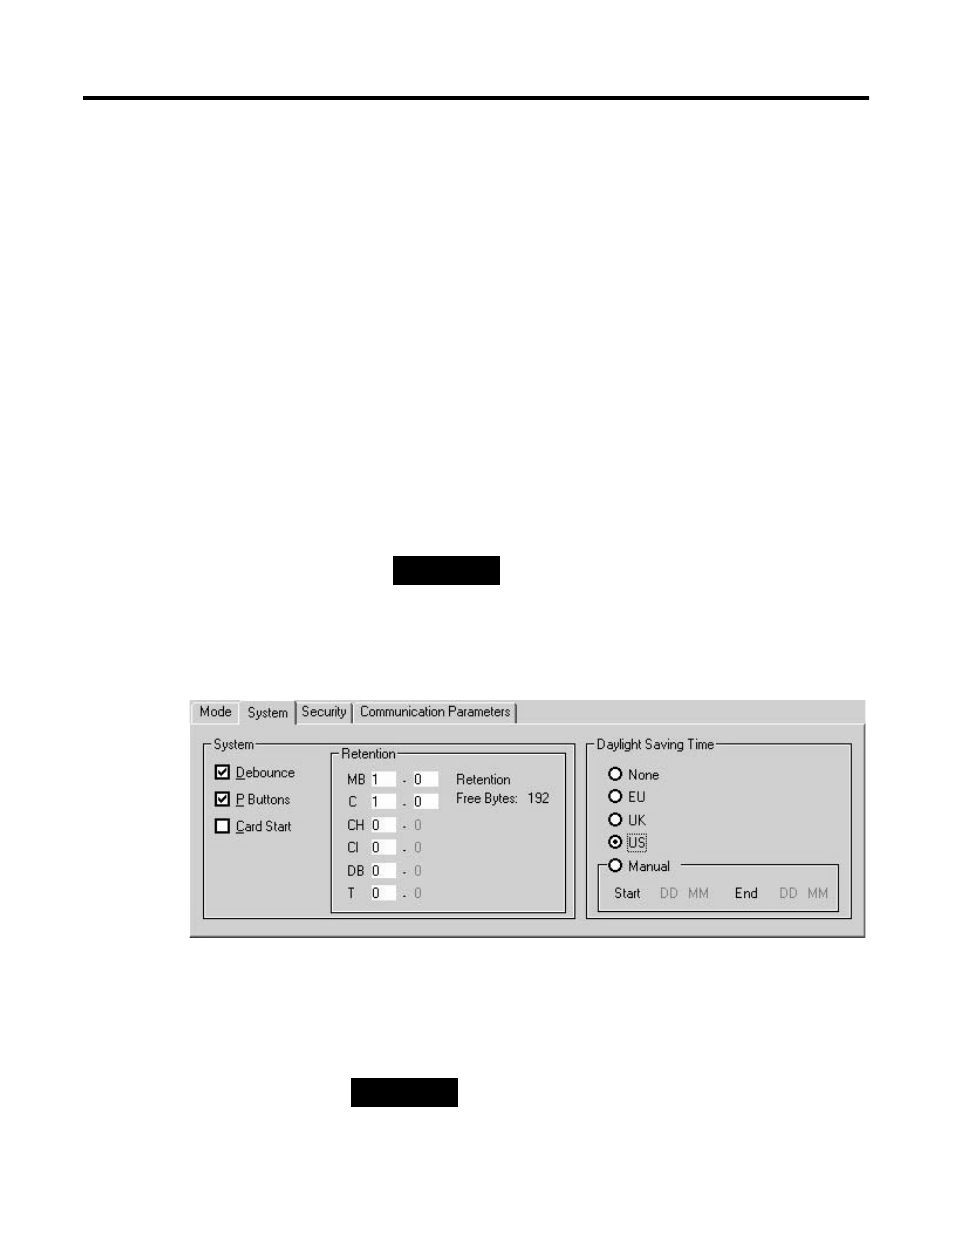
5. Select the System tab. In our example we want to set the
following device properties for the Pico GFX-70 device in the
System and Daylight Saving Time areas:
• Debounce active
• P Buttons active
• Retention On for: MB 1 (Marker byte 1 -> Marker bits 1-8) and
C 1 (counter function block)
• Circuit Diagram Name: Device_1
• Daylight Saving Time: EU (the automatic time change is based
on the DST for Central Europe).
When the System tab is activated, the Properties field then
looks like this:
Let us delete the expansion unit as we won't need it in the next
exercises. To do this position and right-click the mouse on the
expansion device and choose Delete Device.
TIP
Note on retention setting: The setting 1 - 0
has the same effect as 1 - 1, and therefore only
declares retentive the first operand stated.
TIP
Deleting the basic unit will automatically delete the
circuit diagram that belongs to it.