Setting up the meter – SATEC PM175 Manual User Manual
Page 60
Chapter 4 PAS Application Software
Setting Up the Meter
60
Series PM175 Powermeters
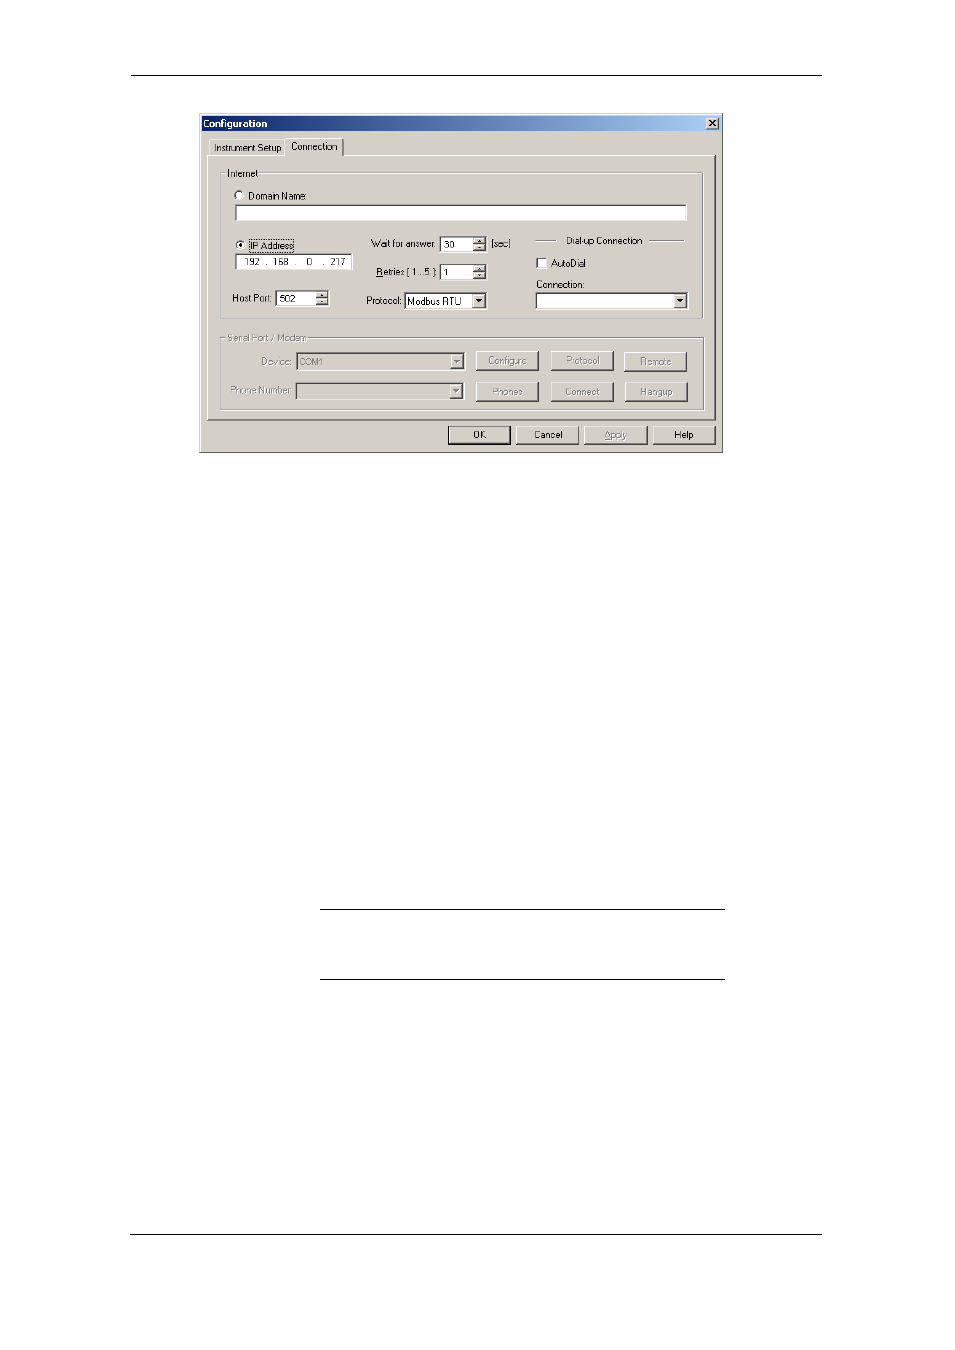
3. Click on the “IP address” and type in the IP address of
your meter. The default IP address preset at the factory is
192.168.0.203.
4. In the “Protocol” box, select the communications protocol
for the TCP port. The meter can provide Modbus/TCP
connections on TCP port 502 and DNP3/TCP connections
on port 20000. The host port is set automatically as you
select the protocol. Select “Modbus RTU” for
Modbus/TCP or “DNP3” for DNP3/TCP.
5. In the “Wait for answer” box, adjust the time that PAS
waits for a connection before announcing an error and the
number of retries PAS uses to receive a response from
the device if communications fail.
Setting Up the Meter
PAS allows you to prepare setup data for the meter off-line
without the need to have it connected to your PC.
Select the device site from the list box on the PAS toolbar, and
then select the desired setup group from the Meter Setup
menu. Click on the tab with the setup you want to create or
modify, and then fill in the boxes with the desired configuration
data for your device. Click the “Save as…” button to store the
data to the site database.
Always set up and store the Basic Setup data to the site
database first. PAS uses this data as a reference when arranging
other meter setup.
To save your setup to another site database, select it from the
file pane. Click OK.
To reuse setups from another site, copy them to your present
site database. Click Open, select the desired site database,
and click OK. The opened setup is copied to your site
database.
You can also copy all setups from one site database into
another site's database. Select a device site from the list box
on the toolbar from which you want to reproduce setups, and
then select “Copy to...” from the Meter Setup menu. Select the
site database to which to copy setups, and click OK.