2draper fingers/draper guides, Draper fingers/draper guides, 2 draper fingers/draper guides – MacDon PW8 Pick-Up Header User Manual
Page 141
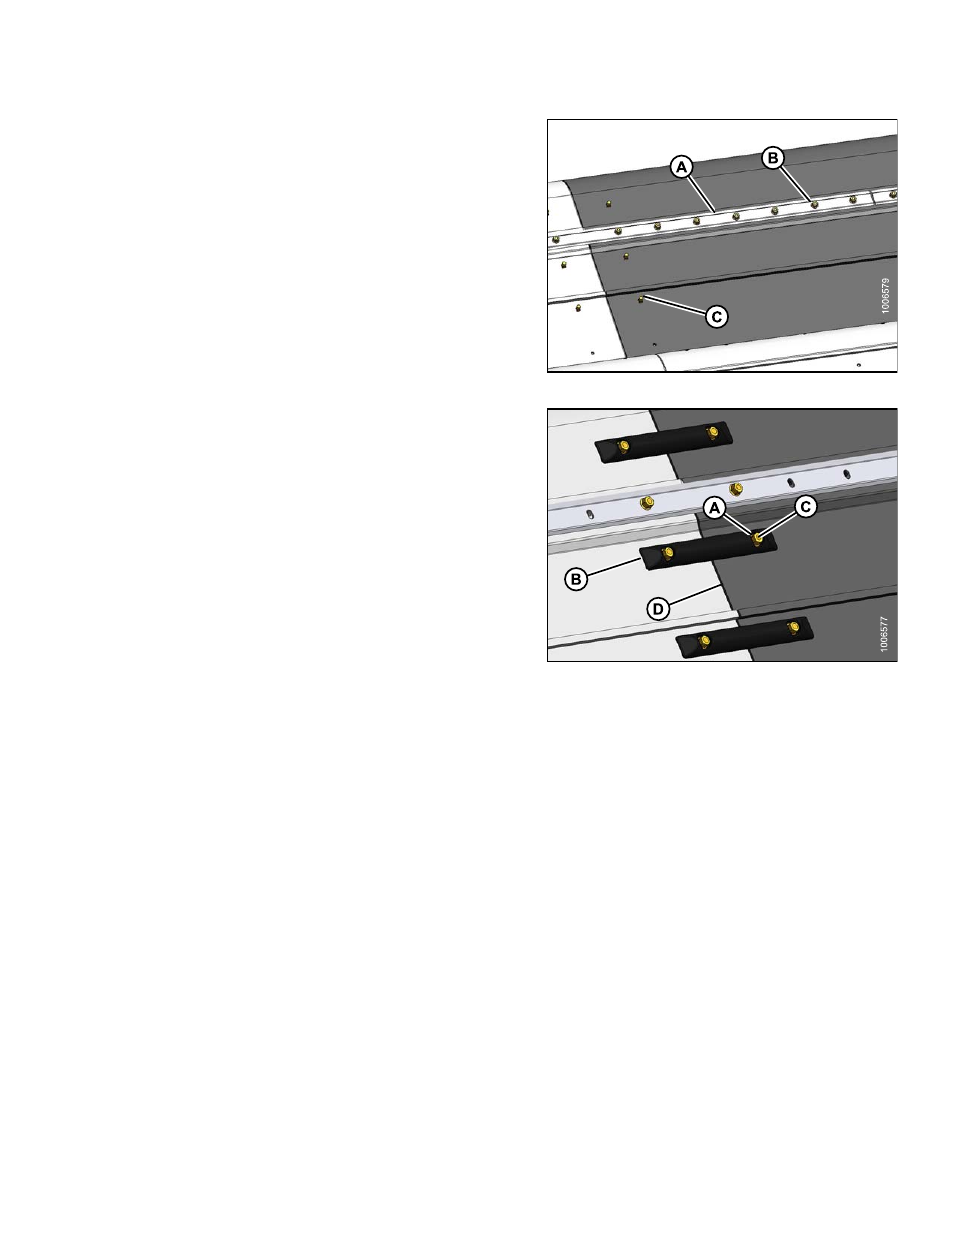
4. Install connector bar(s) (A) onto bolts, and secure with
M6 flange nuts (B).
5. Tighten M6 flange nuts (B) to 35–45 lbf·in (4–5 N m).
6. Install two square neck elevator bolts (C) at each strap
location.
Figure 4.106
7. Install straps (B) onto bolts, and secure with M6 flange
nuts (A).
8. Torque nuts (A) to 45–60 lbf·in (5.0–6.8 N·m).
9. Tension draper belts.
Refer to Section
Draper Belt Tension on Rear Deck, page 69
.
Figure 4.107
4.8.2
Draper Fingers/Draper Guides
If any of the fingers break or wear down enough to affect the performance of the machine, the finger should be
replaced. Excessively worn fingers will reduce picking efficiency resulting in losses far exceeding the cost of new
fingers.
The guides, which maintain draper tracking, are located along the outboard edge on the inside of the right draper belt
on both decks. If any of the guides wear down enough to cause large amounts of draper tracking / shifting, the guide
should be replaced. Also check to make sure the guides are aligned perpendicular to the direction of draper travel.
Excessively worn or misaligned guides can cause the drapers to shift and ride up on the frame causing premature
draper edge wear and even draper tearing.
NOTE:
It may be necessary to remove the draper belt when replacing the fingers / guides. Refer to Section:
Removing Front Draper Belt, page 128
.
169489
133
Revision A