Removing drive sprocket, Danger – MacDon PW8 Pick-Up Header User Manual
Page 127
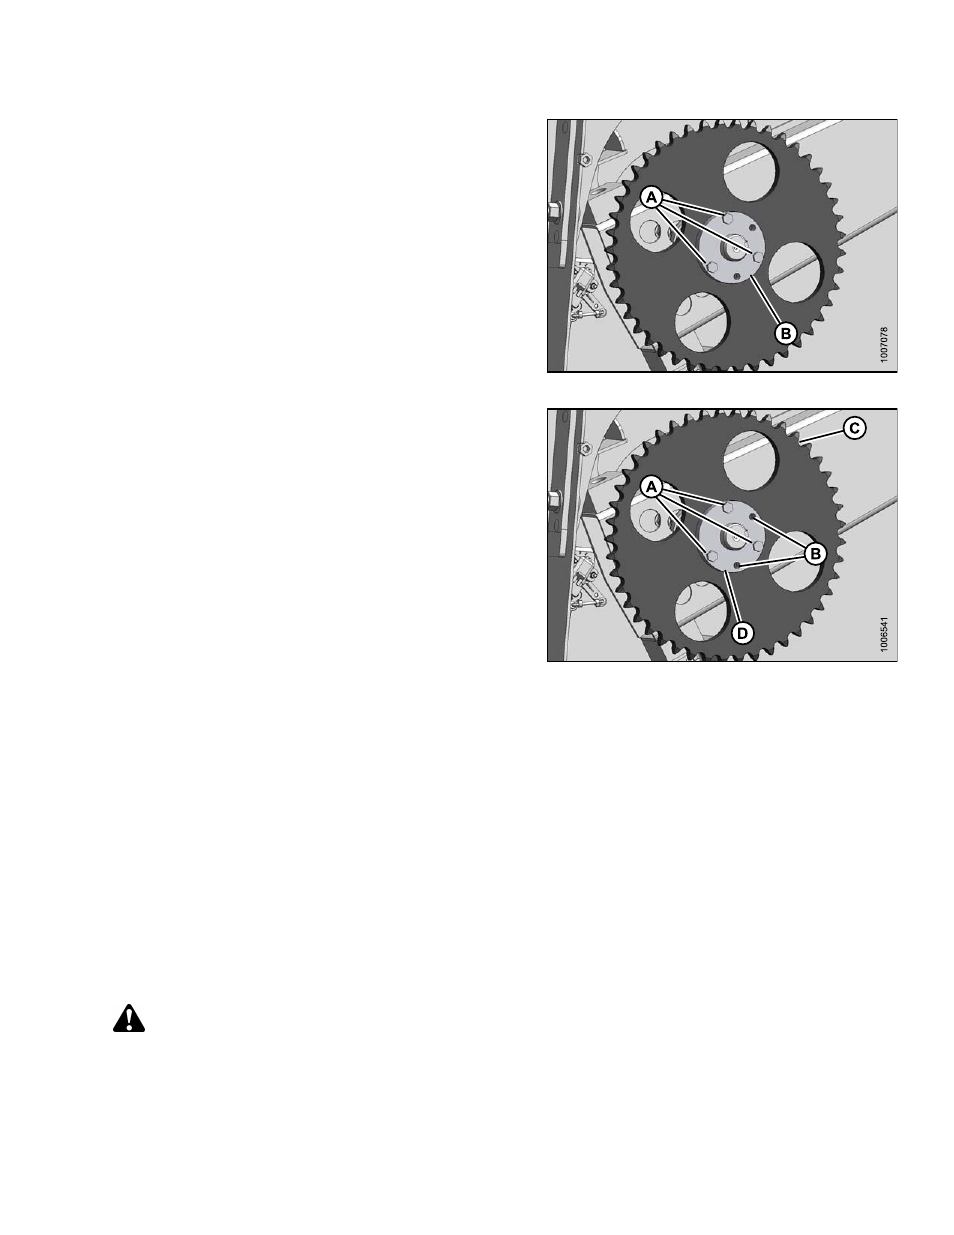
7. Tighten the three hex bolts (A) in equal increments to
32 lbf·ft (44 N·m), maintaining sprocket alignment.
8. Tap bushing (B) with a hammer, and retorque.
Repeat three times or until bolts no longer turn at
32 lbf·ft (44 N·m).
Figure 4.73
9. Check alignment of sprockets. If misalignment is more
than 0.04 in. (1 mm), measure, record amount and
proceed as follows:
a. Measure and record the position of the tapered
bushing relative to the driveshaft.
b. Remove the three hex bolts (A) from tapered
bushing.
c. Reinstall twp of the bolts (A) into the threaded
holes (B) in the tapered bushing (D).
d. Turn bolts into tapered bushing equal amounts in
half-turn increments, until the tapered bushing (D)
and sprocket (C) can be moved.
e. Reposition the tapered bushing, accounting for the
misalignment.
f.
Repeat Steps:
5., Installing Driven Sprocket, page
to
9., Installing Driven Sprocket, page 119
above.
g. Check alignment of sprockets.
h. Repeat substeps a. to g. until specified alignment
is achieved.
10. Install and tension chain. Refer to
.
11. Close endshield. Refer to
Figure 4.74
Removing Drive Sprocket
DANGER
Stop engine and remove key from ignition before leaving operator’s seat for any reason. A child or even
a pet could engage an idling machine.
169489
119
Revision A