Manage limits, Using stop actions within a test – MTS Acumen User Manual
Page 182
Manage Limits
Quick access:
Explorer tab > Set Up > Tools > Manage Limits
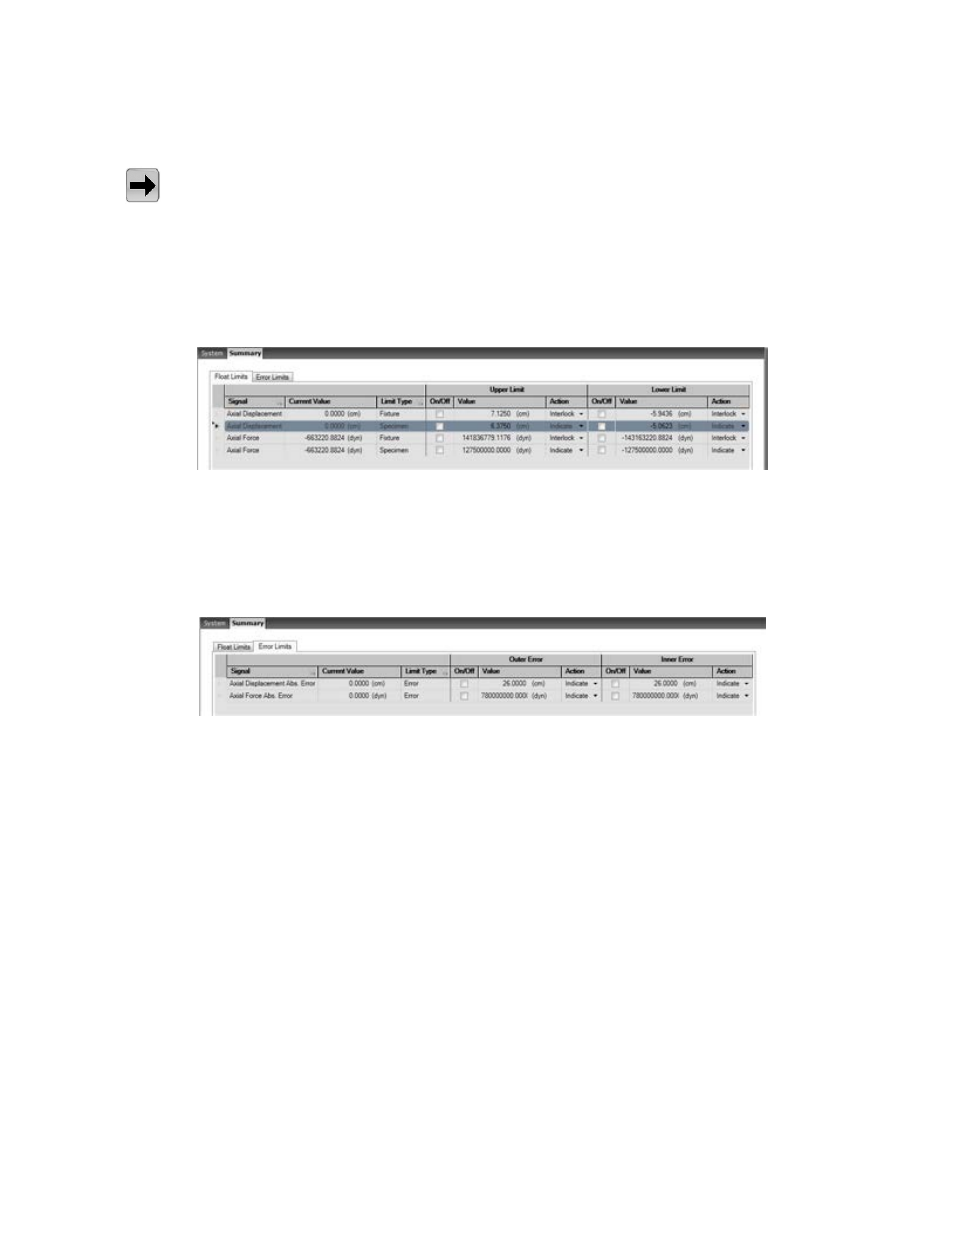
The Manage Limits element allows you to view or modify fixture and specimen limits and offset values
using either the virtual frame diagrams on the Situational Awareness panel (see
(p. 58)) or by using a table format on the Summary tab. The Summary tab contains the Float
Limits tab and the Error Limits tab.
Float Limits Tab
Float Limits Tab
The Float Limits tab allows you to select an action that occurs when a signal limit is reached or turn a
signal limit on or off. The values on this tab correspond directly to the values indicated in the Situational
Awareness panel. The Signal and Limit Type columns can be sorted.
Error Limits Tab
Error Limits Tab
The Error Limits tab allows you to select an action that occurs when a signal error limit is reached or turn
Outer Errors (frame) and Inner Errors (specimen) on or off. The Signal and Limit Type columns can be
sorted.
Using Stop Actions Within a Test
When you apply program command manually (by applying command via the manual command controls
or the function generator in the Generate Command element of the Set Up node) and stop the command
using the Stop button on the control panel, the actuator may move unexpectedly. The occurrence depends
on the relationship between program command and specimen characteristics. In general, this condition is
more likely to occur with higher specimen mass, higher command frequency, and higher command
amplitudes.
182 | MTS Acumen
™
Best Practices for Other System Configurations and Tests