Table 2. controller setup fields – Despatch Protocol Manager with Protocol 3 and Protocol Plus User Manual
Page 20
I
NSTALLATION
&
S
ETUP
Protocol Manager Instruction Manual
20
Version 1
Copyright © 2013 by Despatch Industries.
All rights reserved. No part of the contents of this manual may be reproduced, copied or transmitted in any form or by any
means including graphic, electronic, or mechanical methods or photocopying, recording, or information storage and
retrieval systems without the written permission of Despatch Industries, unless for purchaser's personal use.
a. Select the first blank line by clicking on it.
b. Press
Insert
to display the
Controller Setup
dialogue window (Figure 16).
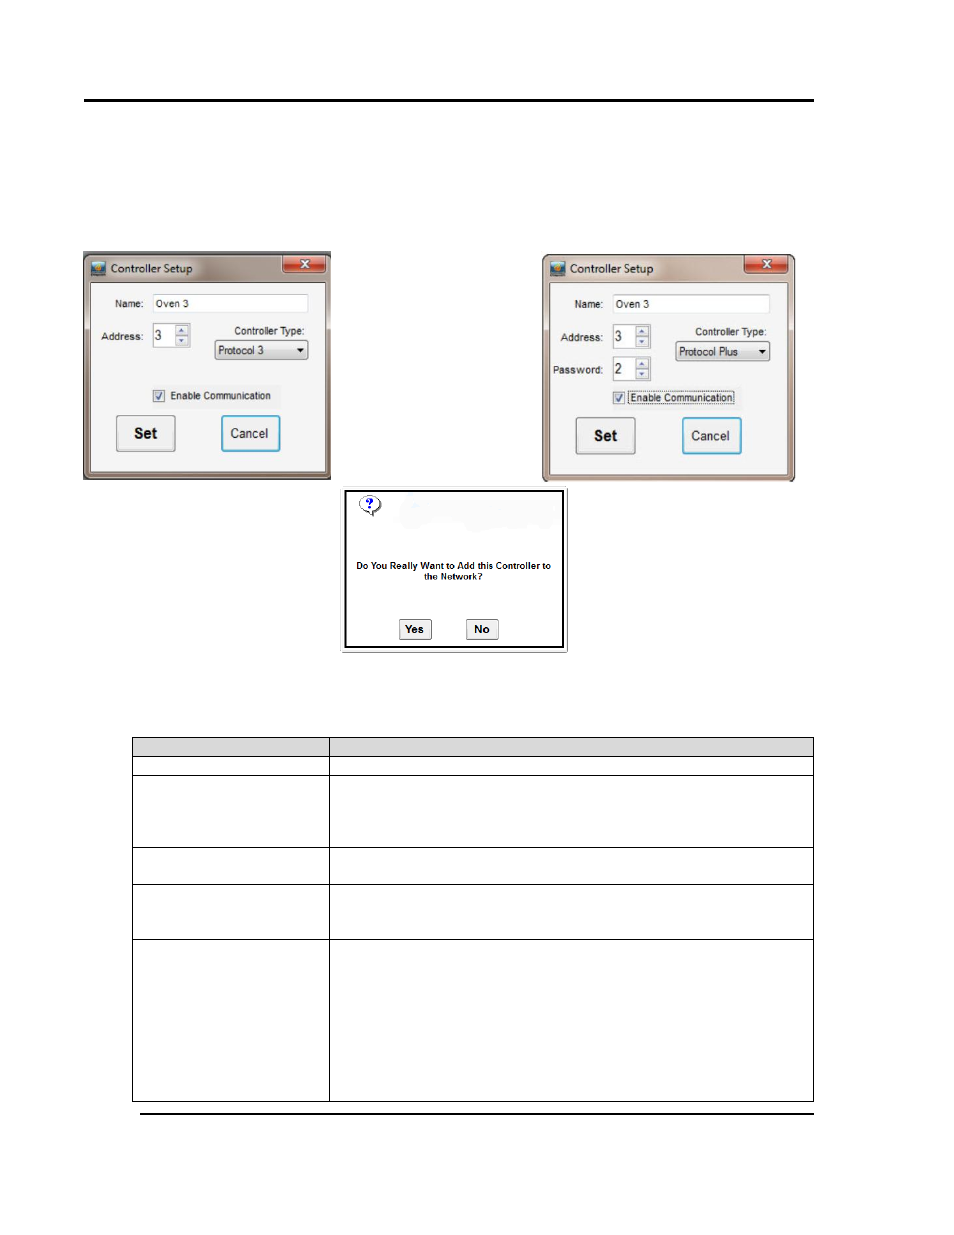
4. Complete the information in the
Controller Setup
Dialogue Window using Table 2. Note
that the Protocol Plus also requires a password (default value is 2). Click “Yes” for the
additional dialogue window.
Table 2. Controller Setup Fields.
Field
Purpose
Name
Unique name of oven or controller, maximum 24 characters
Address
Unique address of oven or controller. Enter address with keypad or
use arrows. Address must correspond with the address
programmed into the controller (Refer to Section 3.2). Values 1-256
are accepted.
Controller Type
Choose Protocol 3 or Protocol Plus depending on the controller
type
Password
(For Protocol Plus
controllers only)
Enter the password that corresponds to the desired level of access
(Refer to Section 3.4.5 for information on access levels). Default
value is 2.
Enable Communication
Check the box to add the controller to the list of controllers
controlled by the software.
Note: If the Controller Network (Network tab
—Figure 15) shows
Disabled in the Status column, navigate to the Controller Setup
Dialogue Window (Figure 16) and recheck Enable
Communication.
If the controller is disabled (by unchecking Enable
Protocol 3 Controller Setup
Protocol Plus Controller Setup
Figure 16. Controller Setup Dialogue Windows (complete with reference to Table 2).