3 factory setup parameters (dual) – Dakota Ultrasonics UMX-2 User Manual
Page 9
Dakota Ultrasonics
5
1) Referring to the diagram above, be sure the dongle and transducer are
connected as illustrated. Note: in order for the UMX-2 to recognize the
transducer that has been attached, it must be in the proper channel location.
2) Press and release the single button located on the end of the UMX-2. The
displays should illuminate, and led lights will begin flashing.
3) The smaller of the two displays will begin scrolling the current configuration
settings of the UMX-2 in the following order: UMX-2, BATT (LO, ME, HI),
Probe Type (1/2 2S or 5S)…etc. If ‘NO PRB’ is displayed, the dongle has
been plugged into the wrong channel. Press and hold down the button for
approximately 30 seconds, or until the UMX-2 powers off. Repeat steps 1 –
3 until the probe has been identified.
4) The UMX-2 is ready to begin making measurements.
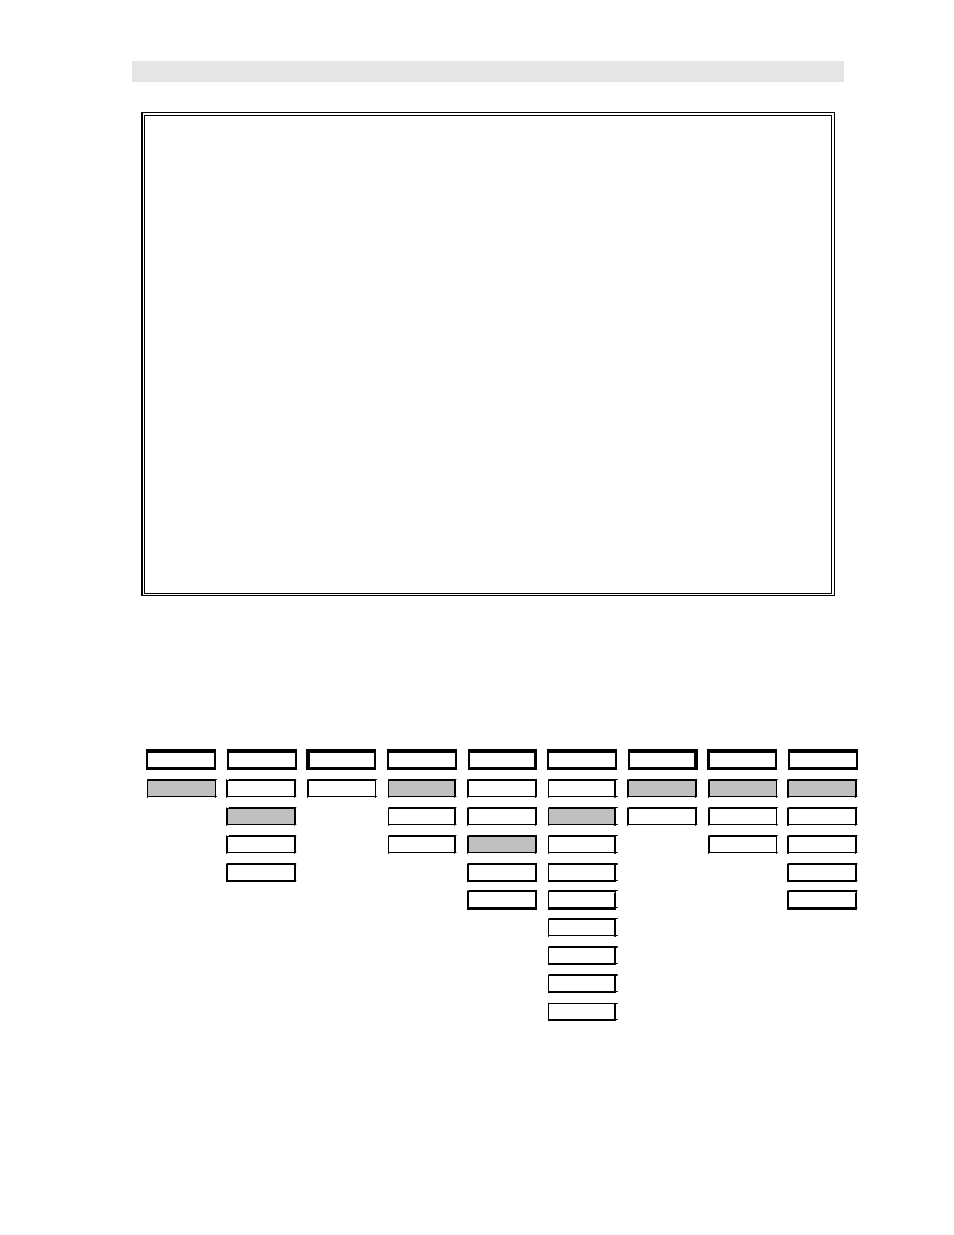
2.3 Factory Setup Parameters (Dual)
UMX-2 Dual Element Menu Structure & Factory Configuration
Top Level
STORE
DIRECT
CLEAR
ZERO
GAIN
MATL
UNITS
MODE
UMX-2
A 1
NORTH
LOC
AUTO
VLOW
ALU
IN
P-E
LT ON
SOUTH
MANUAL
LOW
STL
MM
PECT
LT OFF
EAST
COATIN
MED
STST
E-E
LTAUTO
WEST
HIGH
IRON
MEMOFF
VHIGH
CIRO
UPGRAD
PYC
PLST
PLUR
CUSTOM