2 probe zero – Dakota Ultrasonics UMX-2 User Manual
Page 29
Dakota Ultrasonics
25
or
1) Connect the probe to the UMX-2.
2) Be sure all couplant has been removed from the face of the transducer.
3) Press and release the single button located on the end of the UMX-2. The
displays should illuminate, and led lights will begin flashing.
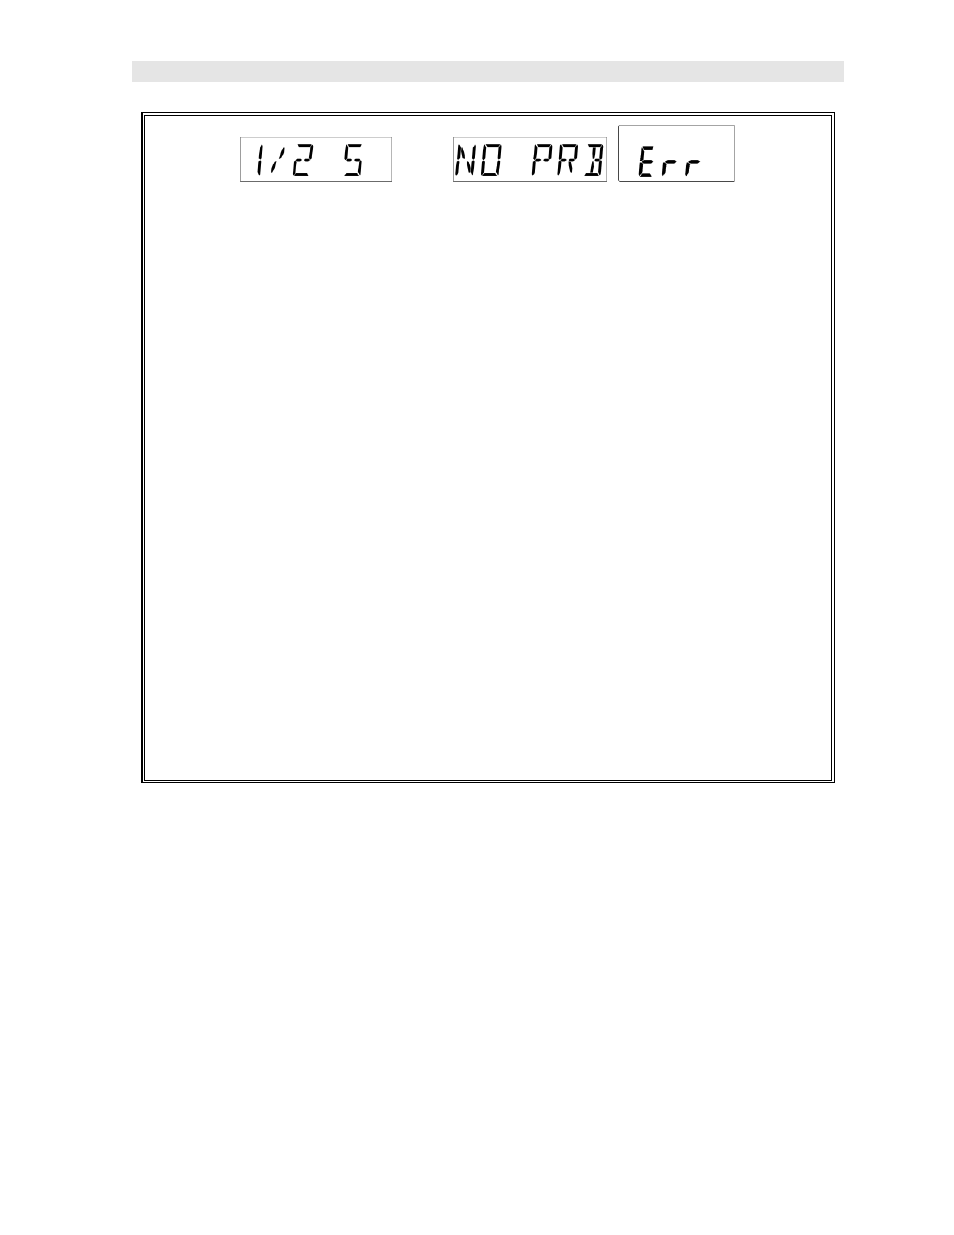
4) The smaller of the two displays will begin scrolling the current configuration
settings of the UMX-2 in the following order: UMX-2, BATT (LO, ME, HI),
Probe Type (1/2 2S or 1/2 5)…etc. If ‘NO PRB’ is displayed and a dual
element probe has been connected to the gauge, either the transducer is
faulty, or it is not a certified UMX-2 transducer. If a single element
membrane transducer has been connected, be sure the dongle is connected
to the correct channel. Press and hold down the button for approximately 30
seconds, or until the UMX-2 powers off. Repeat steps 1 - 4 until the probe
has been identified.
5) If the probe was identified, the UMX-2 will automatically perform a ‘probe
zero’.
7.2 Probe zero
Continuing on from the previous section, if a dual element transducer was connected
to the UMX-2, and the mode is currently setup either pulse-echo (P-E) or pulse-echo
coating (PECT), a probe zero will automatically be done following startup. Therefore,
if the UMX-2 was previously set to echo-echo mode, the user will first need to set the
gauge back to either pulse-echo or pulse-echo coating, before performi ng a probe
zero.
Note: multi-echo modes do not require a probe zero. A probe zero should be done
on a regular basis.
The probe zero function is an ‘electronic zero’ much like a mechanical zero used with
a set of calipers. If the UMX-2 is not zeroed correctly, all the measurements may be
in error by some fixed value. is in the echo -echo measurement mode and a manual