Leading edge adjustment, Centering, Leading edge adjustment] -12 [centering] -12 – Konica Minolta BIZHUB C360 User Manual
Page 149: P. 7-12
bizhub C360/C280/C220
7-12
7.1
[System Settings]
7
[Leading Edge Adjustment]
Adjust the starting print position at the leading edge of each type of paper (with respect to the paper feed
direction).
1
Press the Utility/Counter key ö [Administrator Settings] ö [System Settings] ö [Expert Adjustment]
ö [Printer Adjustment] ö [Leading Edge Adjustment].
% To adjust the starting print position at the leading edge of the second side for 2-sided printing (with
respect to the paper feed direction), press [Leading Edge Adjustment (Duplex Side 2)].
2
Select a paper type to be adjusted.
3
Load the paper into the Bypass Tray.
4
Press the Start key.
A test pattern is printed.
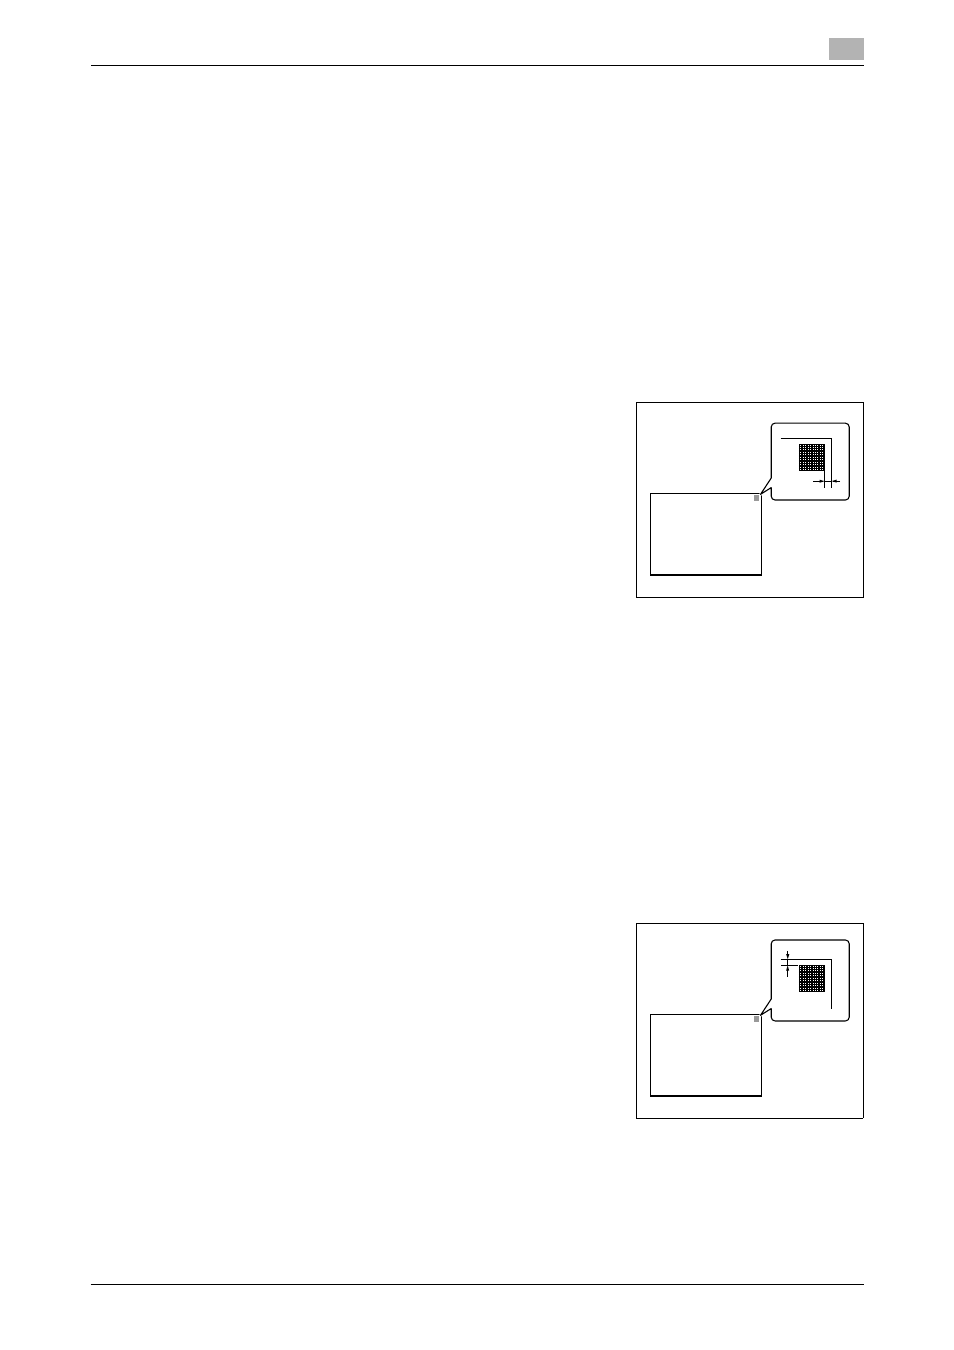
5
Check that the distance from the starting print position of the test
pattern to the edge of the paper (a) is 4.2 mm.
% Press [+] or [-] to adjust the width.
Press the Start key to print a test pattern.
6
Press [OK].
[Centering]
Adjust the starting print position at the left edge of each paper tray (with respect to the paper feed direction).
0
Only 8-1/2 e 11 v (A4 v) paper can be used to adjust the Bypass Tray.
1
Press the Utility/Counter key ö [Administrator Settings] ö [System Settings] ö [Expert Adjustment]
ö [Printer Adjustment] ö [Centering].
% To adjust the starting print position at the left edge of the second side for 2-sided printing (with re-
spect to the paper feed direction), press [Centering (Duplex 2nd Side)].
2
Select a paper tray to be adjusted.
3
Press the Start key.
A test pattern is printed.
4
Check that the distance from the starting print position of the test
pattern to the left edge of the paper (b) is 3.0 mm (±0.5 mm).
% Press [+] or [-] to adjust the width.
Press the Start key to print a test pattern.
5
Press [OK].
a
a:4.2mm
b
b:3.0mm±0.5mm