Make up – Hawk Industries Hawkjaw Sr. Manual ALS Serial Numbers 1 to 100 User Manual
Page 23
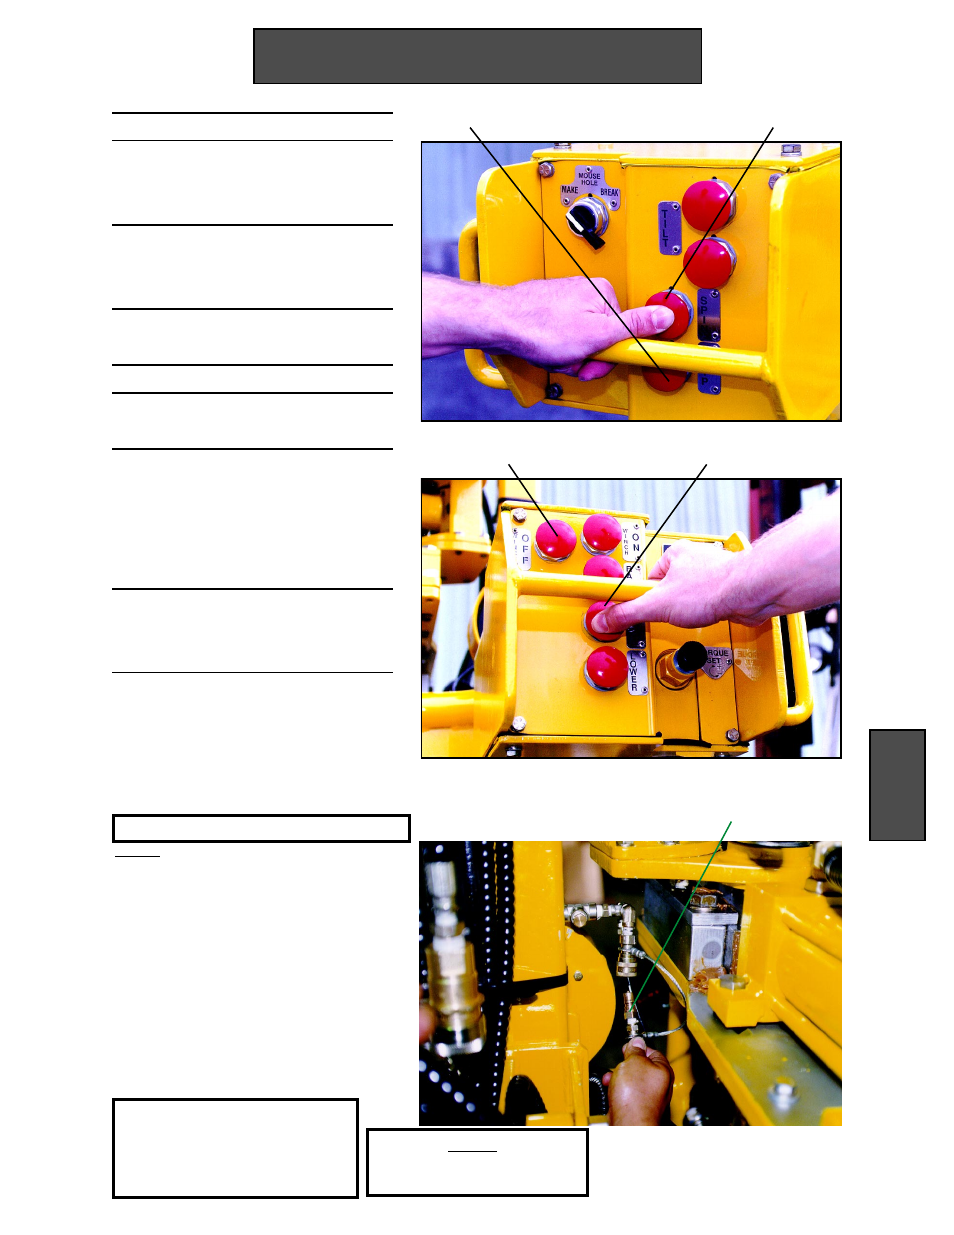
Make Up
1. Follow the steps on pages 17-22.
2. Make sure the Torque gauge
red needle (RN) is dialed to the
desired torque.
3. Push and hold down Spin (S)
until the stand rotates down to
the shoulder.
4. Release Spin (S). Immediately
push and hold down Grip (G).
5. Push and hold down Torque (T).
6. Watch the Torque gauge needle
(TN). *See note below
7. When the Torque gauge needle
rises above and settles at the
desired torque, release both
Torque (T) and Grip (G) at the
same time.
8. Push and hold down Winch Off
(WOff) to pull the HawkJaw off
the drill pipe connection.
Operation
23
G
S
WOff
T
*If the Torque cylinder strokes out before
the desired torque is reached, the Torque
gauge needle (TN) will fall off to approxi-
mately a 8000 Ft.-Lb. reading. If this
happens, release Torque (T). Immediately
release Grip (G). Wait for the Torque
cylinder to reset. Repeat Steps 5-8.
Operation
Test#1: Hawk strongly recommends testing
the Low Torque Warning System on every
trip. If this test procedure is not performed,
the drill string could be over torqued.
Disconnect the Low torque warning test
connector (LTC) located as shown. Torque
the first connection. Note the torque gage
needle position; keep the Hawkjaw positioned
on the same connection. Now re-connect the
Low Torque Warning Connector. Re-torque
the connection. The torque gage should
indicate the same reading. If it does not, see
Trouble Shooting page 96.
LOW TORQUE WARNING SYSTEM CHECK
Do not make up pipe with the low
torque warning test connector dis-
connected. This may result in under
torqued pipe in the hole.
WARNING
NOTE
For safety, push in the "E" stop
when the HawkJaw is at rest.
LTC