Avaya 1.3 User Manual
Page 245
DEFINITY ONE Pre-Administration — Setting Up Your Avaya CT Configuration
Issue 1 October 2003
245
8. Type
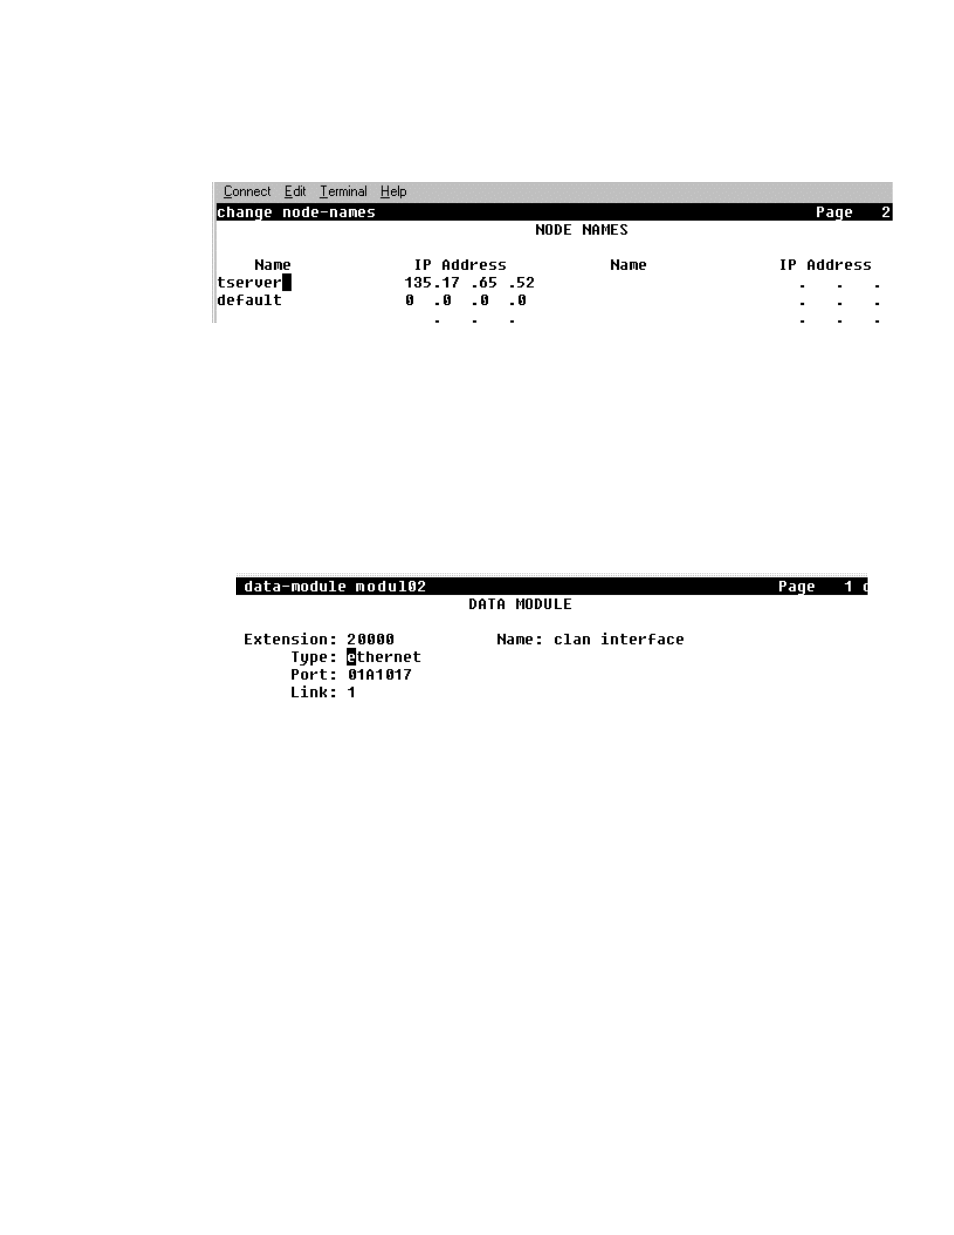
change node-names
The NODE NAMES screen appears.
9. Follow steps a and b to complete the NODE NAMES screen and define the Avaya CT
server’s name and address.
a. In the
Name:
field, type the name you want to assign to the Avaya CT server (free-
form field)
b. In the
IP Address:
field, type the IP address of the G3PBX Driver (default is
192.128.25.20)
10. Type
add data-module modname
(substitute
modname
with the name of your data
module. For example
modul02
).
The DATA MODULE screen appears.
11. Follow steps a through e to complete the DATA MODULE screen.
a. In the
Data Extension:
field, type any valid extension on the dial plan (for
example,
20000
).
b. In the
Type:
field, type
ethernet
c. In the
Port:
field, type
01A1017
, where:
●
01A10
is for the C-LAN board slot (in this example)
●
017
is the port (must always be port 17)
d. In the
Link:
field, type any number from
1
to
25
e. In the
Name:
field, type the name you want to assign to the Avaya CT server (free-
form field)