Avaya 1.3 User Manual
Page 242
Pre-Release 11 Link Administration Instructions
242 Installation Guide
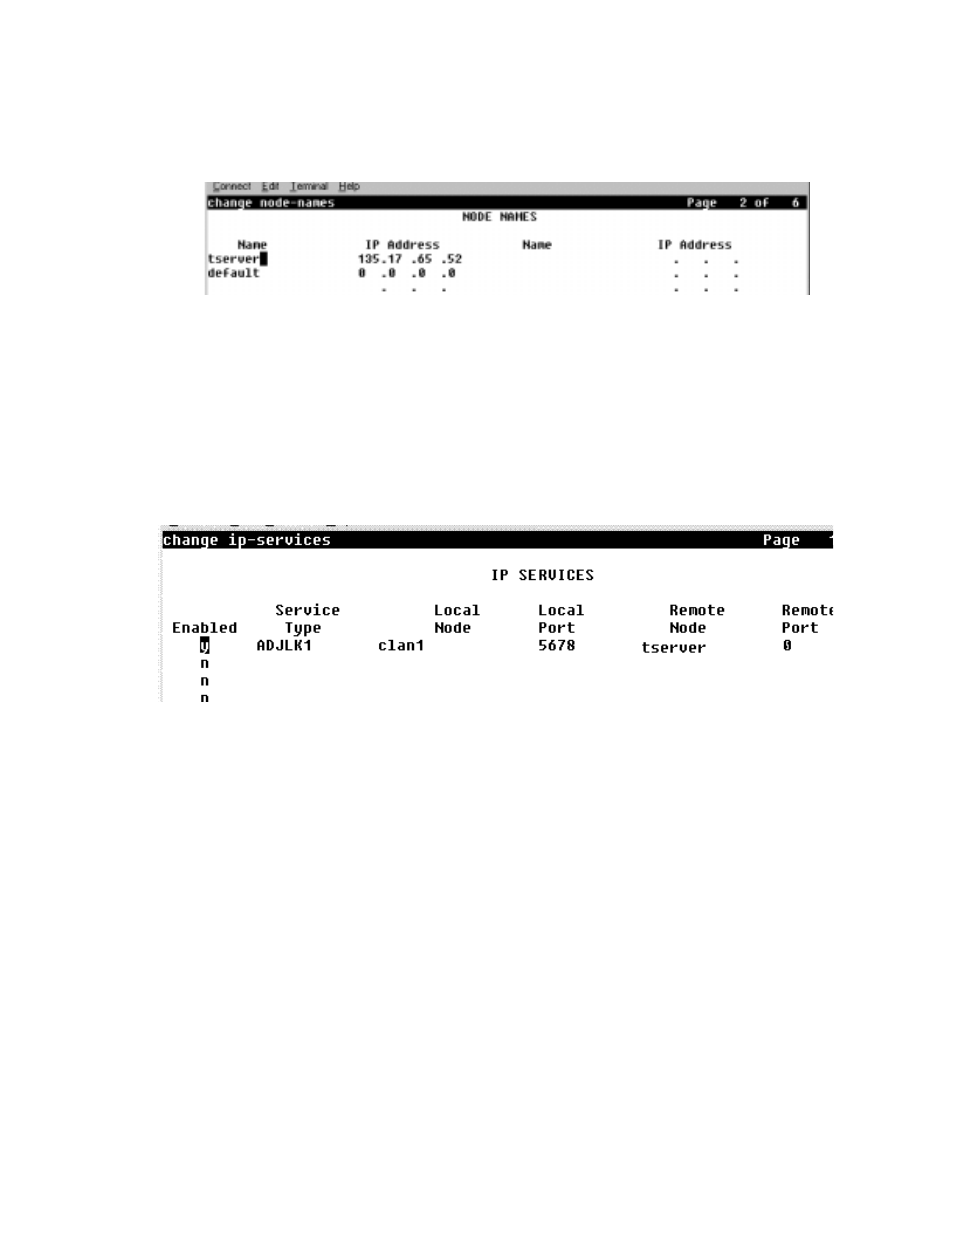
10. Type
change node-names
The NODE NAMES screen appears.
11. Follow steps a and b to complete the NODE NAMES screen and define the Avaya CT
server’s name and address.
a. In the
Name:
field, type the name you want to assign to the Avaya CT server (free-
form field)
b. In the
IP Address:
field, type the IP address of the G3PBX Driver (default is
192.128.25.20)
12. Type
change ip-services
The IP SERVICES screen appears.
13. Follow Steps a through e to complete the IP SERVICES screen and administer the
DLG link on a DEFINITY ONE system.
a. In the
Service Type:
field, type
ADJLK1
(DEFINITY ONE uses link 1 only)
b. In the
Local node-option:
field, type
procr
c. In the
Local port:
field, type
5678
d. In the
Remote node:
field, type the name you assigned to the Avaya CT server on
the NODE NAMES screen.
e. In the
Remote port:
field, type
0
(zero). Remote port is always set to zero.
This completes the procedure for setting up PROCR connectivity to DEFINITY ONE.
For a checklist of these administrative tasks, see Table D-2 on page -247.