Phase 1 – Allied Telesis AT-S41 User Manual
Page 199
AT-S41 User’s Guide
199
Phase 1
This phase assigns a VID and a name to your VLAN and also designates
the VLAN port members.
1. Click on the Advanced Config menu tab and select VLAN Config from
the sub-menu. Select Create VLAN from the next sub-menu.
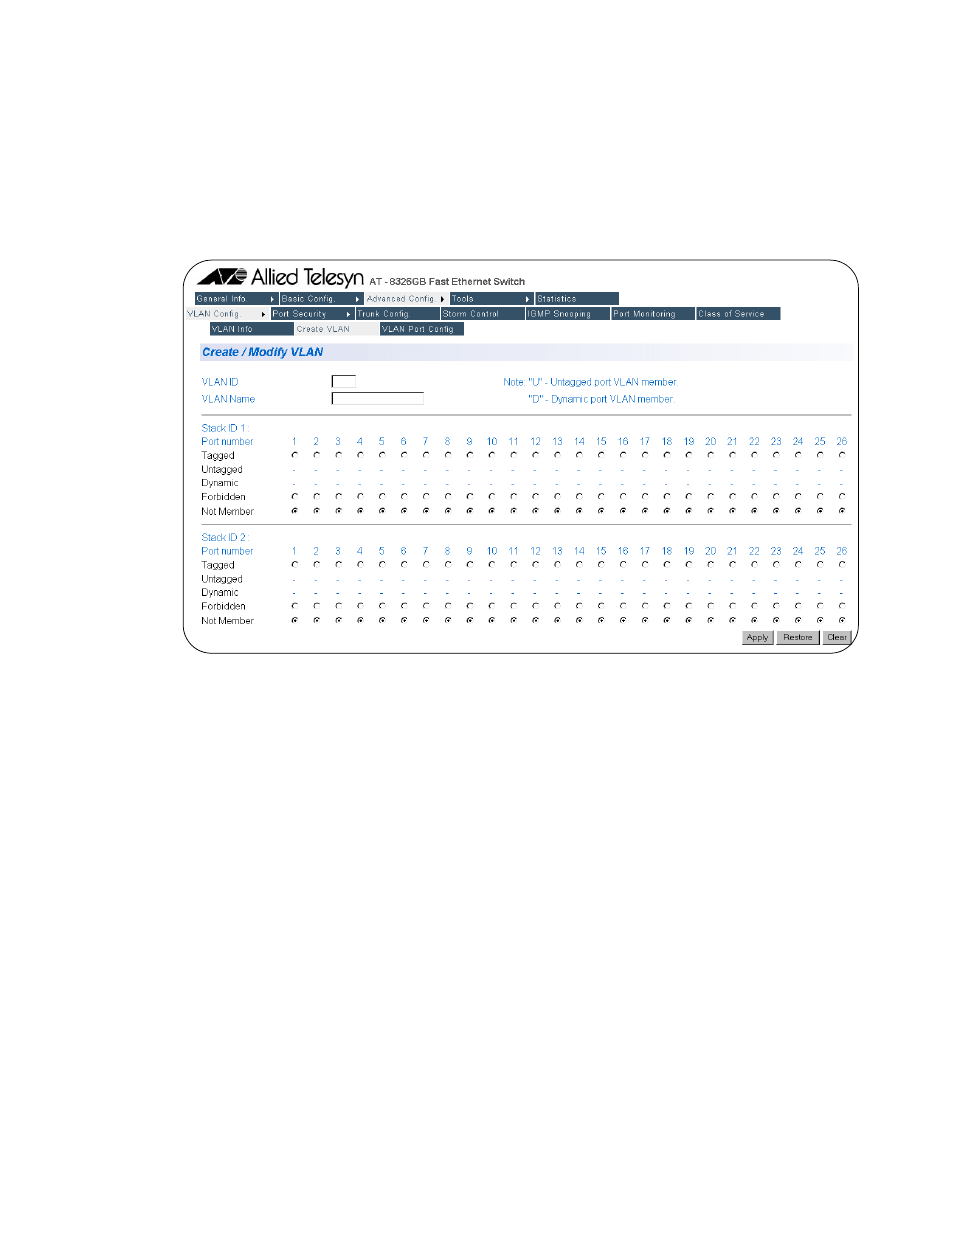
The Create/Modify VLAN page will appear, as displayed in Figure
67.
Figure 67 Create/Modify VLAN (802.1Q VLANs)
2. Enter a VLAN ID in the VLAN ID field.
If this VLAN will be unique in your network, then its VID must also be
unique from all other VIDs in the network.
If this VLAN will be part of a larger VLAN that spans multiple stacks,
than the VID value for the VLAN should be the same on each stack. For
example, if you are creating a VLAN called Sales that will span three
stacks, you must assign the Sales VLAN on each stack the same VID
value.
The VLAN ID must be a value between 2 and 4094.
3. Enter a name for the VLAN of up to 32 characters in the VLAN Name
field.
The name should reflect the function of the nodes that will be a part
of the VLAN (for example, Sales or Accounting). The name spaces, but
not special characters, such as asterisks (*) or exclamation points (!).