Allied Telesis AT-9724TS User Manual
Page 133
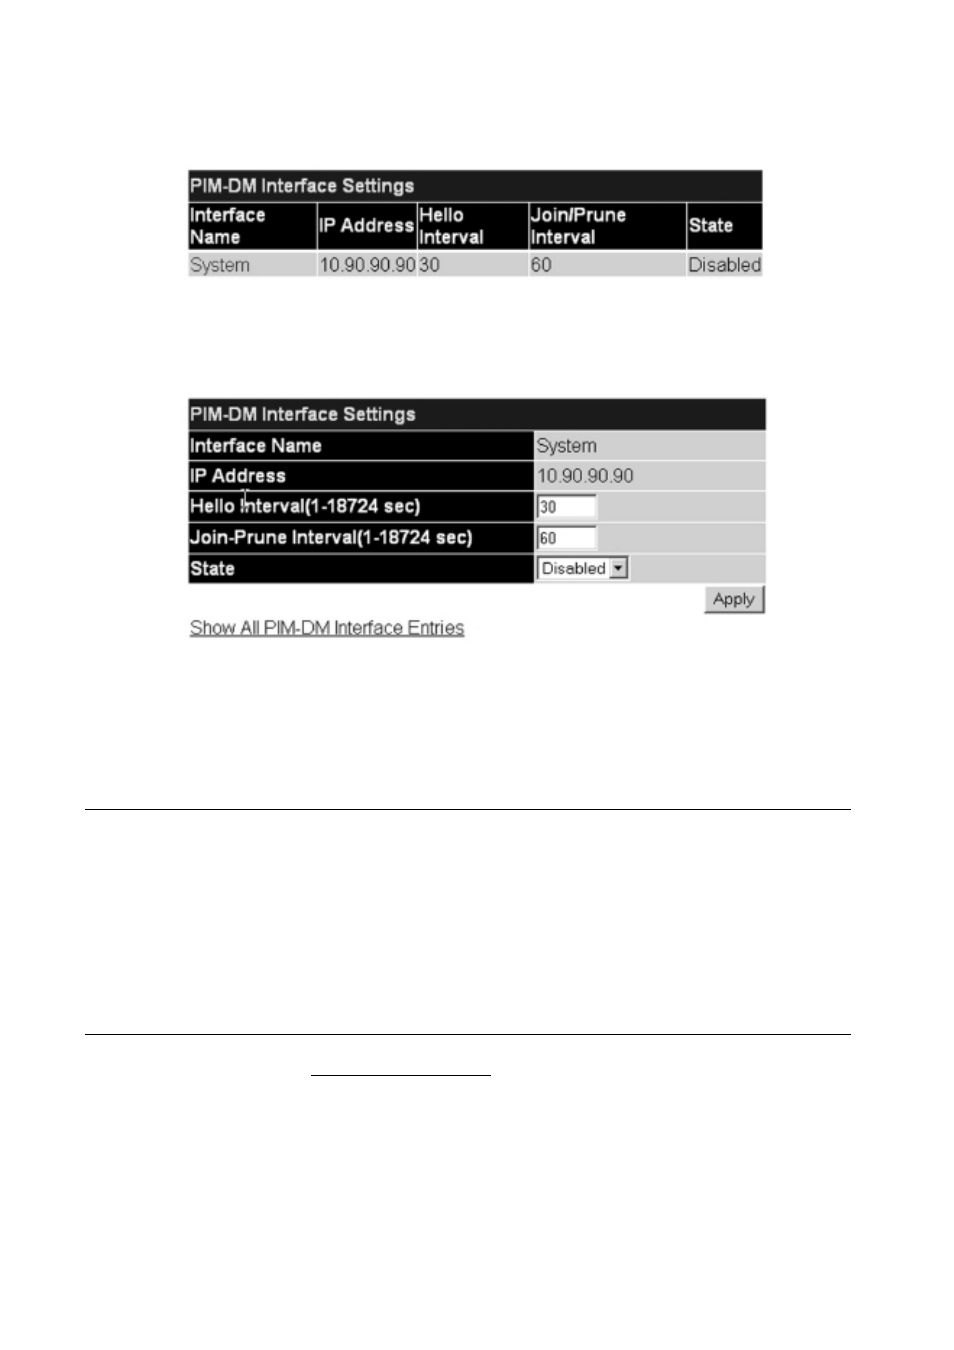
To view the PIM-DM Table, open the IP Multicasting folder under Configuration and click PIM-DM Interface Configuration.This window
allows the PIM-DM to be configured for each IP interface defined on the Switch. Each IP interface configured on the Switch is displayed in the below PIM-DM
Interface Table dialog box.To configure PIM-DM for a particular interface, click the corresponding hyperlink for that IP interface.This will open the PIM-
DM Interface Configuration window:
Figure 6- 136. PIM-DM Interface Settings window
Figure 6- 137. PIM-DM Interface Settings window – Modify
The following fields can be set:
Parameter
Description
Interface Name
Allows the entry of the name of the IP interface for which PIM-DM is to be configured.This must be a
previously defined IP interface.
IP Address
Displays the IP address for the IP interface named above.
Hello Interval (1-18724)
This field allows an entry of between 1 and 18724 seconds and determines the interval between sending Hello
packets to other routers on the network.The default is 30 seconds.
Join/Prune Interval (1-18724) This field allows an entry of between 1 and 18724 seconds.This interval also determines the time interval the
router uses to automatically remove prune information from a branch of a multicast delivery tree and begin to
flood multicast messages to all branches of that delivery tree.These two actions are equivalent.The default is
60 seconds.
State
This field can be toggled between Enabled and Disabled using the pull-down menu, and is used to enable or
disable PIM-DM for the IP interface.The default is Disabled.
Click Apply to implement changes made. Click Show All PIM-DM Interface Entries to return to the PIM-DM Interface Table.
132
Allied Telesyn AT-9724TS High-Density Layer 3 Stackable Gigabit Ethernet Switch