Owner alarm datetimers232, Option not installed, Alarm relay enable disable – Ashcroft ATE-100 Handheld LCD Digital Calibrator User Manual
Page 61: High setpoint, Open close, Low contact open close, Monitor function left right
- 61 -
Revision 4.6 3/2004
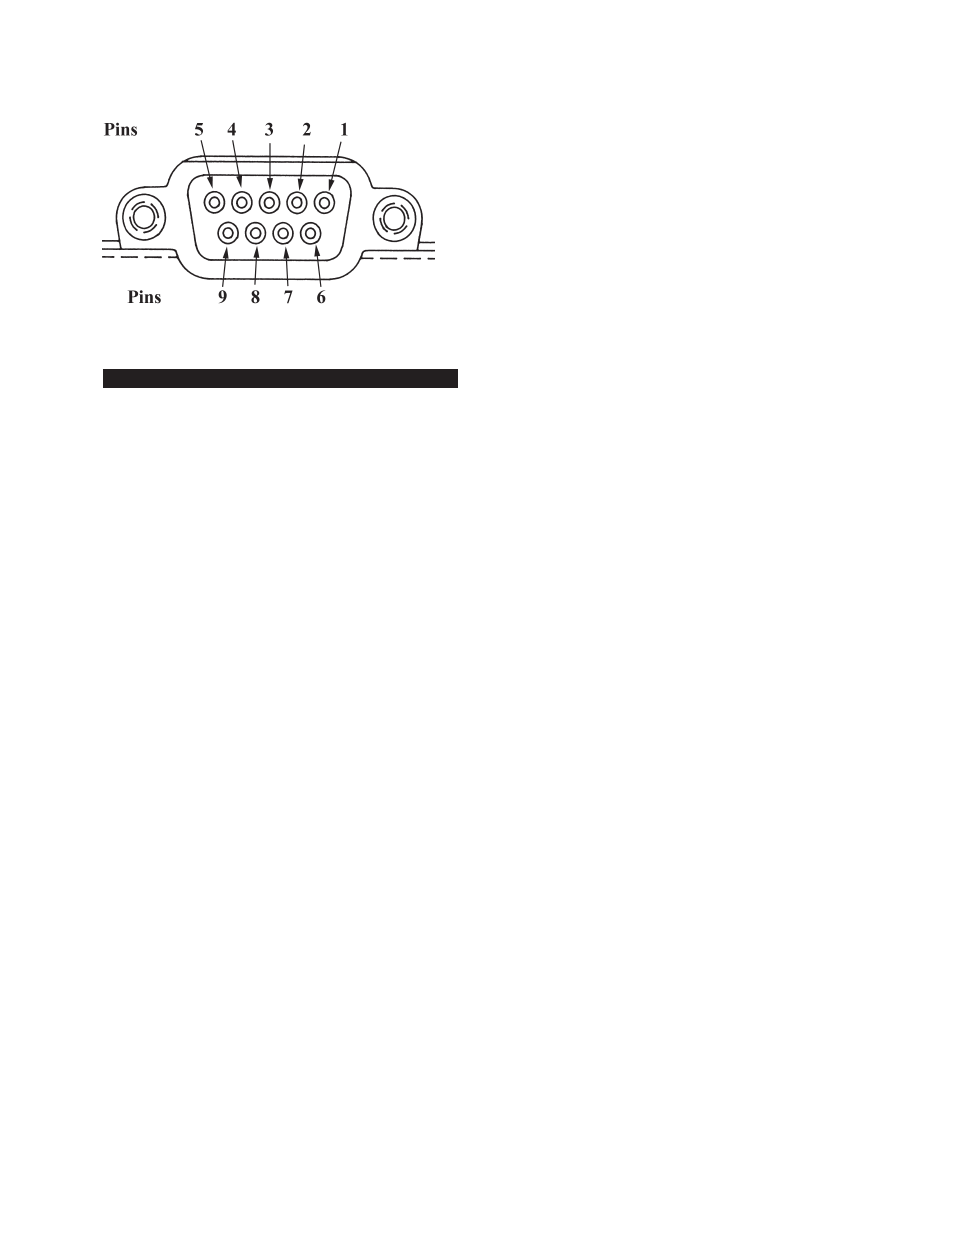
Pin 8 Relay 2 common
Pin 9 Relay 2 (normally opened or normally closed)
Section 26.1
Alarm Set Up
The alarm level trip points can be programmed from
the keypad as follows.
Step 1
With the HHC on and reading pressure press the
SET UP key.
SET
UP
Step 2
Using arrow keys select the alarm function from
the setup menu. When selected the word “Alarm” will
flash on the display.
Owner Alarm
DateTimeRS232
Step 3
With the word Alarm flashing press the enter key.
ENT
This is an optional feature, if the option is not installed
the HHC system will respond with:
Option not
installed
If this message appears press any key to resume normal
operation.
Step 4
After pressing the enter key the display will read:
Alarm Relay
Enable Disable
To set alarm levels, using the arrow keys, select the word
Enable.
Alarm Relay
Enable Disable
Step 5
With the word “Enable” flashing press the
enter key.
ENT
Step 6
After pressing the enter key the HHC will respond:
High Setpoint
????????
Important Note:
Set points must be entered for the spe-
cific engineering unit to be monitored. For example if a
setpoint of 10 is entered the alarm relay will trip when
measured and displayed pressure exceeds the numerical
value of 10. The HHC will not automatically convert the
entered trip point to a new value to reflect a change in
engineering units.
Open Close
If Open is selected, the low limit contact will be open
when the measured pressure exceeds the setpoint value.
If Close is selected, the contact will close if the setpoint
is exceeded.
Step 7
Using the arrow keys select the desired
mechanical configuration. In this example we have con-
figured the system to close the relay contact when the
alarm value is exceeded.
Low Contact
Open Close
Step 8
When the desired configuration has been
selected and the text is flashing on the display, press the
enter key.
ENT
Step 9
After the enter key has been pressed the HHC
will respond by displaying:
Monitor Function
Left Right
This will determine whether the HHC is monitoring
the left or right Quick Select pressure or temperature
module. Using the arrow keys select the desired pressure
module to be monitored.
Step 10
Use the left/right arrow keys to select the
desired module to be monitored. In this example the left
module has been identified for monitoring.
Monitor Function
Left Right
Step 11
With the desired module selected and flashing,
press the enter key.
ENT
The alarm function is now armed and operating. This
function is automatically disabled when the HHC is
turned off and must be re-initiated by enabling the
alarms via the set up menu.