Grounding the system, Powering on the system – Brocade ICX 7750 Hardware Installation Guide User Manual
Page 28
18
Brocade ICX 7750 Hardware Installation Guide
53-1003084-01
2
Grounding the system
8. Repeat step 7 to attach the rear left bracket to the rack rail and tighten all 10-32 x 5/8 in.
screws to a torque of 25 in-lb (29 cm-kg).
Proceed to
Grounding the system
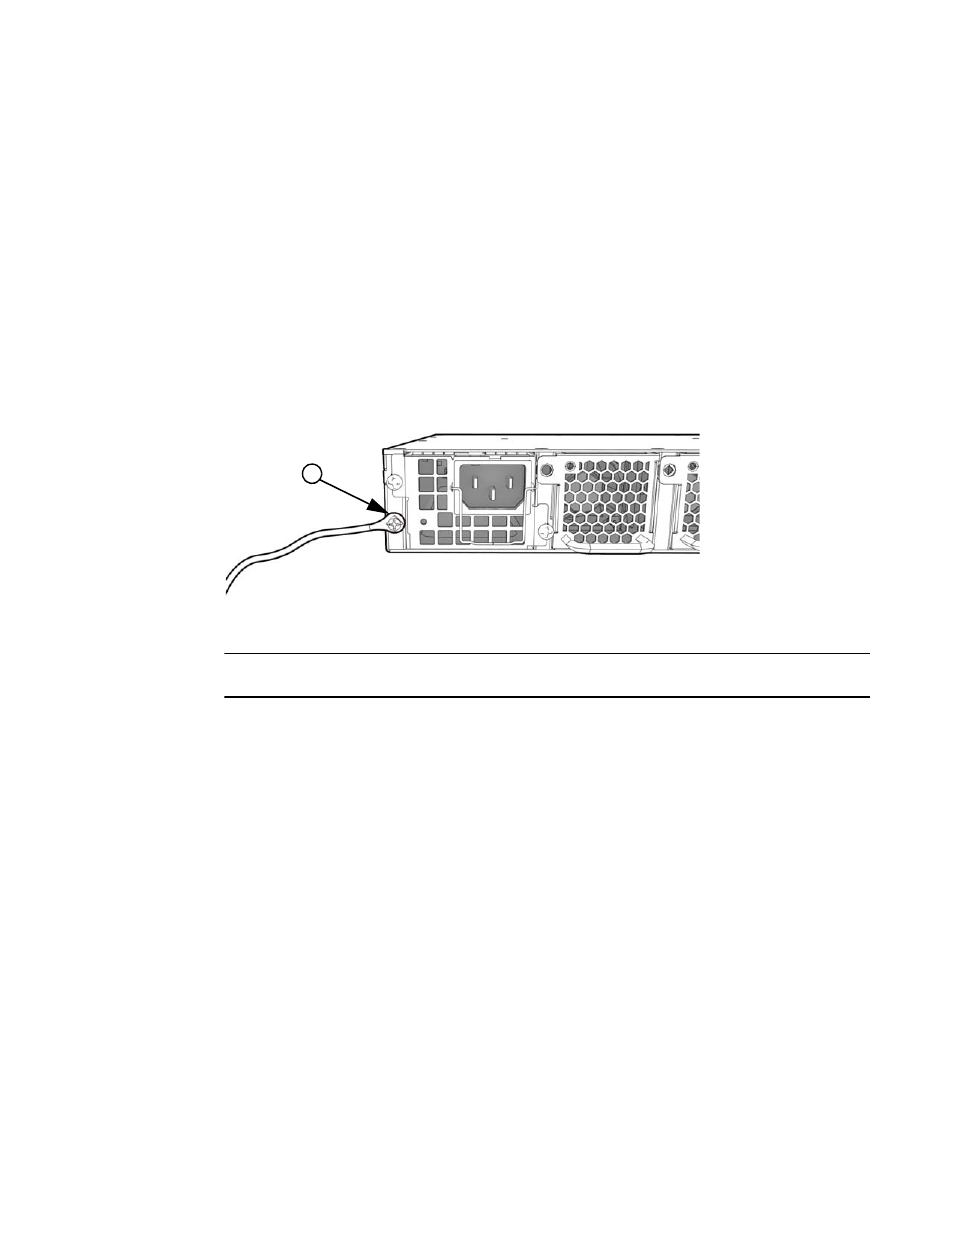
The rear panel of the Brocade ICX 7750 includes a single-screw grounding terminal. The surface
area around this terminal is not painted in order to provide a good electrical connection. Before
connecting power to the device, the grounding terminal must be connected to ground to ensure
proper operation and to meet electromagnetic interference (EMI) and safety requirements.
FIGURE 14
Connecting the grounding terminal
NOTE
Use the grounding lug and screw included in the Brocade ICX 7750 grounding kit.
Perform the following steps to connect to the grounding terminal:
1. Ensure that the rack in which the Brocade ICX 7750 is mounted is properly grounded and in
compliance with local regulations.
2. Ensure that there is a good electrical connection to the grounding point on the rack (no paint or
isolating surface treatment).
3. Crimp the included grounding lug to a grounding wire of at least 6 American Wire Gauge (AWG).
The 6 AWG wire and grounding lug should be crimped together using a proper tool.
4. Attach the 6 AWG stranded copper wire to the grounding terminal on the Brocade ICX 7750
using the screw included in the grouding kit.
5. Attach the grounding wire to the ground point on the rack.
Powering on the system
After you complete the physical installation, you can power on the system.
1. Install alternating-current (AC) and direct-current (DC) power supplies in the switch.
2. Attach AC or DC power cables to the power supply connectors on the rear panel.
1
Grounding terminal
1