Proface AGP3500 - 10.4 DIO HMI" User Manual
Page 90
Chapter 4 Installation and Wiring
4-11
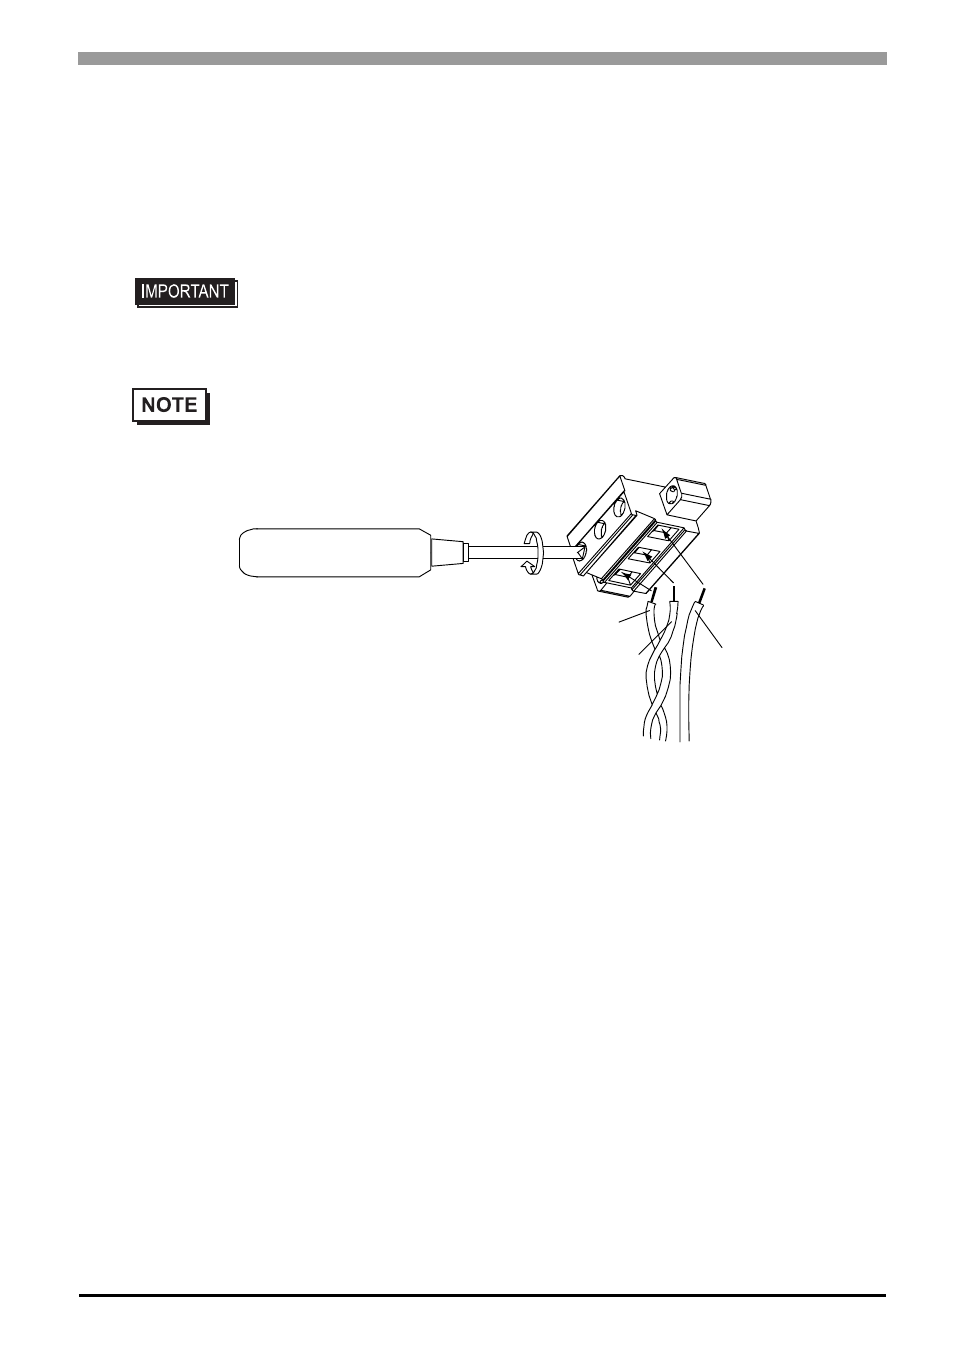
When using the ST-3500 Series
(1)
Confirm that the power cord is unplugged from the power supply.
(2)
Remove the power connector (plug) from the main unit.
(3)
Loosen the three screws in the center of the Power Connector (plug).
(4)
Strip the sheath of the power cord, twist the wire ends, insert them into the bar terminals.
(5)
Attach them with screws.
(6)
Attach the Power Connector (Plug) to the ST and attach it to the ST main unit with the right/left
tightening screws.
• Use a slot screwdriver (size 0.6 x 3.5) to tighten the terminal screws.
The torque required to tighten these screws is 0.5 to 0.6N
•m [5-7Lb•In.]
• Do not solder the cable connection.
•
Be sure to twist the power cords together, up to the power connector.
+
-
FG
- AGP3400 - 7.5 DIO HMI" AGP3300 - 5.7 DIO HMI" AGP3600 - 12.1 FLEX Network HMIs" AGP3500 - 10.4 FLEX Network HMI" AGP3400 - 7.5 FLEX Network HMI" AGP3600 - 12.1 CANopen HMI" AGP3500 - 10.4 CANopen HMI" AGP3400 - 7.5 CANOpen HMI" AGP3300 - 5.7 CANopen HMI" AGP3300H - 5.7 Handheld HMIs" AGP3750 - 15 Multi-Media HMI" AGP3650 - 12.1 Multi-Media HMIs" AGP3550 - 10.4 Multi-Media HMIs" AGP3450 - 7.5 Multi-Media HMI" AGP3360 - 5.7 Multi-Media HMI" AST3300 - 5.7 Basic HMI" AST3200 - 3.8 Basic HMI" AGP3600 - 12.1 Standard HMIs" AGP3500 - 10.4 Standard HMIs" AGP3400 - 7.5 Standard HMI" AGP3300 - 5.7 Standard HMI" AGP3200 - 3.8 Standard HMI"