Add an exception using the wizard – TREND 963 User Guide User Manual
Page 51
Using 963
963 User Guide TC200635 Issue 3 25/03/2008
51
3.6.2.1.2 Add an Exception Using the Wizard
To add an exception using a the wizard:
1. Log in as described in the ‘Log In’ section of this manual.
2. Click
or on the Mode menu click Diary to select the Diary Display.
3. Click the Group Time Planner tab.
4. Click the part of the diary navigation structure below which groups are to have the exception applied.
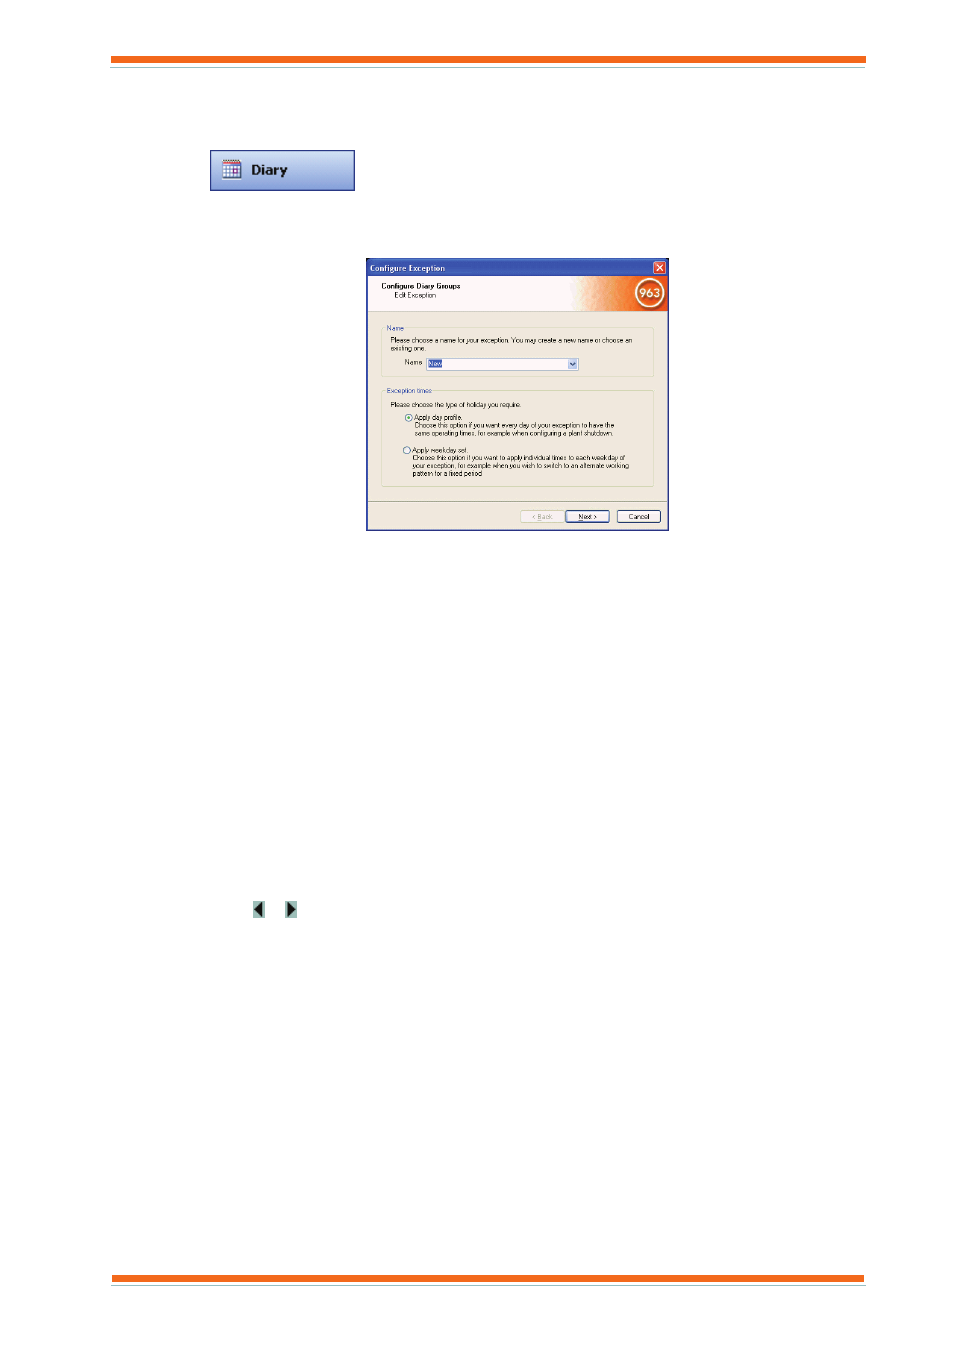
5. Click Exception Wizard. The Configure Exception dialogue box is displayed.
6. In the Name box enter the name for the exception, or click an existing label.
Note that when adding an exception to more than one diary group 963 checks the other groups to see if
there is an exception with the same name. If there is, 963 uses the times from the existing exception.
Note that exceptions with the same label can have different operating times specified.
7. Click Apply day profile to specify to have the same operating times, or click Apply weekday set to
specify individual times for each weekday.
8. Click Next.
9. In the Available times box click the template that is to supply the times from the list. This list will contain
all the templates from all the groups below the selected point in the diary navigation structure that have the
same name.
If the exception is being added to a single diary group it is possible to either create a new template by
clicking Add new times, or existing times can be changed by clicking Edit selected times.
10. Select the Repeat this exception yearly check box if the exception is the same each year (e.g. Christmas
day).
11. Click Next.
12. Select the day(s) to which the exception is to apply. To select individual days click them. To select a range
of days drag the mouse over them. To deselect a day or range of days click it. If the required day is not
visible click or until it is visible.
13. Click Next. A dialogue box is displayed describing the exception.
14. Click Finish. A dialogue box asking if you want to download the changes now or configure the scheduler
to do it later is displayed, click the required option and then click OK.
Note that if the changes are for today they are sent immediately.